A rock wall to be specific. We’re not really sure how we’ll treat the path around the back of the house, but we decided to build a rock wall to help support the bank and to plant shade loving plants such as ferns, grasses, hostas and others. We also planted some mosses in the cracks between the stones so we hope these take root. The rocks were ones that we had dug up in the garden so it’s good to re-use them. We don’t have enough rocks for the complete wall but additional rocks can be had from just up the road where they’re abundant and just sitting by the side of the road. Bit of a struggle getting them up our garden as one of them must have been around 200lbs. What’s nice about this wall is that it can easily be modified or removed if we ever have a change of plan.
When we eventually move into the ground floor this will be the view out of the back windows so we want something lush and refreshing. Aimee did most of the wall and it is crude, but in a nice way, solid and I think it will age nicely. We’ll publish additional photographs when it’s finished and the plants have had time to settle in..
Before we can replace our sill beams the corner of the house needs to be repaired, it had some really funky repairs done on it in the past so I’m glad we’re fixing it. Weather is just about decent enough to risk doing lime mortar.
From the photos you can see it was in pretty bad shape and even worse by the time I removed all loose and flaking mortar. A lot of the mortar was of very poor quality and would crumble in you hand, hence the huge hole you can see.
On Saturday we rebuilt the main structure of the wall by hand, filling in small cracks & gaps and on Sunday we used our mortar sprayer to finish the job off. We had to spay a lot on as in some places the mortar is a couple of inches deep. We did push in stones whenever we could and we do add fiberglass strands to the mix – in the old days they may have added horse hair.
I’m not great at finishing the surface but my trick is to go over any irregularities with a diamond polishing/grinding disk which will give great results. I’ll grind the top nice and flat and it will also have to be at an angle as the two beams are at a slightly different height, probably due to subsidence etc.
The last couple of nights have dipped below freezing (disastrous for lime mortar) so we built an outside tent around the wall and left a small fan heater inside. Each day we’ll spray the wall with water which helps the lime to cure.
The reason why we look like we’re not doing much in the video is that each batch of mortar takes about 25 minutes to mix – it’s a lime thing. Also the SD card ran out of space, hence the abrupt end.
In a previous post I mentioned the rotten sill beams, still haven’t replaced it but the house is still standing. Last weekend I got down to the nitty gritty and started to cut the existing beam to accept the new one. A butt joint probably wouldn’t pass code so I made a staggered cut for more glue area. First I made plywood template and attached them to each side of the beams and then, using a Japanese hand saw, cut away the rotten wood, results were decent enough. There are still a few cracks and splinters in the existing beams but epoxy will eventually fill this. I also applied this treatment to the other end of the beam.
By the way if you’ve never used a Japanese hand saw, check out this introduction video. Very sharp and very useful for some certain cuts.
The replacement beam is made from pressure treated 4×4’s which are roughly the same thickness as the existing beam. I cut these out on my miter saw and trimmed up with a hand chisel. Before I can install them I’ll need to repair the wall such that it presents a smooth surface for the sill plate to rest on and as the weather is getting better I think I’ll be able to do that in a week or so.
Lastly I decided I should support the corner of the house in case it starts to sink, I don’t think it will as the rotten beams were no support, but better be safe than sorry. Not great shoring up but it will do for now but I may improve it and try and jack up the house a bit as it was obvious that this corner had sunk a few inches over the year.
Weather is finally getting better so time to get stuff done!!!!
We were hoping to start work on repairing the wall so we can install the new sill beam but temperatures are still dipping below 40°F so we’re hoping to do that next weekend. To access the sill beam and wall I’d already removed a small part of the old deck but as it was a lovely day and we wanted to work outside so we decided to remove a lot more so we’d have more space to work. It’s not completely gone and we left the main structure and a 3′ square by the doors upstairs, just incase someone ever stepped out by mistake.
The deck and balcony obviously weren’t original and when we come to replace it we will add something that is in character with the house. The upper balcony will be triangular to match the roof line and on the ground floor you will step out the back door onto a blue stone patio which should last centuries.
Because we’re usually at the house on weekends we often get visitors and today we had Bianca, Seth, Rob, Randall and Richard, always nice to see folks.
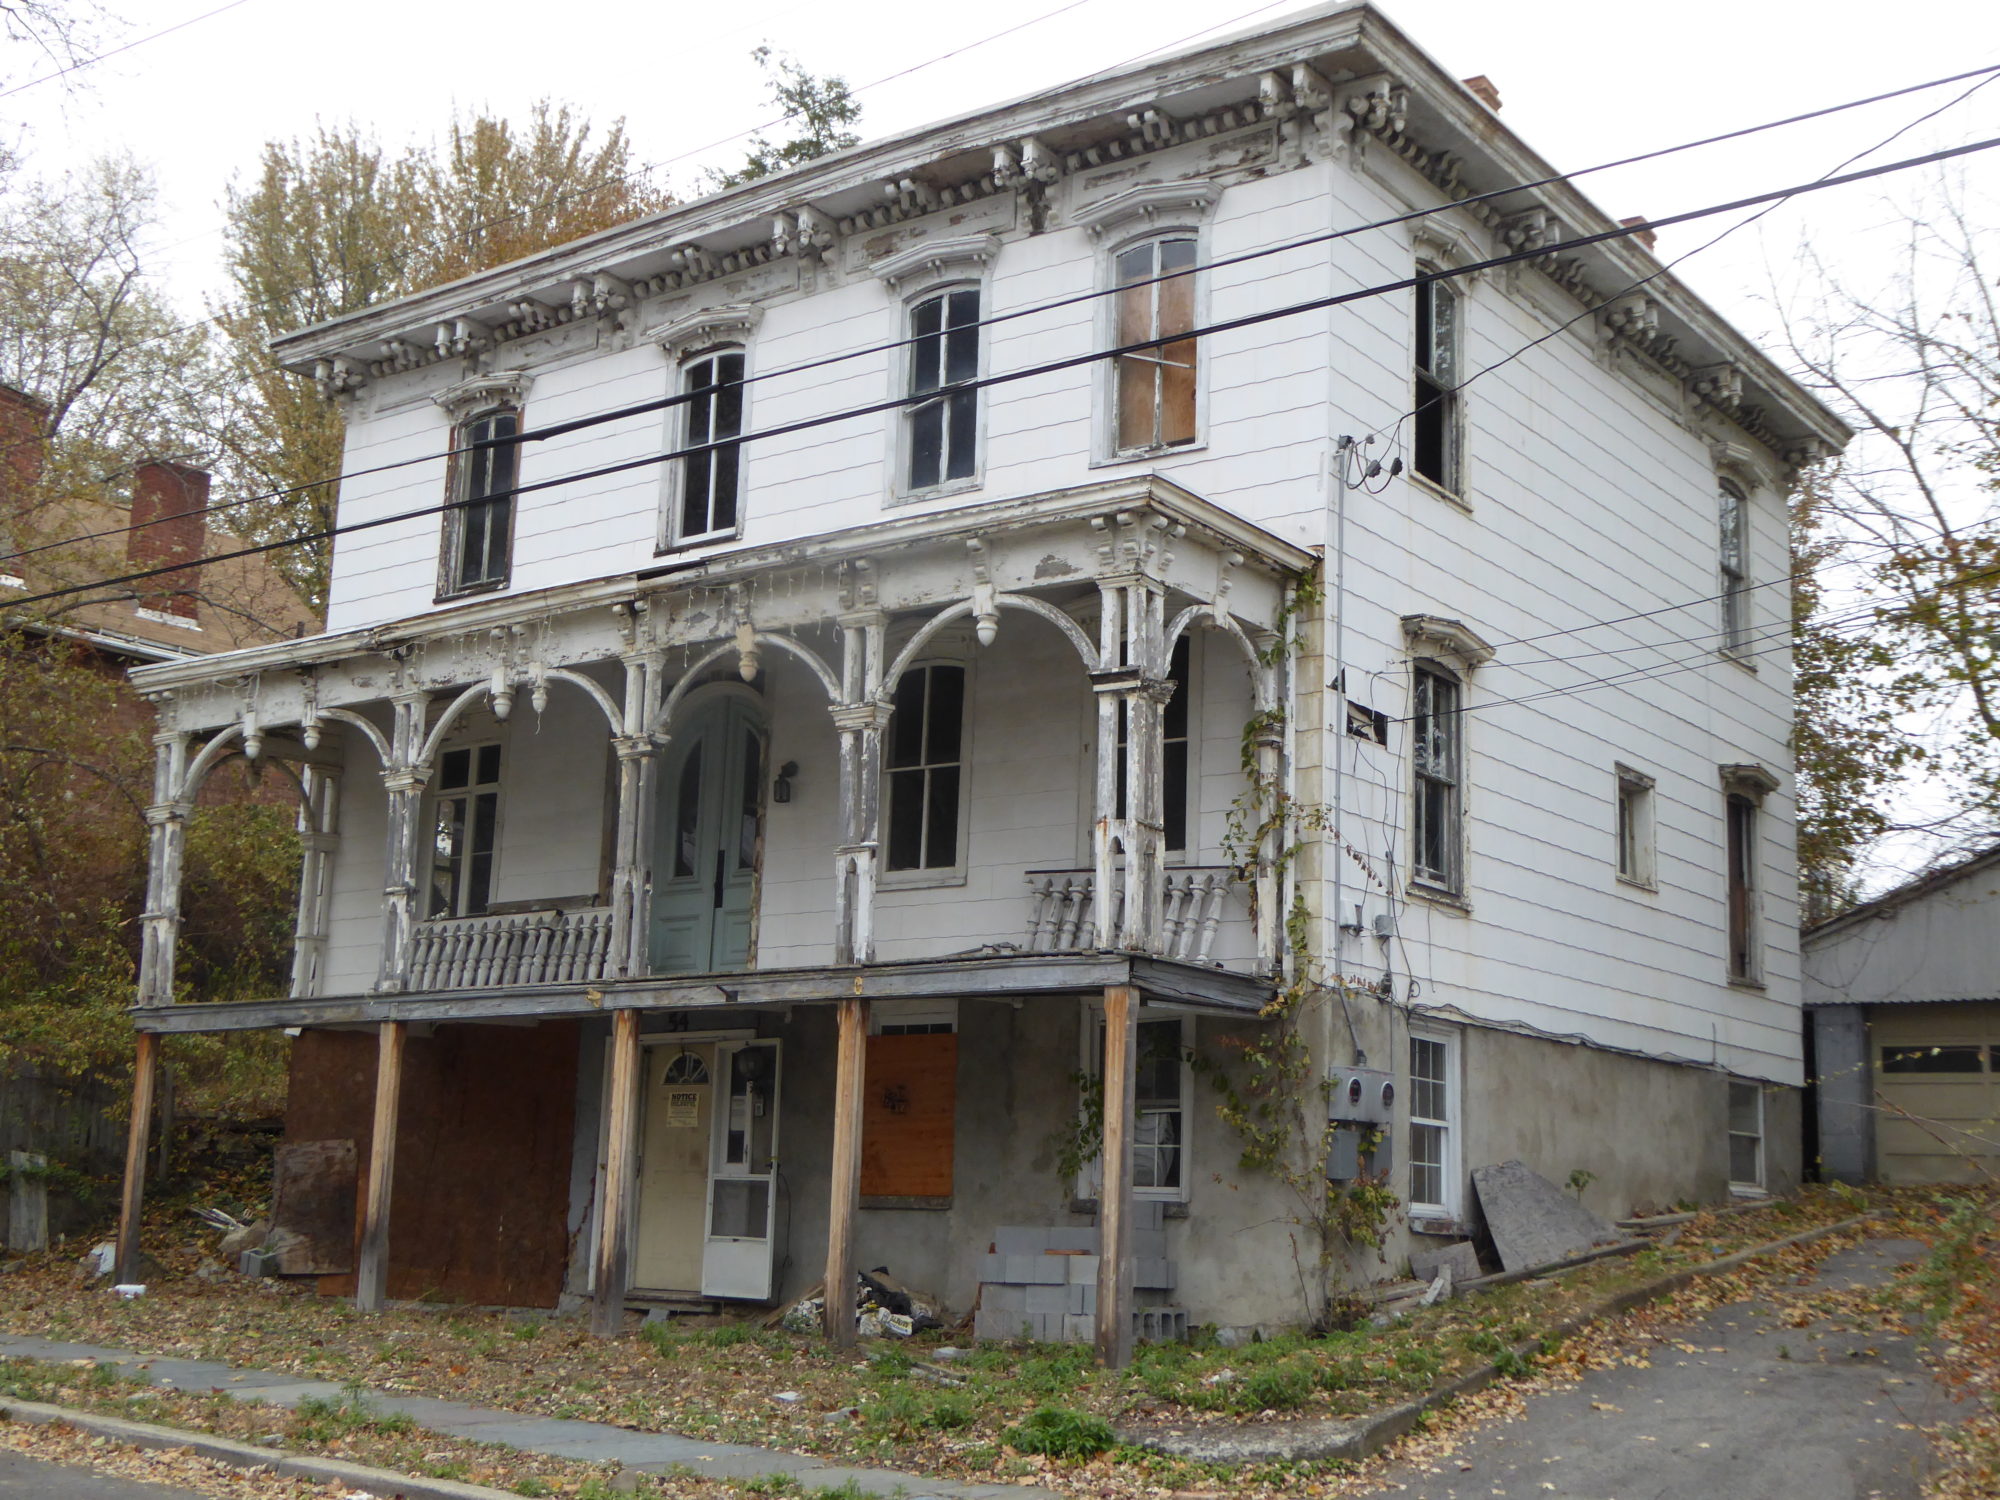
There has alway been something a bit funky about the rear right corner of our house. Looking at it, it was pretty obvious that someone had been up to some f#$%&ery† in the past. Today was the time to remove the band aid and find out what was going on – a few months ago I really wouldn’t have wanted to know, but now it needs to be addressed. Once we start framing inside and adding insulation, access to these areas gets harder.
So in the photos you can see, going horizontally, that we have tile, tile, tile, some odd bit of concrete painted white, probably to make it look like tile. By the way beneath the tile is wooden sidings or cladding. So what was going on here was that the sill plate, a 5x”10″ beam that rested on top of the masonry wall (to which floor joists are connected to etc.) had rotted away. Two likely reasons for this, firstly the single gutter from the roof was vertically above this so any blockages or leaks would have sent water running down the outside walls. Secondly this is below where all the bathrooms were so any leaks would make their way down to the sill plate.
After removing the funky concrete it was obvious that the sill plates were totally rotted and in places completely missing.
If the beams weren’t so rotted and crumbling I would have been nervous about removing them. Anyway I took the risk and the house is still standing. It might not be obvious from the photos but the ends of the floor joists were so rotten that the ends don’t even meet the walls. As a precaution I did put screw jacks under the joists.
Currently we have about 7 linear foot of the house which is unsupported. We’ll be addressing this asap. We’ll also need to rebuild a lot of the corner wall but we’ll have to wait until temperatures are warmer.
Indoors we started on making some shelves for all our wavy glass. For years we’ve had piles of it dotted around the house and every now and again, we would end up breaking the odd pane. Some of these panes are pretty big at 3’x3′ and this glass is getting rarer and rarer so I’m glad it’s out of harms way.
The shelves took longer than we thought to make but they are pretty heavy duty and the vertical dividers can be removed should we want some workshop shelving in the future. Our workshop has become pretty cluttered so it was nice to have a good tidy up.
Well it turns out that two very smart readers do know and they are Troy Ellen Dixon and Abigail Simon. Congratulations and let’s connect so I can coordinate the delivery of your prize!!!
Their correct answers were
My father used them to match removable storm windows and screens to each window. Troy Ellen Dixon
These are window number tacks. Actually, they may be called something more interesting — those Victorians were crazy — but that is what they are for — you put one on the frame and one on the window and somehow that is supposed to fend off window confusion. Abigail Simon
Yes, the number tacks are to help match window screens and storm windows to the windows they belong to, hence the duplicate numbers. In the old days windows would have been handmade and probably varied in size quite a bit. These tacks removed the guess work out of finding the matching screen or storm. We have forty plus windows in our house so trying to match a screen or storm to the correct window without these would involve a frustrating number of trips up and down the ladder.
If you have old sash windows then you may also have these numbers though it’s likely that they’ve been painted over. I did check our old windows but couldn’t see them so maybe this numbering system wasn’t that popular.
Individual sashes were also often numbered during manufacture to make sure they matched the correct window frame. For this numbering they would just stamp a number onto the sides of the sashes and frame as these parts of a window aren’t painted. You can see in the picture that they choice roman numerals to number the sashes, I’m guessing they did this so they could use a simple tool such as a chisel to make them.
Over the last few days we’ve noticed a very strong skunk smell in the house, so strong that Aimee thought we had a skunk living in the house – I hope not. Today Aimee got a text from our neighbour, Lisa, to inform us that a skunk had shuffled off ‘is mortal coil next to our house. I checked tonight and indeed a poor skunk had met her/his demise in a shallow trench next to our house.
Today in day light I took a better look and it looked like the poor thing had a broken rear leg so I suspect it had been hit by a car and either crawled or was picked up and thrown there. I moved him/her to a sunny spot, put them the right way up and will let nature take it’s course. Apart from the stink, they are pretty cute animals. Hope it didn’t suffer.
This vice belonged to my Dad and possibly my Grandfather before that. It’s a Record No. 52 and it dates from somewhere between 1940 and 1960 and for as long as I can remember it’s been sitting unused on a shelf under a work bench in Dinas Powys, Wales.
We’ve been looking for a woodworking vice for a while now and it made perfect sense to bring this back from the UK. I disassembled it and Aimee and I both bought parts back in our luggage. It had quite a bit or surface rust so I removed that before reassembling it. The last picture is after I removed most of the surface rust. The blue painted pieces were just washed and will retain their patina.
Here it is assembled, incorrectly I may add, and it took me maybe 10 minutes to figure out the quick release. Next step is to make some oak jaw pads from local wood supplied by John Paul. Odd that it didn’t have any jaw pads, maybe it was never used.
The idea to add leather to the pads was something I saw on a youtube video and should help stop the jaws from marring the wood. Holes were punched in the leather so that I could remove the pads without having to remove the leather.
I should think that with decent care, the vise will last for many more decades and I like the idea that my Dad and Grandfather used it. I wrote all the owners names on the inside of the pads so the next owner can see a bit of the vises history and add their own name.
Nowadays Record are owned by Irwin and they make their vices in China so it’s nice to have a good old, “Made in England” one.
You’ll notice that I interchange vice with vise and if you’re interested in grammar read on:
As the end of the year draws nigh and the sun sets over Disaster Mansion, I’d like to recap on what we’ve been up to over the year, what’s given light and what has cast shadows.
January
This is our fifth winter working on the house, we are slowing down a bit, but that’s fine with us. In January we started on some inside projects, first was to build a new partition wall between the boiler room and our bedroom. I over-engineered it with 4×4’s in case we ever needed to hang heavy shelving as well as act as a load bearing wall to support all the partying up above.
I continued to work on the newel post restoration and started to epoxy together wood for our sash windows. I had bought some thermally modified wood (lasts a long time and is pretty dimensionally stable) but it only came in 1 & 1/4″ thicknesses so the wood had to be milling and then epoxied together to get to the requires 1 7/8″ (≈ 48mm). Again I could do this on the kitchen table. There are a lot of pieces to a sash window so it took some time and spread into March.
March
As well as continuing with the sash window wood we started to clean up the inside and removed all the old gas pipes, knob and tube electrical wiring, old screws/nails and random scraps of wood that had been nailed to the beams.
It was during these winter months that I was also doing a lot of research on self-leveling compound and trying to work out the best way to fix our uneven concrete pour, including how many people we needed, what tools were required, how much we could pour at any time etc. We also started again clearing out the trench at the back of the house for our foundation drain. My brother Matthew helped me with this and he earned his keep as well as getting me motivated again.
By April I thought we had dug enough out of the trench, but sadly that wasn’t to be so. I think I had previously got french drains and foundations drains confused and after doing a bit more investigation and consulting our architects plans I released that foundation drains needed to be below the top of the footings. We dug a little deeper and found out that our recently installed new footings were in a very poor state, sigh, but more of that later.
As mentioned previously I’ve been planning for months on how to use self-leveling compound to level our floor. Self leveling compound appears to be an ultra fine cement and sand mix which has the consistency of pancake mix so it can flow and self-level. When I say self-level, it will only do this to a degree, imagine when you make a pancake, you have to encourage the batter to fill the bottom of the pan. The reason I hadn’t started on the self-leveling before was that we needed the surface of our concrete floor to be above 50°F and we were only just starting to get these temperatures. It was frustrating that we had to wait until April as this held us back a bit.
Self-leveling can be tricky as you only have about 15 minutes before the mix starts to set, so you need to be fast and have a team who know what they’re doing. Our team consisted of Joe, Deborah, Rob, Brain and Aimee and I can’t thank them enough, everyone was a vital link and they all preformed faultlessly. Thank you!
Because some areas needed in excess of 1″ of self-lever we did multiple pours in these areas, spread over a number of weeks and re-priming each time.
May
In May we tried our hand at re-plastering one of our interior walls with lime using a process called harling, which is basically throwing the lime mortar at the wall. This proved hard work and the results were just about okay. After a bit of research I found an air driven tool that could do the job a lot faster.
June was back to the trenches but some major rain storms caused the trench to collapse again which meant digging out an extra 2′ deep of dirt, wasn’t happy about this.
We also finally finished applying self leveling to the main basement room and the results were very pleasing. We added ice to the water this time to give us a bit longer cure time.
Lastly we enlarged the bathroom widow and reframed the plaster. We did this for two reasons, firstly code dictated that this had to be a means of escape from the bathroom, should you be trapped by any nasty whiffs and secondly, the previous window was miserably small and we wanted a decent amount of light in there.
The month started off with a fun project, some brick bat boxes, well they were wood (thermally modified) but painted to blend into the brick house next door. Didn’t see any bat action around them this year as we probably installed them too late, but fingers crossed for next year.
Back in April I mentioned that we had discovered some pretty poor workmanship on our footings. This was the month to repair them and it wasn’t fun. More dirt had to be dug out and working down there was pretty cramped, that said I think we did a great job fixing them and in the end it was worth the extra effort.
Lastly we tidied up some door openings. The builders left them very rough so we added shuttering and packed them with stone and lime mortar. The doorway to the boiler room will have an arch so there will be at least one room where you can bang your head on. Form for the arch is pretty much complete, just isn’t on a high priority.
August
Having just finished all the footing repairs it seemed a good idea to re-plaster the exterior walls. In some places it had crumbled away leaving 4 – 5″ depressions into the wall which is not insignificant. Once this trench gets filled in, these walls won’t see daylight for many many decades, so it seemed a good idea to fix these walls correctly and not skimp.
Luckily for us there was a perfect tool for this, the ToolCrete mortar sprayer which was a pretty invaluable tool. The mortar we used for the wall was lime to match the existing mortar and we also added as much stone as we could to fill in the deep areas. Once sprayed on the walls you could push stones into the lime and suction would do the rest. Once the lime work was done we applied a limewash coat to give some extra protection and then resumed work on the foundation drain.
One of the issues we have with being “new to the trade” is that we don’t always know what products are out there and one case in point was my discovery of Dimple board. Before I filled in the trench I didn’t want wet gravel against the wall, but at the same time we couldn’t paint it with a bitumen type water proof coating as lime walls need to breath. Anyway dimple board was a hallelujah moment for me.
Late August, early September we took a much needed vacation to see family in the UK, first time back in over three years and it was great to see family and friends, eat fish & chips, curry and steak pie, not forgetting mushy peas, bliss!!!!
The remains of September were spent prepping the rest of the trench for the drainage pipe, including removing a long section of our old cast iron waste water pipe.
Finally finished off the parging and started work on the drainage pipe. We couldn’t find pre-drilled pipe so spent an evening drilling our own holes in the pipe. We measured the distances and assembled the pipe with PVC glue on the lawn and then dragged it into the trench. I think we only made one correctable mistake. Once the pipe was in the trench we could add a bit of gravel below the pipe and check that the gradient was roughly 1/8″ per foot.
It was nice to finally be filling in the trench and we had a few kind volunteers to help fill the trench up to the top of the footings. At last you could walk around the trench without it being a trip hazard.
Having filled in the trench to the top of the footing it was time to install the dimple board. Dimple board is a tough water proof membrane with the added advantage of leaving an air gap between itself and the wall which allows moisture to condensate and fall by gravity.
Once the dimple board was in it was time to fill the trench with gravel. I did eventually have to splash out and buy some more ply for shuttering, but that was worth it, after all we only needed a column of gravel 12″ – 18″ wide. Thank you Giovanna and Derrick who helped us shift the gravel.
With the cold weather approaching we moved indoors to complete the lime parging/wall repairs. This can’t be done in cold weather so had to get it done soon and we needed this completed before we started framing out the inside for insulation (our winter project). A lot of the time was spent prepping the wall, removing all the plaster and loose and flakey mortar.
After parging inside was complete we moved outside and eventually started to fill the trench in. We had a lot of gravel to shift so it took many weeks to complete. We also lost Aimee’s Mum, Doris who will be sadly missed.
So in reflection I feel this year was an improvement on the last, we had less disappointments, which could be down to us doing most of the work ourselves. We are definitely slowly down, both physically and mentally but I’m hoping that is balanced by future jobs being less physical and more artistic in nature (hence fun).
Here’s to a healthy, peaceful and cheerful 2023 to all of you that have been following our progress. I special call out to Chris and Ian who are constantly giving us positive feedback – thank you, it means a lot.
Lastly we made a small video in which we tried to encapsulate all the above work. I did forget to add John Paul and Brian from the credits, so my apologies. If we’ve left anyone else out please reach out.