Old Growth Lumber

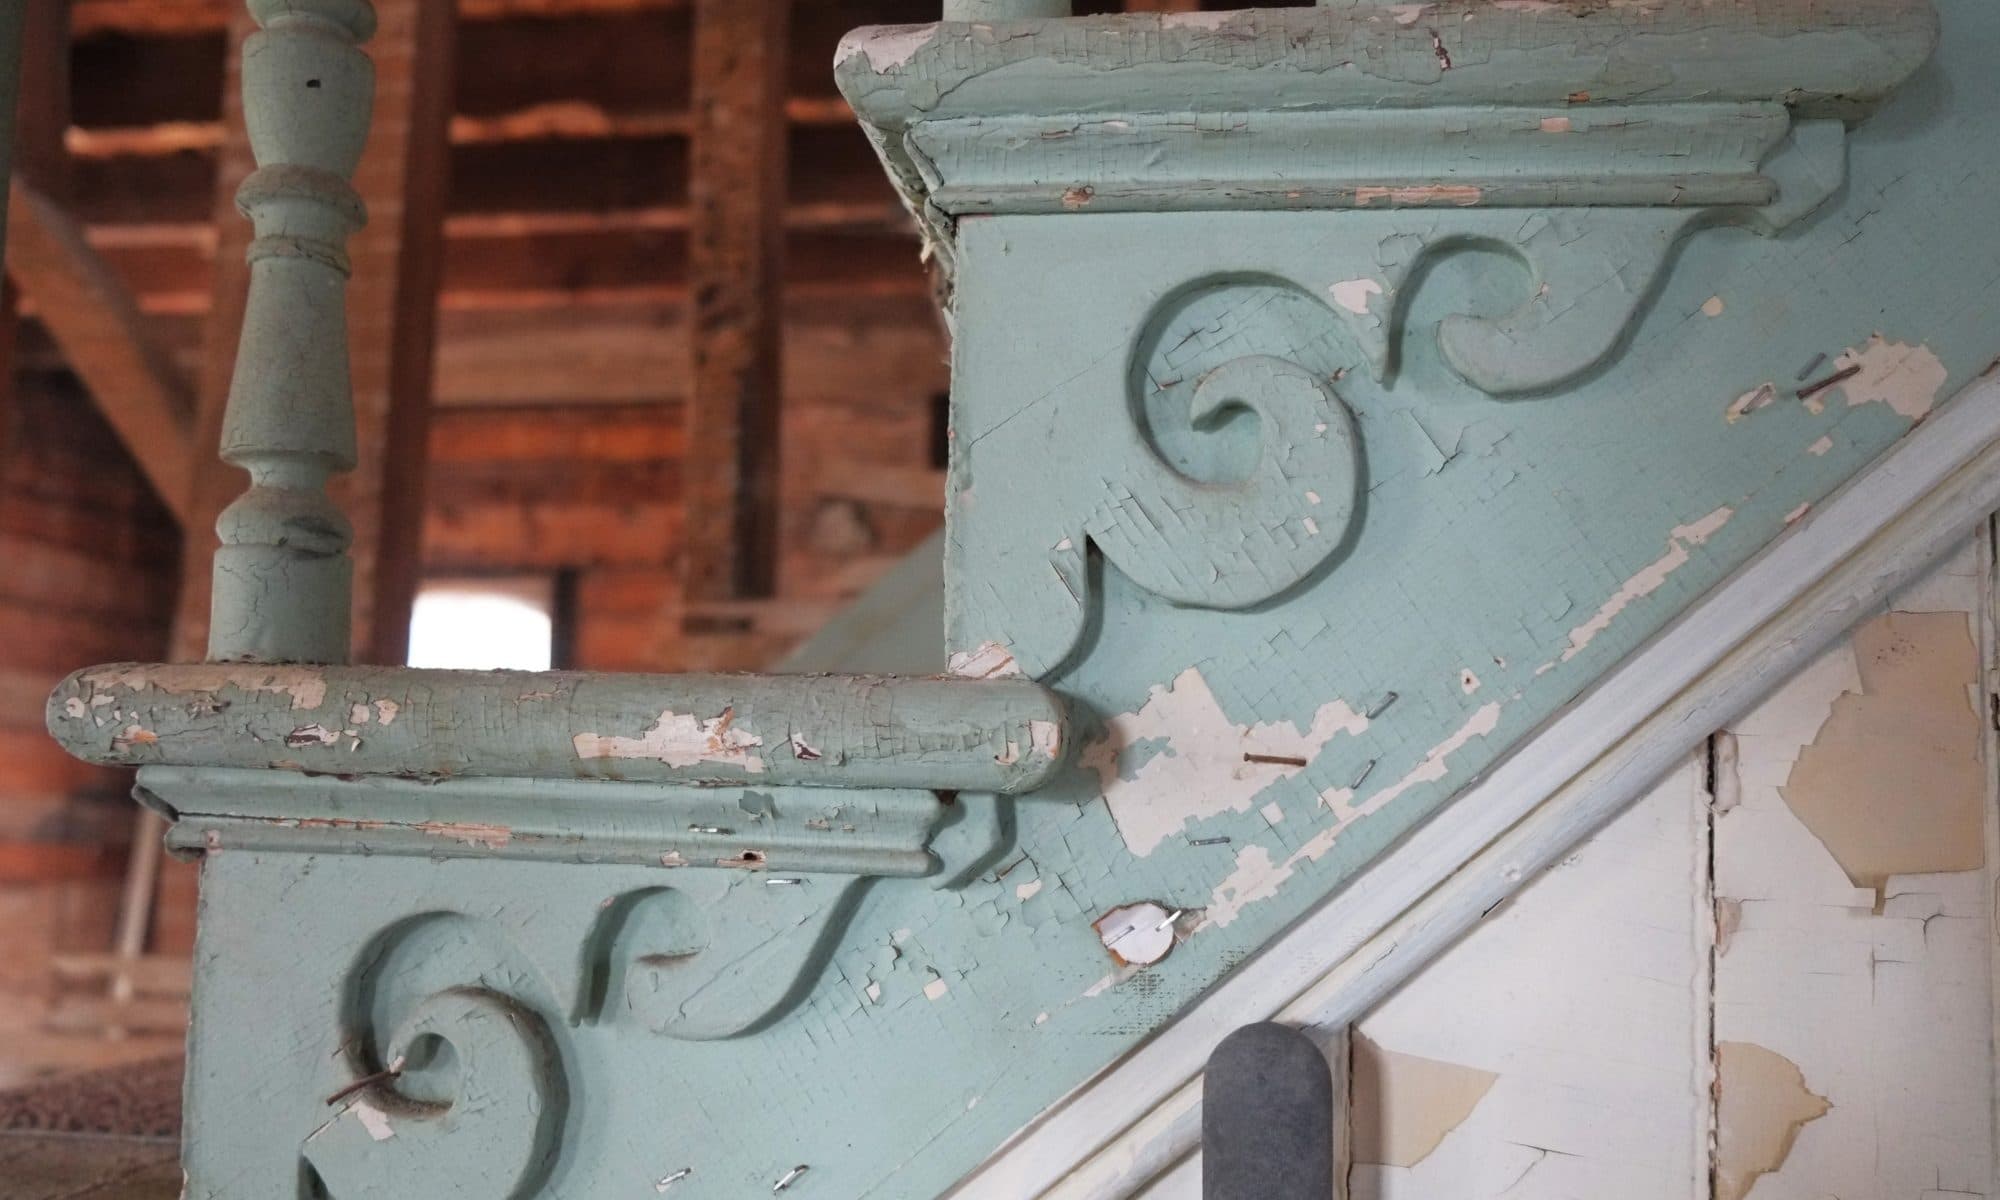
Whilst Aimee was building the rock wall I was working on replacing the rotten sill beam. I was reshaping the end of the old beam to except the new beam when I removed a small section and noticed the incredible grain of the old wood. I had know our house would have been made from old growth lumber but I never really appreciated it until I saw this piece of wood.

In the following pictures we have the old wood I removed and a new 2×6 for you to compare the grain. For the last three pictures I increased the contrast so you can see the grain better and what a difference between old and new.

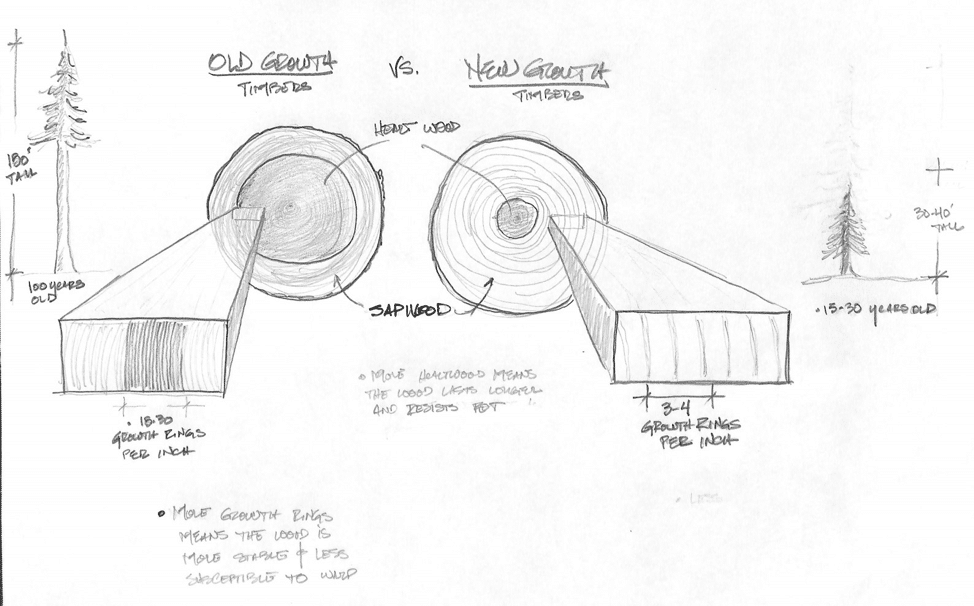
Old growth wood came from a forest that had never been harvested before. In these “virgin” forests the trees aged gradually due to partial sunlight and competition from surrounding trees. The gradual growth rate leads to the formation of tightly crammed growth rings which are highly beneficial, increasing strength, stability and rot resistance.

Stability isn’t the only advantage. This slow growth also yields more heartwood. Heart wood is the longest lasting part of the tree, whereas sap wood will rot very quickly. You can see in the diagram below that the slow growth lumber is mostly heart wood, where as modern lumber is all sap wood.

Old growth versus new growth wood. Credit Hull Works architectural millwork, residential construction & historic restoration

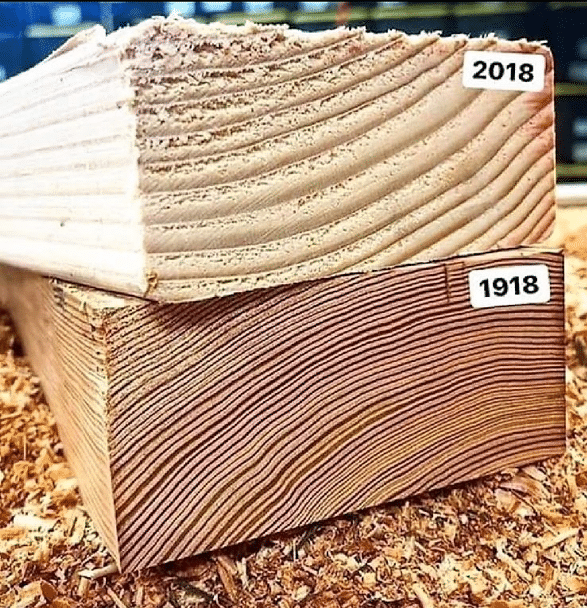
In the picture below, the wood from 1918 is all heart wood, the wood from 2018 is all sap wood.

Old growth versus new growth wood. Credit Hull Works architectural millwork, residential construction & historic restoration

So what happened to old growth lumber? Well I’m not an expert so it’s easier to quote.

In America, we began seriously depleting these virgin forests during the industrial revolution, and by the 1940s, most of them were gone. Lumber prices began to spike as Americans looked for substitutions for our lumber addiction. Enter second-growth and new-growth wood.

Tree farms began to produce lumber for the growing demand and the fastest growing species like Pine were selected for this reason. The trees grew in open areas with little to no competition for sun, which caused them to grow very quickly so they could be harvested in 10-20 years as opposed to old-growth wood, which may be from trees as old as 200-300 years old before being harvested.

Credit: https://thecraftsmanblog.com

Old growth forests still exist but they are usually in protected state parks. The best source for old growth lumber nowadays is reclaimed wood from old houses, barns etc.

I’m tempted to try and find some reclaimed old growth wood to use to fix our sill beams and ditch the pressure treated pine I was planning to use. I’ll ask about and maybe someone local has some.

If you’re interested, this is a good video explaining old growth lumber in greater detail.

We’ve hit a wall

A rock wall to be specific. We’re not really sure how we’ll treat the path around the back of the house, but we decided to build a rock wall to help support the bank and to plant shade loving plants such as ferns, grasses, hostas and others. We also planted some mosses in the cracks between the stones so we hope these take root. The rocks were ones that we had dug up in the garden so it’s good to re-use them. We don’t have enough rocks for the complete wall but additional rocks can be had from just up the road where they’re abundant and just sitting by the side of the road. Bit of a struggle getting them up our garden as one of them must have been around 200lbs. What’s nice about this wall is that it can easily be modified or removed if we ever have a change of plan.

When we eventually move into the ground floor this will be the view out of the back windows so we want something lush and refreshing. Aimee did most of the wall and it is crude, but in a nice way, solid and I think it will age nicely. We’ll publish additional photographs when it’s finished and the plants have had time to settle in..

We do need a few more plants but Aimee put out a request on facebook and we should have some more ferns and grasses soon.

A Wall is a Wall

Before we can replace our sill beams the corner of the house needs to be repaired, it had some really funky repairs done on it in the past so I’m glad we’re fixing it. Weather is just about decent enough to risk doing lime mortar.

From the photos you can see it was in pretty bad shape and even worse by the time I removed all loose and flaking mortar. A lot of the mortar was of very poor quality and would crumble in you hand, hence the huge hole you can see.

On Saturday we rebuilt the main structure of the wall by hand, filling in small cracks & gaps and on Sunday we used our mortar sprayer to finish the job off. We had to spay a lot on as in some places the mortar is a couple of inches deep. We did push in stones whenever we could and we do add fiberglass strands to the mix – in the old days they may have added horse hair.

I’m not great at finishing the surface but my trick is to go over any irregularities with a diamond polishing/grinding disk which will give great results. I’ll grind the top nice and flat and it will also have to be at an angle as the two beams are at a slightly different height, probably due to subsidence etc.

The last couple of nights have dipped below freezing (disastrous for lime mortar) so we built an outside tent around the wall and left a small fan heater inside. Each day we’ll spray the wall with water which helps the lime to cure.

The reason why we look like we’re not doing much in the video is that each batch of mortar takes about 25 minutes to mix – it’s a lime thing. Also the SD card ran out of space, hence the abrupt end.

Replacing sill beams

In a previous post I mentioned the rotten sill beams, still haven’t replaced it but the house is still standing. Last weekend I got down to the nitty gritty and started to cut the existing beam to accept the new one. A butt joint probably wouldn’t pass code so I made a staggered cut for more glue area. First I made plywood template and attached them to each side of the beams and then, using a Japanese hand saw, cut away the rotten wood, results were decent enough. There are still a few cracks and splinters in the existing beams but epoxy will eventually fill this. I also applied this treatment to the other end of the beam.

By the way if you’ve never used a Japanese hand saw, check out this introduction video. Very sharp and very useful for some certain cuts.

The replacement beam is made from pressure treated 4×4’s which are roughly the same thickness as the existing beam. I cut these out on my miter saw and trimmed up with a hand chisel. Before I can install them I’ll need to repair the wall such that it presents a smooth surface for the sill plate to rest on and as the weather is getting better I think I’ll be able to do that in a week or so.

Lastly I decided I should support the corner of the house in case it starts to sink, I don’t think it will as the rotten beams were no support, but better be safe than sorry. Not great shoring up but it will do for now but I may improve it and try and jack up the house a bit as it was obvious that this corner had sunk a few inches over the year.

A Mild Case of Demo

Weather is finally getting better so time to get stuff done!!!!

We were hoping to start work on repairing the wall so we can install the new sill beam but temperatures are still dipping below 40°F so we’re hoping to do that next weekend. To access the sill beam and wall I’d already removed a small part of the old deck but as it was a lovely day and we wanted to work outside so we decided to remove a lot more so we’d have more space to work. It’s not completely gone and we left the main structure and a 3′ square by the doors upstairs, just incase someone ever stepped out by mistake.

The deck and balcony obviously weren’t original and when we come to replace it we will add something that is in character with the house. The upper balcony will be triangular to match the roof line and on the ground floor you will step out the back door onto a blue stone patio which should last centuries.

Because we’re usually at the house on weekends we often get visitors and today we had Bianca, Seth, Rob, Randall and Richard, always nice to see folks.