The Highs and Lows of 2022

As the end of the year draws nigh and the sun sets over Disaster Mansion, I’d like to recap on what we’ve been up to over the year, what’s given light and what has cast shadows.

January

This is our fifth winter working on the house, we are slowing down a bit, but that’s fine with us. In January we started on some inside projects, first was to build a new partition wall between the boiler room and our bedroom. I over-engineered it with 4×4’s in case we ever needed to hang heavy shelving as well as act as a load bearing wall to support all the partying up above.

I also started to restore our newel post for our stairs, this was pleasant job as I could work on it from the comforts of our kitchen table.

February

I continued to work on the newel post restoration and started to epoxy together wood for our sash windows. I had bought some thermally modified wood (lasts a long time and is pretty dimensionally stable) but it only came in 1 & 1/4″ thicknesses so the wood had to be milling and then epoxied together to get to the requires 1 7/8″ (≈ 48mm). Again I could do this on the kitchen table. There are a lot of pieces to a sash window so it took some time and spread into March.

March

As well as continuing with the sash window wood we started to clean up the inside and removed all the old gas pipes, knob and tube electrical wiring, old screws/nails and random scraps of wood that had been nailed to the beams.

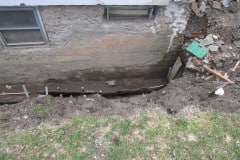
It was during these winter months that I was also doing a lot of research on self-leveling compound and trying to work out the best way to fix our uneven concrete pour, including how many people we needed, what tools were required, how much we could pour at any time etc. We also started again clearing out the trench at the back of the house for our foundation drain. My brother Matthew helped me with this and he earned his keep as well as getting me motivated again.

April

By April I thought we had dug enough out of the trench, but sadly that wasn’t to be so. I think I had previously got french drains and foundations drains confused and after doing a bit more investigation and consulting our architects plans I released that foundation drains needed to be below the top of the footings. We dug a little deeper and found out that our recently installed new footings were in a very poor state, sigh, but more of that later.

As mentioned previously I’ve been planning for months on how to use self-leveling compound to level our floor. Self leveling compound appears to be an ultra fine cement and sand mix which has the consistency of pancake mix so it can flow and self-level. When I say self-level, it will only do this to a degree, imagine when you make a pancake, you have to encourage the batter to fill the bottom of the pan. The reason I hadn’t started on the self-leveling before was that we needed the surface of our concrete floor to be above 50°F and we were only just starting to get these temperatures. It was frustrating that we had to wait until April as this held us back a bit.

Self-leveling can be tricky as you only have about 15 minutes before the mix starts to set, so you need to be fast and have a team who know what they’re doing. Our team consisted of Joe, Deborah, Rob, Brain and Aimee and I can’t thank them enough, everyone was a vital link and they all preformed faultlessly. Thank you!

Because some areas needed in excess of 1″ of self-lever we did multiple pours in these areas, spread over a number of weeks and re-priming each time.

May

In May we tried our hand at re-plastering one of our interior walls with lime using a process called harling, which is basically throwing the lime mortar at the wall. This proved hard work and the results were just about okay. After a bit of research I found an air driven tool that could do the job a lot faster.

We also did another self-leveling pour, the results weren’t perfect but luckily this wasn’t the final pour.

June

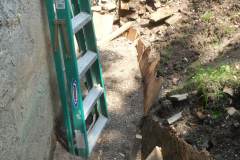
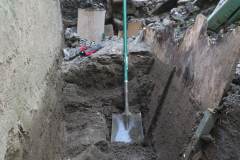
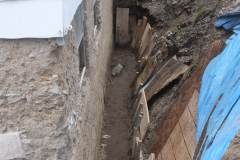
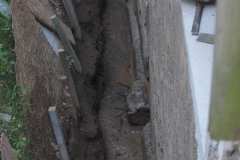
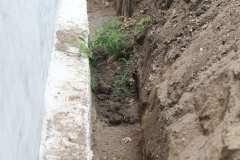
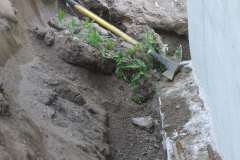
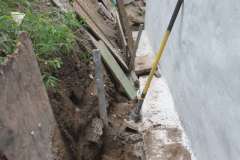
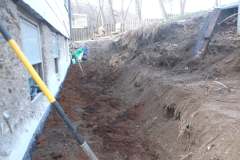
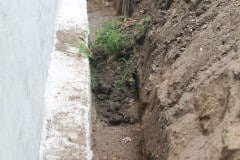
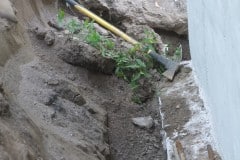
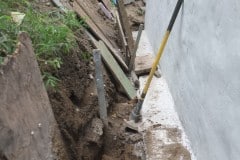
June was back to the trenches but some major rain storms caused the trench to collapse again which meant digging out an extra 2′ deep of dirt, wasn’t happy about this.

We also finally finished applying self leveling to the main basement room and the results were very pleasing. We added ice to the water this time to give us a bit longer cure time.

Having finished the floor we thought we would epoxy it and apply a stencil pattern, we ran a poll and the top three you voted for were:

  1. Starry Moroccan Night (8 votes)
  2. Aragon Damask (8 votes)
  3. Duomo (6 votes)

Lastly we enlarged the bathroom widow and reframed the plaster. We did this for two reasons, firstly code dictated that this had to be a means of escape from the bathroom, should you be trapped by any nasty whiffs and secondly, the previous window was miserably small and we wanted a decent amount of light in there.

She came in through the bathroom window…

July

The month started off with a fun project, some brick bat boxes, well they were wood (thermally modified) but painted to blend into the brick house next door. Didn’t see any bat action around them this year as we probably installed them too late, but fingers crossed for next year.

Brick Bat Box!!!

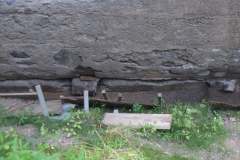
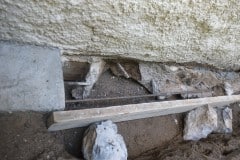
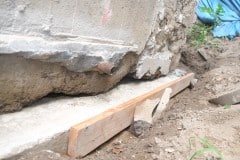
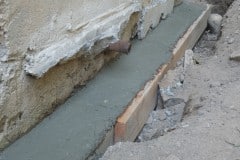
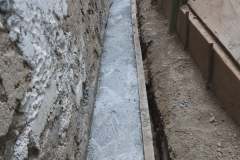
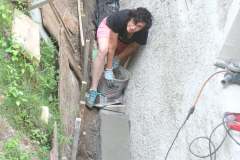
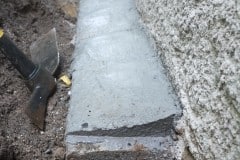
Back in April I mentioned that we had discovered some pretty poor workmanship on our footings. This was the month to repair them and it wasn’t fun. More dirt had to be dug out and working down there was pretty cramped, that said I think we did a great job fixing them and in the end it was worth the extra effort.

Repairing the footings

Lastly we tidied up some door openings. The builders left them very rough so we added shuttering and packed them with stone and lime mortar. The doorway to the boiler room will have an arch so there will be at least one room where you can bang your head on. Form for the arch is pretty much complete, just isn’t on a high priority.

August

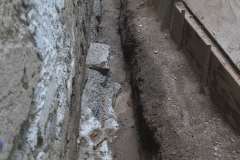
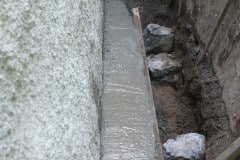
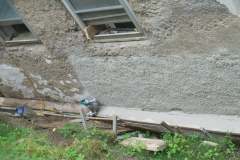
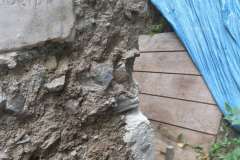
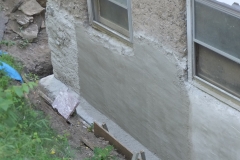
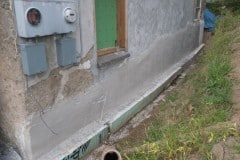
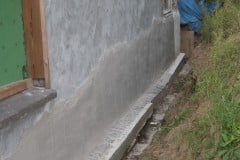
Having just finished all the footing repairs it seemed a good idea to re-plaster the exterior walls. In some places it had crumbled away leaving 4 – 5″ depressions into the wall which is not insignificant. Once this trench gets filled in, these walls won’t see daylight for many many decades, so it seemed a good idea to fix these walls correctly and not skimp.

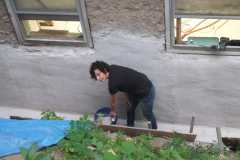
Luckily for us there was a perfect tool for this, the ToolCrete mortar sprayer which was a pretty invaluable tool. The mortar we used for the wall was lime to match the existing mortar and we also added as much stone as we could to fill in the deep areas. Once sprayed on the walls you could push stones into the lime and suction would do the rest. Once the lime work was done we applied a limewash coat to give some extra protection and then resumed work on the foundation drain.

One of the issues we have with being “new to the trade” is that we don’t always know what products are out there and one case in point was my discovery of Dimple board. Before I filled in the trench I didn’t want wet gravel against the wall, but at the same time we couldn’t paint it with a bitumen type water proof coating as lime walls need to breath. Anyway dimple board was a hallelujah moment for me.

Almost Ready to Lay Down Pipe

September

Late August, early September we took a much needed vacation to see family in the UK, first time back in over three years and it was great to see family and friends, eat fish & chips, curry and steak pie, not forgetting mushy peas, bliss!!!!

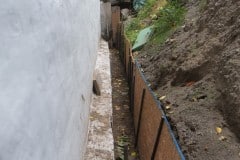
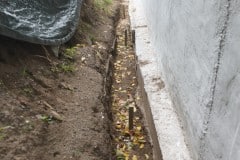
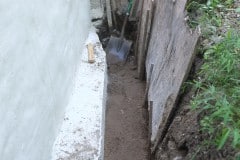
The remains of September were spent prepping the rest of the trench for the drainage pipe, including removing a long section of our old cast iron waste water pipe.

Back to work

October

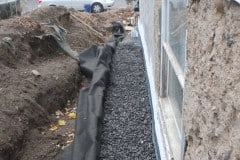
Finally finished off the parging and started work on the drainage pipe. We couldn’t find pre-drilled pipe so spent an evening drilling our own holes in the pipe. We measured the distances and assembled the pipe with PVC glue on the lawn and then dragged it into the trench. I think we only made one correctable mistake. Once the pipe was in the trench we could add a bit of gravel below the pipe and check that the gradient was roughly 1/8″ per foot.

Foundation drain update

It was nice to finally be filling in the trench and we had a few kind volunteers to help fill the trench up to the top of the footings. At last you could walk around the trench without it being a trip hazard.

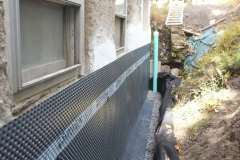
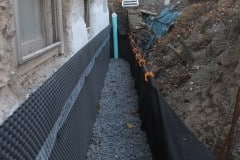
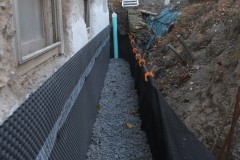
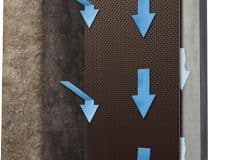
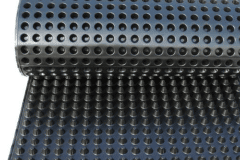
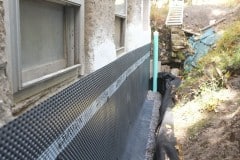
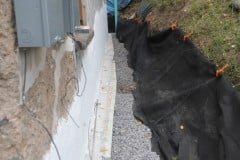
Having filled in the trench to the top of the footing it was time to install the dimple board. Dimple board is a tough water proof membrane with the added advantage of leaving an air gap between itself and the wall which allows moisture to condensate and fall by gravity.

Dimple Board

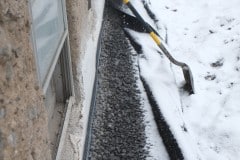
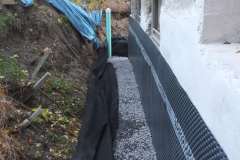
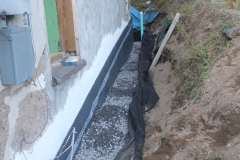
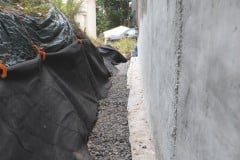
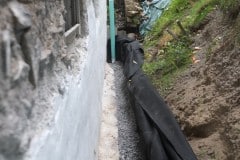
Once the dimple board was in it was time to fill the trench with gravel. I did eventually have to splash out and buy some more ply for shuttering, but that was worth it, after all we only needed a column of gravel 12″ – 18″ wide. Thank you Giovanna and Derrick who helped us shift the gravel.

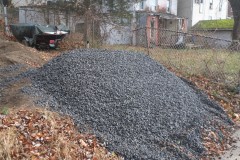
National Gravel Day

November

With the cold weather approaching we moved indoors to complete the lime parging/wall repairs. This can’t be done in cold weather so had to get it done soon and we needed this completed before we started framing out the inside for insulation (our winter project). A lot of the time was spent prepping the wall, removing all the plaster and loose and flakey mortar.

Parging Inside Walls

After parging inside was complete we moved outside and eventually started to fill the trench in. We had a lot of gravel to shift so it took many weeks to complete. We also lost Aimee’s Mum, Doris who will be sadly missed.

Filling in the Trench

December

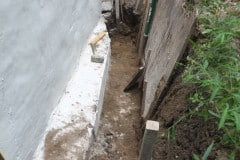
We finally finished the foundation drain, okay there is a bit to do at the front of the house but that will be easy. Phew!!!

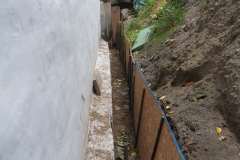
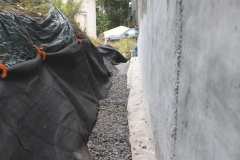
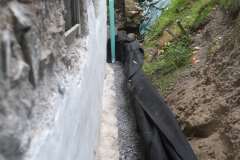
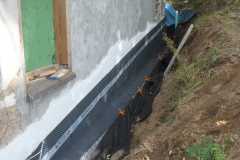
Trench Finally Gone


So in reflection I feel this year was an improvement on the last, we had less disappointments, which could be down to us doing most of the work ourselves. We are definitely slowly down, both physically and mentally but I’m hoping that is balanced by future jobs being less physical and more artistic in nature (hence fun).

Here’s to a healthy, peaceful and cheerful 2023 to all of you that have been following our progress. I special call out to Chris and Ian who are constantly giving us positive feedback – thank you, it means a lot.

Lastly we made a small video in which we tried to encapsulate all the above work. I did forget to add John Paul and Brian from the credits, so my apologies. If we’ve left anyone else out please reach out.

Best David & Aimee, 2022
Trench Finally Gone

It almost seems a shame that we are finally covering up all our hard work but at least we know whats down there which is:

  • Repaired foundations
  • Chamfer on footings to direct water away from wall
  • Dimple board to allow any trapped water to seep away
  • Geo-texitle fabric to keep the dirt from blocking up the gravel
  • Tons of gravel
  • Pipework with two clean outs
  • Chamfer on the top level of gravel
  • Sloped top layer of gravel and added on top a thick plastic top layer to again divert water away from house
  • 5″ of soil with a few bags of peat mixed it

It is a relief to finish this job as it’s taken many months and lots of of grunt work.

We do have a bit of gravel left over but we’ll find a use. In total I think the three deliveries dumped about 25 cubic yards of gravel which equates to around 60,000 lbs, no wonder it took us weeks to shift it. Again a big thank you to all who helped.

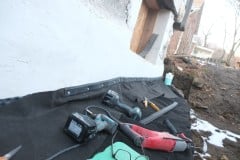
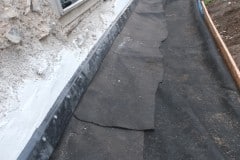
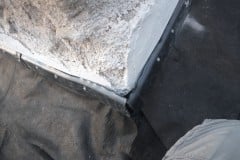
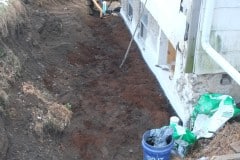
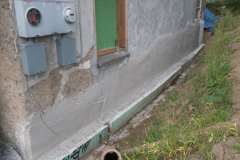
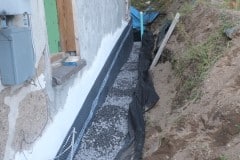
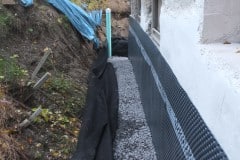
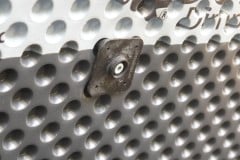
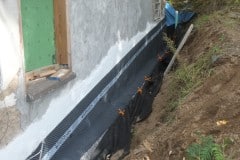
This weekend I added the capping strips to the dimple board, thanks again Andy from DIY Basement Solutions for your kind donation. These strips help seal the top of the dimple board to the wall. I used the white Tapcon screws with stainless steel washers to attach the caps. I will have to tweak some of these as in places more lime plaster needs to be added, including the corner, but that can wait to spring. We also have some Stego mastic left over, so I may add a bead along the top. You’ll notice in the pictures that the capping strips hold in place an apron of the geo-textile fabric, this covers the edge of the wrapped around fabric to fully encapsulate the gravel.

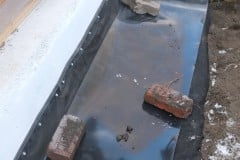
After smoothing down the fabric and apron I added the plastic membrane, for this I used an 18″ wide roll of rhizome barrier which is used to prevent bamboo rhizomes from spreading. This is tough stuff and I got it in 40 mil (a little over 1mm) and it would be hard to puncture this stuff with a shovel. As I had previously sloped the gravel away from the house the membrane is similarly sloped to help divert ground water away from the house. Once this was down, it was time to cover up everything.

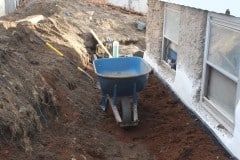
It was nice to to get the wheelbarrow down there as it made it easy to move soil around. I also added quite a bit of peat and bio-char to improve the soil quality and in the spring we’ll also mix up some of our kitchen compost.

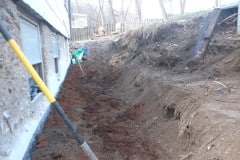
I still have to finish off the drain on the side of the house but that can wait until after Christmas now and will only take a day.

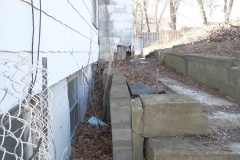
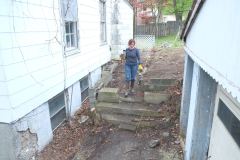
We want one access route to the house that is step free and this route will be up the drive and around the back of the house. In the last photo the flat area to the right will be the start of our path. It will be about a foot higher than the ground outside our rear windows which we plan to plant plants that do well in the shade like ferns. The transition from this lower level to the path (12″ higher but increasing) will be via a rock garden as we have many huge stones laying around in the garden. This will be a fun project to work on and we’re both looking forward to.

Below I’ve ordered a few images chronologically so you can see how we progressed through the year. I’ve included some pictures of the rear so you can see how it looked when we bought it.

Part 1. Digging the trench, fixing footings, plastering and whitewashing.

Part 2. Fixing more trench collapses, installing dimple board, geo-textile cloth, piping, gravel, caping strips and finally soil.

Lastly if we had paid someone to do all this I think we would have probably had to pay in excess of $30,000 and possibly double that.

By the way Kingston (and similarly the Hudson Valley) have experienced a housing boom and earlier this year Kingston supposedly had the hottest real estate market in the country, hard to believe until you look at housing pricing.

See Why Kingston’s real estate market is the hottest in the country

and

As home prices soar in unlikely places, the most vulnerable residents pay the price

I bring this up as it’s difficult to find contractors, who can now pretty much charge what they like. It’s certainly great to have the energy of new people moving into the area but it is sad to see people being evicted and rents increasing sharply.

All in all I think we added quite a few defences against damp and I don’t think we could have done a better job. If my Dad was still alive today he would definitely have approved of the work.

Filling in the Trench

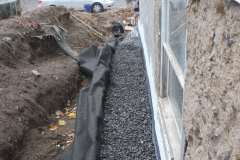
At last we’ve started to fill in our trench and start to regain the path around our house. It’s been a a long slog and I think we started on this project in 2020. On Thursday we almost run out of the gravel but fortunately I was able to order another 4 sq. yards on Friday morning which pretty much kept us busy the for the rest of the long weekend.

By Saturday evening I think all the shoveling and carrying had caught up with us and we were both beat. Big thanks to the Mayor of Ponckhockie, Barry, who helped us on Saturday. Sunday it started to rain around mid-day so I didn’t get a lot done, pretty much just trimmed the top edge of the dimple board and some cleanup inside. We will cap the tops of the dimple board with these dimple and sloped caps which help to seal the top of the dimple board. Thank you Andy for your kind gift of some free sloped caps, every little helps.

We’ve probably got about 1.5 cubic yards of gravel to shift, which may not sound much, until you realise that a cubic yard of gravel can weight between 2,300 and 3,000 lbs and we’ve already shifted 14.5 cubic yards.

Pushing a Car

I know that’s an odd title for a post but I’ll get to that.

So another Gravel Day, I can’t tell you how happy I am!!! Possible I’m coming down with something but today seemed a bit of a slog, it wasn’t I just felt like it. Probably close to freezing but the sun was out and within ten minutes I needed to ditch some clothing.

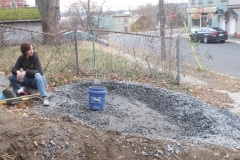
I’m bucketing the in gravel but I’m only filling the buckets to halfway and taking them one at a time. Our friend Derrick suggested that we should add any unwanted stone so I’m adding the stone rubble which we took off the top of the walls, this has helped a lot. I probably added about 6″ of gravel on Saturday and today was similar. We’re probably halfway done and have added enough to prevent any trench collapse, in fact I now want the trench to collapse to save us shoveling dirt back in. If it doesn’t rain or snow over the next few weekends we’ll probably finish the project this year, though I do think we may need to order some more gravel, joy to my ears!!!

It was a bit of a slog today also so I’m not coming down with anything, it’s just the nature of the beast.

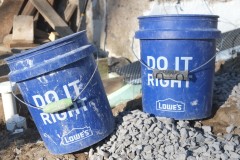
By the way we added the thick grips to the buckets to make carrying a lot less painful. The green one on the left cannot be transferred to a new bucket, however, the rubber one on the right can be. I highly recommend them.

So, pushing a car, how does that tie in? It’s something Aimee and I witnessed a few years back when we lived in Oakland. It was evening and we were sitting on the front patio of Beer Revolution (3rd and Broadway) when we saw a chap, maybe in his 50’s/60’s pushing his car through the intersection. I thought he’d just bring his car to rest as soon as he had cleared the junction, but no, he kept on pushing it. I kept on expecting him to pull over, but no he kept on going. Feeling sorry for the chap I caught up with him and asked whether he wanted a hand, “no” he said politely, he was fine. Being inquisitive I asked him where he was going and he said Berkeley. Berkeley!!! That was a couple of miles away and there was a slight incline on the way, nothing if you’re walking or cycling, but pushing a car, crazy!!!!

On returning to our beers I mentioned this to Aimee and we decided to leave and catch up with the chap who was heading in the direction of our loft. We caught up and after some persuasion he let us help him push his car. Turns out when we first saw him he had already pushed it a few miles, I think from East Oakland or Fruitvale. I can’t remember where his final destination was in Oakland but at the time the total distance seemed to be at least 5 miles.

So whenever I have a daunting task I think of this chap, who incidentally must have had the heart of an ox, and think can this be has hard as pushing that car.

Aimee has a bit of a bad back at the moment so she spent her time raking up the leaves on our lawn and it does look great clear of leaves.

Dedicated to Aimee’s Mum who passed away today. Bye, Bye Doris you will be missed, love you. 20th April, 1929 – 20th November, 2022.

National Gravel Day

Did you know that 16th October is National Gravel day – that’s news to me. First off a big thank you to Giovanna and Derrick who helped us shift gravel for a few hours. That was a huge help and thank you. It’s amazing how much difference a couple of extra people can make.

We probably removed about 3 cubic yards of gravel which is half of what we ordered. We’ll probably need to order more and I’ll do the calculations so we’re not left with much over.

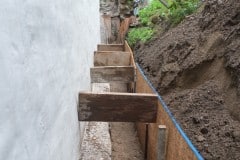
My plan was to pull the plywood shuttering up as the level of gravel increased but I didn’t and now it won’t budge. I should of also paid attention to the metal spikes holding up the shuttering – I managed to rescue all the long 4′ ones (that’s what I’m doing at the end of the video), but the shorter 30″ spikes got buried which is a shame but I don’t want to dig up the gravel again – lesson learnt.

We bought 6 more sheets of 4’x8′ OSB which we had cut lengthwise and that will provide the next layer of shuttering. I’m thinking that as the weather is getting colder this weekend we may spend plastering the inside walls as this can’t be done when it gets too cold and gravel can be shifted in most weather conditions.

The camera decided to stop working halfway through so apologies for the discontinuity and I’m sorry I didn’t get Aimee and Giovanna on film as they did a great job shoveling the gravel into the buckets.

Dimple Board

This weekend we finally got to install the dimple board and started to fill in the trench. This job has been going on for over a year so it’s fantastic that it’s finally coming to an end. It will be great to get our driveway and path around the house back again!

The dimple board being plastic protects the wall from moisture in the ground and its 5/16″ dimples, which face towards the wall, allow the wall to breathe (important for our lime mortar walls) and moisture to condensate outwards so it falls by gravity to our foundation drain.

I’m really pleased I came across this product as it’s the perfect solution for our house. We bought ours from the fine people at DIY Basement Solutions who provided excellent customer service on numerous occasions, thank you Andy.

Before we could add the dimple board I realised that we needed shuttering around the side of the house to contain the gravel. This meant removing a decent amount of gravel so I could pull back the geo-textile fabric, hence why the video is rather long.

Warning: may contain butt crack.

I had planned on wrapping the dimple board around the house horizontally and then trimming it to hight once we had backfilled but on the day for some reason I changed my mind and added a slope to it, bit risky as we’d only know if I got the angle right once it had been fully installed and if I got it wrong we’d have to take it all off and re-position it. As it turned out I think we were lucky and we got it right the first time. We’ll still have to trim it back in parts but it’s easy to cut with scissors. You’ll also noticed that we wrapped the board over the footings to further direct water away from the wall. To seal the top edge of the board we also bought some top caps which we’ll add towards the end.

All in all a great product and easy to install and I doubt we’ll ever have any issues with damp in the future. Loved the attachment plugs. Huge physical job overall but this will help keep the house dry for another century.

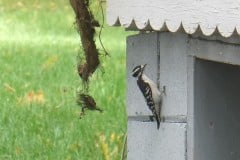
Last picture is of a female Downy woodpecker, there were two of them playing a few feet away but I couldn’t get a good shot of both of them.

Foundation drain update

I’m getting a bit tired of this drain, as must you readers, but it would be a shame to stop reporting on it now. It’s taken us ages to get where we are today, but we’re not cutting corners and we had a lot of things to deal with such as:

  • Dig out trench – no mean task, especially as it kept collapsing
  • Repair poor footings and add bevel
  • Remove old wall plaster, repair wall, re-plaster and white wash
  • Remove old cast iron sewer pipe
  • Grade channel to correct depth
  • Install geotextile, gravel, pipe and dimple board etc …

So a few weeks ago we parged the side wall, we only did the lower half as once we have filled in the trench it will be easier to do the top half. Again the ToolCrete sprayer was invaluable and I can highly recommend it, okay cleaning it is a bit of pain, but then cleaning always is. Last week we limewashing the plaster, cleared out the trench after another landslide and started to grade it.

This last weekend we pretty much finished preparing the trench for the pipe which involved getting the slope right so when we added gravel, the pipe would have a gradient close to 1/8″ per foot (0.6°).

We couldn’t find the pre-drilled pipe locally so we had to drill about 50 3/8″ holes in each pipe. We assembled most of it on the lawn and then dragged it into the trench. The vertical pipes you see are clean out points in case the pipe ever gets clogged. I’ll probably bury these a few inches below the surface but mark their locations somewhere.

So first down in the trench was the heavy duty geo-textile fabric, this will help keep the gravel from getting clogged up with fine particles and this will wrap around both pipe and gravel. Next down was 2″ of gravel followed by the pipe which was set a gradient of a little less than 1°. And now at last we can start to fill in the damn trench!!!

We bucketed in the gravel as it was tricky to walk down the trench with the pipe there, but as we start to fill it up we may be able to get a wheel barrow down there. Luckily we weren’t alone in this task and Aimee’s friends came around to help, wow, what a difference a few more hands make.

I can’t thank Kerry, Rich, Jesse and T-E-A-L enough for their help, in addition to which, Kerry and Rich brought over the most delicious food and wine, incredible!!!! Unluckily for us we had less gravel than we thought so worked stopped on the early side, that said, people said they’d help again and we already have a fresh pile of gravel sitting on the drive, just waiting for you all! I can’t thank you enough and I was touched by your help and enthusiasm.

Kingston is having it’s yearly O+ Festival this coming weekend so there won’t be much happening at the house. The following weekend however we’ll be installing the dimple board and then continue to fill up with gravel.

P.S. In case you’re interested in what the back of the house looked like before we dug this trench, check out these old posts:

And also some photos, we almost forget we have a drive!!! Sometimes all this work seems a step back, but at least we’ve got rid of that horrible wall behind the rear windows, now hopefully you’ll be able to see the garden from the ground floor.

This coming Sunday (13th October) we’re hosting another gravel moving party so if anyone has any spare time please consider helping us out for an hour or two, it would be a huge help to us 🙂 We’re still bucketing it in and we’re filling the buckets to about a 1/3 full so we’re talking maybe 15lbs.

Back to work

Just got back from a lovely vacation to the UK and now we’re full of vigor and a positive attitude to get stuff done on the house, probably…

It’s still our aim this year to fill in the trench behind the house and although we’re getting closer we keep coming across additional tasks that needs addressing before we can lay the pipe and start filling. Today it was to remove our old sewer pipe as it was in the way of where the foundation drain will be. The wall of this 5″ pipe are 1/2″ thick so it’s very heavy which is why I’ve been cutting it in 5′ – 6′ lengths and I think removing two such lengths will be enough.

Cast iron is pretty tough stuff and it probably took me about 40 minutes to cut through one completely. I used a Sawzall with a 9″ diamond blade (thank you Jude and Kadidja for the Home Depot gift card, it pretty much paid for the saw!).

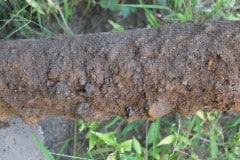
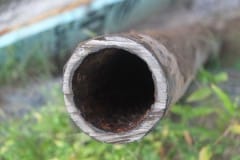
From the photos below you can see the rust nodules that have formed over the years, some of which are at least an inch high. You’d probably think that the pipe was junk if you looked at it, however, after cutting the pipe you can see that it’s still pretty much intact, not bad for a pipe that’s been underground for probably half a century at least and I bet it could survive another half century. So next time you pull up an old rusty cannon from the depths, just go over it with a grinder and it will be as good as new 🙂

This coming weekend we plan to finish off all the remaining tasks such as adding a angle to the footings (to drain water away from the house) and to add lime plaster to the side wall. Temperatures here are starting to cool here so this is great timing as in few weeks it might not be possible to plaster.

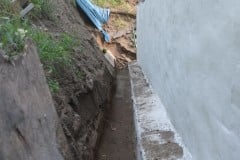
Almost Ready to Lay Down Pipe

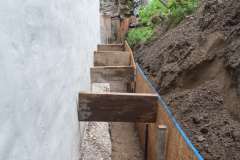
We’ve almost finished excavating the rear for our foundation drain. It did collapse in parts so I cleared that up and spent some money on some semi-decent shuttering to hold back the soil. We’re away at the moment but we couldn’t have started to fill the trench in anyway as the lime paster needs to cure for about a month.

So before the drainage pipes go in and we start to fill etc we have to consider what treatment we should apply to the wall. If the wall had been Portland based then we would have added some sort of membrane to keep the moisture from permeating into the wall, this could have been something we painted on combined with a plastic membrane. Because our lime walls need to remain porous the former option was out leaving us with the membrane. I was going to use our leftover Stego 10 mil vapour barrier plastic which is pretty tough, however after further investigation into foundation drains I came across a product called dimple board. (Note: I had been previously searching the web for French drains whilst in reality ours is a foundation drain).

The dimple board seemed to be the perfect solution and the reason it’s called dimple board is because it has 5/16″ dimples which provide an important service. The dimples protrude towards the wall and leave an air gap for any moisture against the wall to trickle down by gravity. These dimples can withstand the pressure of the soil so remain intact when the trench has been filled. If we had gone with a flat plastic membrane, that would have been pressed flat against the wall and any water behind it would have been held there due to surface tensioning things and wouldn’t have drained.

We got our dimple board and accessories from the nice people at DIY Basement Solutions who provided one stop shopping for the system plus the product looked to be of good quality and was available in a variety of widths.

So next steps on our return is to:

  • Do a bit more digging to achieve the 1/8″ fall per foot for the pipe
  • Lay down a geotextile membrane*
  • Add a couple of inches of gravel
  • Lay the pipe and check the levels etc and then fill around the pipe with gravel
  • Attach dimple board to wall and wrap over footings

* The geotextile membrane surrounds the gravel and the pipe and it’s purpose, especially in sandy soils like we have, is to keep the sand out of the gravel which would slow the drainage of water through the gravel. Once all that is done we’d attach the dimple board to the wall, bending it over the footings and then start to fill up the trench with gravel.

One thing that might cause a problem is around the corner we have the old cast iron sewer pipe and it seems to be right in the way of where we want the foundation drain to be. When the plumbers removed a section of this a few years ago the pipe wall was about 1/2″ thick so that will be a challenge to cut off.