It came from below…

Radon, I hate that stuff.

Radon, known to his Periodic chums as Rn, is a colorless, odorless, tasteless (how boring is that) noble gas. This naturally occurring radioactive gas is created when uranium, thorium, or radium break down. According to the CDC, Radon is the second leading cause of lung cancer in the US.

Uranium, thorium and radium occur naturally in small quantities in the earth and soil so that’s the birthplace of most Radon. Soil and earth are denser than Radon so it seeps upward. In turn Radon is actually 7.5 times denser than air so you would have thought that it would be happy to stay close to the earth and not bother us, however it’s still a gas so will propagate easily around your house due to air movements and pressure difference.

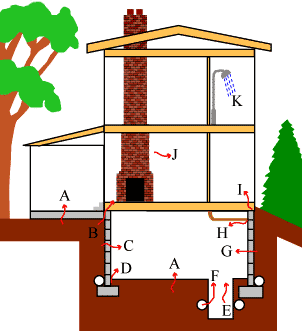
So how does Radon get into your super insulated and hermetically sealed house anyway? Most causes are:

  • A. Cracks in concrete slabs
  • B. Spaces behind brick veneer walls that rest on uncapped hollow-block foundations
  • C. Pores and cracks in concrete blocks
  • D. Floor-wall joints
  • E. Exposed soil, as in a sump or crawl space
  • F. Weeping (drain) tile, if drained to an open sump
  • G. Mortar joints
  • H. Loose fitting pipe penetrations
  • I. Open tops of block walls
  • J. Building materials, such as brick, concrete, rock
  • K. Well water

Image and list courtesy of Radon Testing Lab

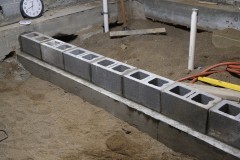
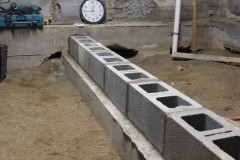
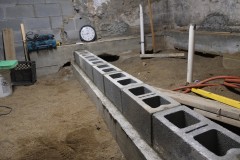
Radon came onto our radar as our architect had included pipes within our basement floor for Radon mitigation (removal for us common folk) which would be something our plumber would do. We did some research and the first step seemed be testing for Radon. We picked up some DIY tests which are $10 a pop and are small packs of charcoal which you leave in your basement for 48 hours and then post them off for testing. We bought two and put one in side of the basement. We posted them off pretty much together. Aimee just got the results for her kit but according to Fedex mine is still a week away from being delivered.

So far the news is good and we seem to be lower than 1.7 1.7 pCi/L (picocurie per litre)

From the EPA these are the risks that Radon presents

Radon Level If 1,000 people who smoked were exposed to this level over a lifetime… The risk of cancer from radon exposure compares to… WHAT TO DO: Stop smoking and…
20 pCi/L About 260 people could get lung cancer 250 times the risk of drowning Fix your home
10 pCi/L About 150 people could get lung cancer 200 times the risk of dying in a home fire Fix your home
8 pCi/L About 120 people could get lung cancer 30 times the risk of dying in a fall Fix your home
4 pCi/L About 62 people could get lung cancer 5 times the risk of dying in a car crash Fix your home
2 pCi/L About 32 people could get lung cancer 6 times the risk of dying from poison Consider fixing between 2 and 4 pCi/L
1.3 pCi/L About 20 people could get lung cancer (Average indoor radon level) (Reducing radon levels below 2 pCi/L is difficult)
0.4 pCi/L   (Average outdoor radon level) (Reducing radon levels below 2 pCi/L is difficult)
Note: If you are a former smoker, your risk may be lower. If you have never smoked your risk is much lower.

We’ll wait to see what my results are before we decide to do anything, but that said it may be good idea to at least put in a pipe before we have a concrete poor. We will keep you posted.

Sleep well everyone and dream not of what is below you ….

Resistance is futile

Not Borg, just slow & low shoveling.

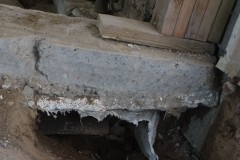
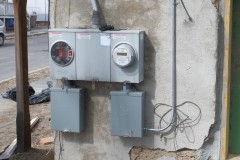
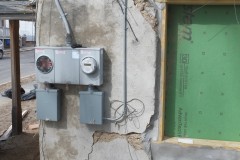
This is just a trench to carry our electrical mains cable from the other side of our drive and into our house. We already have electricity in the house but we’re making this change for a semi practical/cosmetic reason – our current electrical meters are sitting on Portland cement which is bad for our old lime mortar walls and needs to be removed so Derrick can parge with lime mortar, also it looks a bit ugly. In the photo below you can see the difference in color between the grey Portland and the beige lime mortar

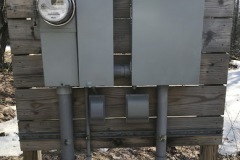
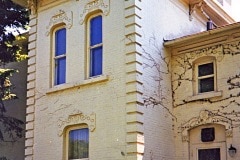
The plan is to move the meters to the other side of the drive and have them on a panel a few feet above the ground. Also Derrick suggested we make the ground floor more grandiose by adding quoins (pronounced coin) to the corners on either side off the door, which I think will look pretty nice. Photos below illustrate an isolated meter board as well as an example of quoins which by the way I had never even heard of before.

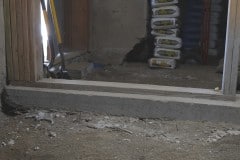
Again, I’m glad we beefed up the footings as this trench goes under our walls and into the house.

Odd jobs

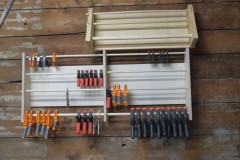
We haven’t posted anything in a while, not because we’ve been inactive, but because we’ve been working on a lot of small projects. One of these was a clamp rack – it got used for a few weeks before being deemed two small, hence I made a bigger one, which now seems too large but that can be fixed with more clamps. Don the Johnson will take the old rack so I’m pleased it won’t become firewood.

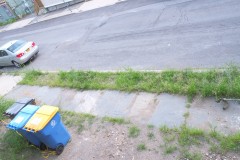
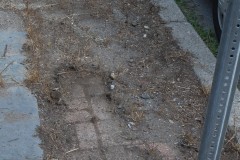
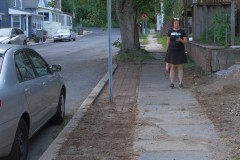
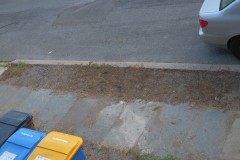
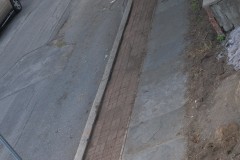
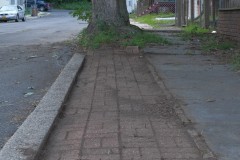
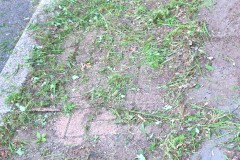
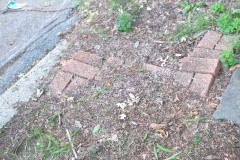
Another small task was to clear the verge which had become overgrown and a favourite spot for local dogs. Initial plan was to put grass down but we have bigger fish to fry so instead we cut back the weeds, burnt the roots with my Dragon flame thrower and then dug up the 1 – 4″ of soil, which had built up over the years, to expose some hand laid bricks. It’s no Roman mosaic but it does look better than weeds and next year we will remove a section of the bricks every 6 foot to make way for some flower beds.

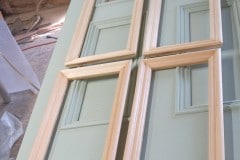
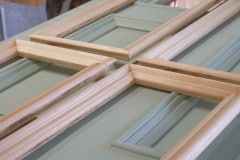
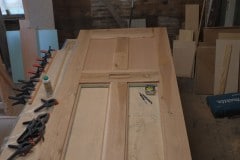
Work continues on the front door and last week we glued in the panel trim and framed around the glass openings. We are now working on the other side. Hopefully it will be ready to paint in a week or so. This door has taken more time than I expected.

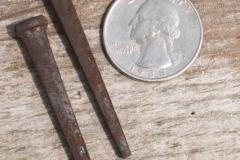
Lastly Disaster Mansion appeared in a local historical treasure hunt. We met some of the intrepid treasure hunters last weekend, gave them a tour of the house and some old antique nails as a memento, not sure what they do with them though.

We’re still waiting to have our plumbing roughed in after which we’ll be getting the electrician in. Only then can we get a concrete floor poured on the ground floor which is looking doubtful now this year.

Assembling oak stiles and rails

Okay this door does have a non-traditional construction method and I would definitely rethink this if we had to do another external door but luckily we don’t, at least not for the foreseeable future. That said it will look like a traditional door which will be long lasting door and have a decent bit of insulation.

You might have remembered that this door started as a foam cored slab, for which I forgot to cut out the windows, see measure once, cut twice.

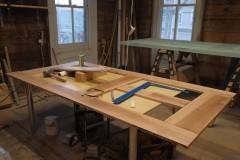
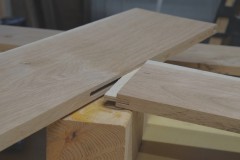
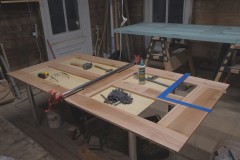
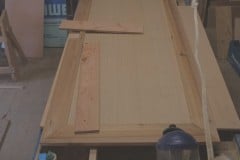
This slab is now in the process of being transformed into a traditional door with the help of some nice white oak that our friend John Paul milled from trees from his estate. We had to wait a month or so until the oak was dry enough to start working on but fortunately we had a humidity tester. The oak stiles are rails were joined with small tenon joints, not massively strong, but enough to keep the wood in the same plane. These joints were all cut on our lovely new router table.

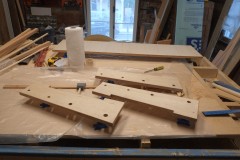
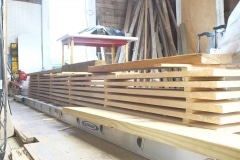
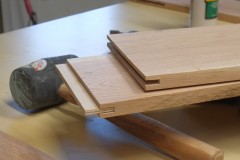
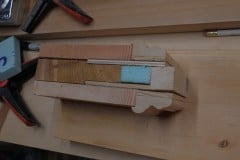
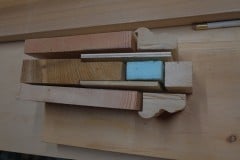
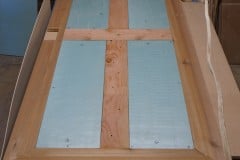
To make sure we didn’t mess up the construction we made a sample cross-sectional piece to see how the glass would fit in and I’m pretty sure that without this there would have been some cutting mistakes. The last picture is of the stiles and the rails that I glued together earlier, sitting on the ply/foam sandwich. It still has to have the trim added which we are currently working on but you can see that it’s looking more door like now. The other side will also get the same stile and rail oak treatment.

Last but not least we cut out the slot for our lovely mail slot, admittedly the door is too thick for the slot, but a minor detail.

Knock, knock, who’s there?

Some idiot who forgot to put windows in our new front door. Sigh.
We hadn’t touched this door for months and I wasn’t thinking when I glued on one side of the plywood sheet yesterday, or when we glued down the foam core insulation with Special 3M 78, never to be removed spray adhesive, today. Of course about fifteen minutes after completing this it dawned on me that we were planning on having two glass window panels.
If it wasn’t for the fact that we have already sunk over $120 and many hours into this door, I probably would scrap it.

I’m sure I can tidily cut the foam out etc., and I’ll think on it tonight or maybe I’ll have a beer instead.

And remember all you makers out there, measure once, cut twice… I’ll get my coat.

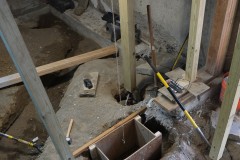
On some good news today we finished all the excavation for the basic ground floor plumbing and shifted enough soil from the driveway that we can get our little sail boat out. Last year we didn’t take the boat out once as there were tons of rubble blocking it in.

New support pillar

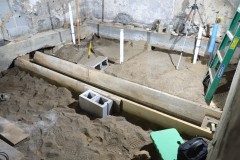
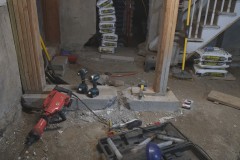
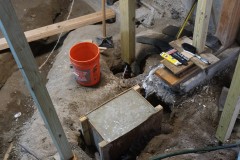
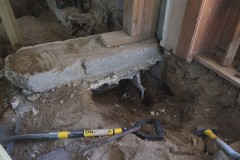
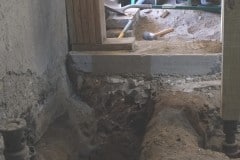
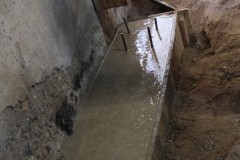
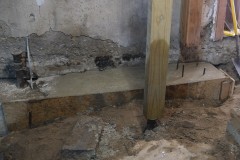
Some day we’ll have a nice concrete floor on the basement instead of of a big sand pit, however, before that can go ahead we have to have the plumbing roughed in and fix anything that will be hidden beneath the concrete floor. Once such item is a load bearing pillar support which the builders put in to support our new LVL beam. This carries a lot of weight and not something you want to see fail. As you can see in the first photo, the laser levels shows that the concrete support block has already sank by 1/2″ on the right and to the left you can see that half the support was built over a 2″ polystyrene sheet and the block has already cracked in half.

I would have liked to have started on this project earlier but we had to wait until the temperatures got consistently to 50°F and above. Winter lasts too long here and we even had snow earlier this month.

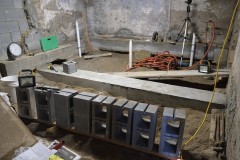
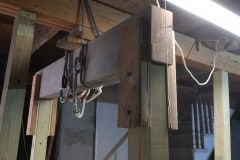
To replace the concrete block we needed to install temporary supports to reduce the load on the existing pillar. After talking to our friends and advisors Derrick and John Paul we jacked the beam up on either side with a couple of screw jacks which Derrick kindly lent us. I slowly cranked up the jacks, checking regularly to see whether the load had been taken off the existing pillar until it got to the point that I couldn’t turn the jacks any more and the existing pillar still wasn’t free. Luckily John Paul stopped by and suggested we add an additional two temporary supports. For this I need two more jack screws, I managed to buy one locally on craigslist and the other on ebay. By the way I wouldn’t  recommend hydraulic jacks for this kind of work as they leak down over time.

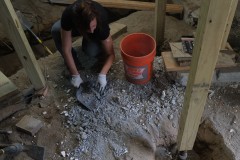
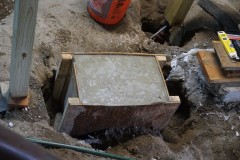
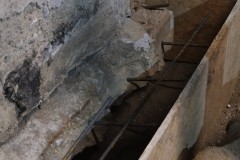
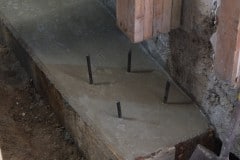
With the four jacks I eventually managed to free the old pillar and set to work removing the old concrete block with the trusty jack hammer. I made the forms for the new block as an 18″ cube with an ample supply of 1/2 rebar, kindly cut by our resident rebar cutting expert Aimee. We used 5,000 psi pre-mixed mortar (just add water) and got through about seven 80lb bags. My dad used to tell me that when he was young the weight of the bags was double that – glad I didn’t live then as 80lbs is quite heavy enough. We mixed the cement by hand which also gets hard after a time!!! Maybe down the road we’ll buy a cement mixer as it would get plenty of use. The new support is probably at least 4 times larger in volume than the old block and we left it to cure for about 10 days.

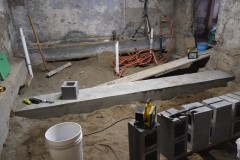
I was hoping to re-use the old support but that didn’t work out so I laminated four 10″x2″ planks together and made some nice headers and footers to help spread the weight. The new pillar is probably about 15% beefier than the previous one.

Today I installed the new pillar and released the pressure on the temporary jacks. There was some groaning noises but that’s probably just the wood settling in and I did re-add one of the temporary supports just in case. Tomorrow, I’ll bolt it down to the concrete block.

I’m glad that’s over with as jacking up your house can get a tad stressful! All in all I think this was a good job worth doing, just a shame we had spend our time, energy and money to redoing it. There are also another two supports resting on polystyrene which will need replacing but they can wait.

Off with the parging

Today we removed most of the parge coat from the house and in case you’re wondering why, it was because the existing (modern) parge coat was done with Portland cement over the existing lime mortar walls. This is not a good idea as pointed out in this article:

Lime is the base product widely used to produce mortars, plasters and limewashes for traditional buildings. Lime has distinct advantages over cement based alternatives for external rendering of traditional properties. Lime is less dense and more vapour permeable than cement based materials and does not trap water in the substrate which is the leading cause of decay in all buildings. Lime materials accommodate general movement better than harder cement based alternatives and are closer in strength to many of the types of stone and brick used in traditional construction and therefore do not exacerbate their deterioration.

Instead of using lime materials, many traditional buildings are repaired and renovated using harder, impermeable materials designed for modern buildings which use completely different construction methods. The result is often worsened damp problems. The simple advantage of using a lime render is that it allows the walls to diffuse any water vapour that penetrates into them, referred to as the free passage of moisture vapour.

which to summarize means that a Portland parge over a lime mortar wall will trap moisture in your house, cause your walls to deteriorate and will likely crack due to its inflexible nature. By the way that is snow in the video.

To remove the existing parge coat I used our recently purchased rotary hammer drill. What a great tool.

By the way, where the mains water pipe goes into the house (clad in blue foam insulation) there used to be a door and steps down to it. It probably got filled in when the garage and driveway were built.

In the process of preparing for french drains and new footings we’ve already cleared a trench around most of the house so this is an ideal time to do a fresh parge coat as well as to repoint all the corners etc. We’re hoping that our friend Derrick can do the work as he is an expert in old school plastering. Once the parge coat is on it’s recommended we wait for two weeks for the parge to partially cure before we apply a lime wash which is an old fashioned whitewash, the sort that you’d see on old farm buildings. Allowing another two weeks for curing we can start to install our french drains and fill the trench in. It will be nice to have our paths around the house back as currently you can’t walk around the house.

Concerning the the new parge coat I’ve been talking to Chris at LimeWorks and he suggested a 3.5 Natural Hydraulic Lime for the parge and a 5.0 Natural Hydraulic Lime for any small structural repairs. I can highly recommend Lime Works if you have lime mortar in your old house.

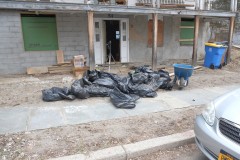
Aimee in the meantime has been double bagging asbestos tiles which were removed from a section of the house last year. This is the second load we’ve disposed of and it will be good to get rid of the stuff. We have to make an appointment at the dump before we take it in and were told that it ends up near Syracuse which is about 200 miles away.

Prepping for the concrete pour

Currently we’re trying to prepare the ground floor for a concrete pour. It’s probably too cold for a concrete pour at the moment, plus we need to get the plumbing roughed in before that happens but at least that will give us a bit of breathing space to save up for it.

The time lapse is pretty boring I know, we were trying to remove all the high spots with a laser level (unfortunately you can’t see it in the video as it makes the soil look like little chunks of burning charcoal), possible we’ll have to remove more earth but we’ll wait until we hire someone. We’re trying to do as much as possible ourselves to keep costs down.

We’re not sure what to do with the staircase, I’m tempted to pull it off and have a new one built which we’ll either do ourselves or pay someone. We would keep the banister rail and as many of the spindles/balusters as possible. It would definitely be easier for the pour if the stairs weren’t there. I’ll probably ask our friends Derrick and Giovanna for some advice on the stairs.

After we finished we had about an hour before it got dark so we got out the ladders and started trimming the trees. We only have a Bahco bow saw (which I love by the way), so it does take a while. I did order a larger Bahco bow saw but we couldn’t find it. Some of the limbs we want to remove are about 12″ in diameter so it may be a long slog, but we’ll keep nibbling away at it. We will do a nice job trimming the trees, such that they still look elegant and balanced.

Wrapping Aimee’s Christmas present

But don’t tell Aimee, it’s a secret. Zip System (chip board with a water resistant membrane) shouldn’t be exposed to the elements for much longer than six months. Usually this would be covered with weatherboards/clapboards/sidings etc. but as we’re not ready to cut out and install the windows we have to dress it in house wrap to help weather proof the house for winter. I wish we had installed the fabric upside down or back to front as we’ll now be advertising Lowes for the next few months. Maybe we’ll paint it as we do have a quite a few paint samples, in which case I’ll do it in a dazzle fashion.

By the way I added extra strips along the corners to give the wrap a bit more abrasive protection.

When we are ready to install windows I think I’ll rip all the existing Zip System off as it wasn’t really installed with love, the panels are uneven, the corners are horrible and the seams are improperly taped. When replacing it I’ll look at alternatives such as ply and DuPont tyvek.

The gap in the video is us going to lunch which in hindsight was a bad idea as we didn’t finish the fastening of the wrap and today is very wet, that said we did go to one of Aimees favourite cafes, Peace Nation which is closing it’s doors for good this weekend. At the end of the time lapse you get a quick view over the Hudson estuary – we get a great view in the winter, but not so good in the summer due to leaf cover.

French drain clearance

To keep our basement as dry as possible, we’ve been working on installing a french drain around the house. A french drain is basically a trench filled with gravel and containing a perforated pipe that redirects surface water and groundwater away from an area, see this wiki for more information. This trench didn’t need much work as the builders had cleared a lot of the soil away when they rebuilt it – this was the first wall to collapse.

We’ll need wait until Thomas and Matt remove the large pile of old wall debris from the front of the house as this is the area that the water will drain into. Once that is removed we can continue the trench and then lay the gravel, pipe and filter fabric (used to stop the gravel from clogging up with soil etc).

It was quite tiring throwing the soil clear of the ditch but the weather was perfect, a crisp autumn day. This was were we removed the tree stump from last week and you can see some of the remaining roots sticking out from the deck on the right. In the background Aimee is building a fire to burn the roots etc. We’ll often finish the day with a beer around a fire 🙂