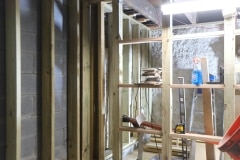
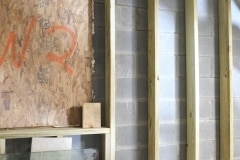
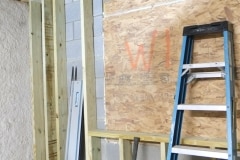
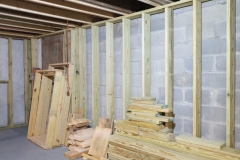
Damn, we’ve been framed

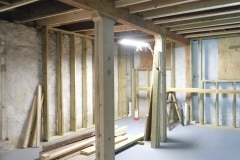
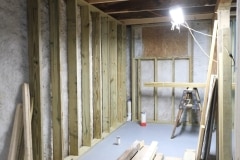
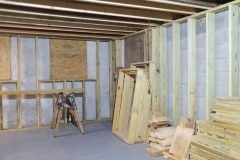
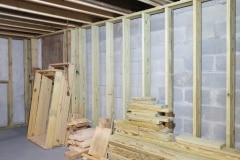
But in a nice way. I was planning on doing most of the internal framing myself but Andre, who is working on our porch, had some spare time so we were glad to hand this project over to him. When working for Andre we pay by the hour, more expensive, but it means that he and Jerrid can work with minimum time pressure and get it done correctly.

No complaints with the workmanship, decent nailing, snug joints and no splits and I’d recommend Andre to anyone who is in need of an intelligent and talented carpenter.

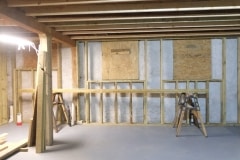
For the framing we went with 2×6″ so we could get a decent amount of insulation in the walls. Building department said we’d pass code using 2×4″ (R15 Rockwool), but we decided to increase this to 2×8″ (R30 Rockwool) for the rear wall and 2×6″ (R23 Rockwool) for the remaining walls. Because the walls are uneven, these are the minimum thicknesses we’ll be using. I know people add even more insulation but I think this will be enough to keep us cosy.

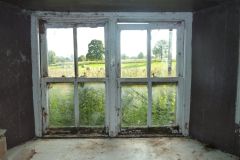
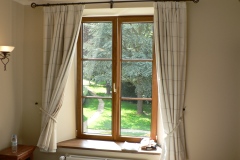
Another advantage in using 2×6″ is that it’ll give us larger window ledges (technically I think these are called window stools) for plants etc. We’ll also add a bit of a bevel to the window openings so we can get more light it, a nice detail I think. Below are some samples images of beveled window opening with large ledges.

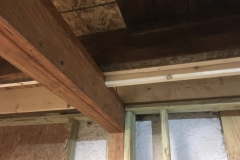
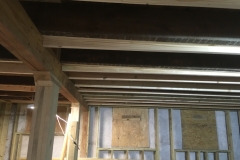
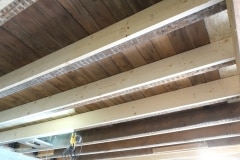
A while back Andre mentioned how the ceiling sloped down on one side due to wall subsidence over the years and last week I asked whether he could help flatten out the ceiling to make it easier to sheetrock and indeed he did that by sistering on a bunch of 2×8″. It does mean that the ceiling is maybe 3-4″ lower in some places.

Finally it feels like things are starting to take shape. Next steps are for us to finish off the internal framing for the bathroom wall – we want to add some built in cabinets, hence why we’ll do this wall. Also there is a small wall in the doorway which we’ll frame up and add a built in seat. After that it will electrical, plumbing, insulation and then sheetrock and plastering.

Sistering the floor joists

A while back we were discussing some joist repairs I was doing with our carpenter, Andre, and he thought the original floor joists over the main span of the ground floor probably wouldn’t be up to modern building code, especially as in places the joist had been badly butchered with 3-4″ notches cut out of them.

We could have left it as it was, and building inspectors would have probably grand-fathered it in etc, but then someone, maybe Derrick, John Paul or Andre mentioned that houses now have to carry a greater load, basically because we cram in more physical stuff, just look around and imagine how sparse your place would have been a century ago. In addition people socilaised differently a century ago, what may have been a tea party for ten could now be a party for forty, anyway you get the idea. So if you’re doing a major renovation of an old house it’s probably wise to think of what loads the house was designed to bear and plan for what you expect the new loads to be.

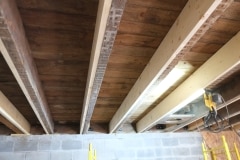
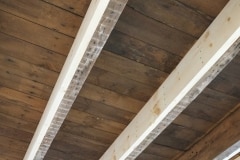
To cut a long story short Andre thought that it would be a good idea to strengthen these floor joists by adding extra wood along the whole length of them, a process known as “sistering”, why that name, I have no idea and a google search wasn’t conclusive but it does reminds me of the bill board on the show, Schitt’s Creek, “Welcome to Schitt’s Creek Where everyone fits it“. If you know, you know.

Our floor joists are about 8 – 9″ tall so Andre did a good job of cutting 2×10’s back to size, plus any necessary shimming. It does take a lot longer but now the new sistered joists are flush top and bottom with the originals. I’m pleased with the work Andre and Jerrid did, thank you. This is another job off our hands.
We really only had one shot to do this work before the electrician and plumber starts pulling wires and pipes through the joist so I’m glad we did it. This work will benefit the house and occupants for decades if not centuries. I appreciate you bringing this up Andre.

I’d like to report a missing porch

Yes officer, it’s gone!!!!

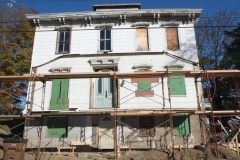
Repairing the porch has been on the books since early this year. It has never been safe to walk to the far ends of the porch and it was starting to pull away from the house a bit. The idea was to replace the lower single supports with double supports and then working upwards, replacing the deck, then upper supports etc. It would have been a big job, possibly beyond our skill level and taken us ages, so Aimee suggested we look to see if we can find someone competent and passionate about this kind of work to undertake this project and not make a bodge out it. Fortunately a partner of one of Aimees work colleagues was a timber frame carpenter which seemed the right sort of skill set and his name was Andre Ernst.

We met Andre a few months ago, explained how we didn’t want a pressure treated nail-gun porch, but more of a hand crafted, near exact replacement, whilst beefing up the strength slightly where possible. Andre definitely knew his stuff and understood what we wanted, but I think what sold it for me was seeing the artistry of his work, see Hudson Valley Timber Frames for some examples of his work. That to me showed me he took pride in his work.

The initial plan was to break the project into two phases, phase one would be to rebuild everything up to the the porch roof and phase two would be to rebuild the roof. During phase one the roof would be supported.

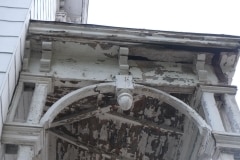
Once the scaffolding went up and a more thorough inspection was carried out it was deemed that the whole porch was in danger of collapse with the ends of the roof rafters rotten and pulling away from the house and the second floor vertical columns bowing out with barely any solid wood connecting them to the roof, so the decision was made to remove all of the porch as part of phase one. Historical society and building department were informed of this decision. I didn’t expect it to come down so quickly, but if it’s unsafe, why wait. Andre did save a lot of the wood so we could recreate the new roof exactly and you can see that the rot is major.

Sure the porch could have lasted for maybe months or years longer, but maybe not. Reminds me of a sad tale of students losing their lives across from where I used to work when their balcony collapsed, Berkeley balcony incident, all very sad and I still feel for all those victims.

Obviously it would have been great if we could have just replaced the odd bit of wood here and there in order to keep the originality, but the decay at the base of the roof was pretty bad. The porch roof gutters had long gone so any rain water would have just been soaking the base of the roof, probably for decades, so the rot is not surprising.

We asked Andre to save all the detailed bits such as the corbels, arches, acorns, curved roof rafters and first floor vertical supports, and we’ll restore a lot of this and if we can’t then they will be used as templates. We won’t reuse the vertical supports for the front porch but I might see if they can be restored and used when we rebuild the rear balcony which is not original and damn ugly.

We did inform the City of Kingston’s, Historic Landmarks Preservation Commissions that the roof needed to be removed and we are appreciative of their support.

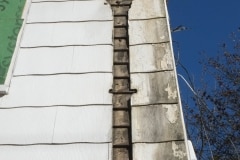
On deconstruction, I did like the way that the concrete tiles were trimmed nicely around the profile of the columns, nice touch, however an even nicer touch was how the vertical columns were notched out to fit the original wooden sidings so they sat flush with no gaps, that’s pretty impressive. I’m going to want the new pillars to be the same. No one would bother with that sort of detail nowadays, hence why I think it’s important for the houses originality, sure it’s new wood, but installed the original way.

Three steps forward, two back

Back again to the front door. We’re trying to get the opening correct for the door we restored a few years ago. The current door (circa 70s, 80s) doesn’t align vertically with the door above it, so our aim is to shift the door a bit to the left so it does – we believe the original door was centered. The new door is 3″ wider than the current door but we will still hope to have side windows to let in a bit more light.

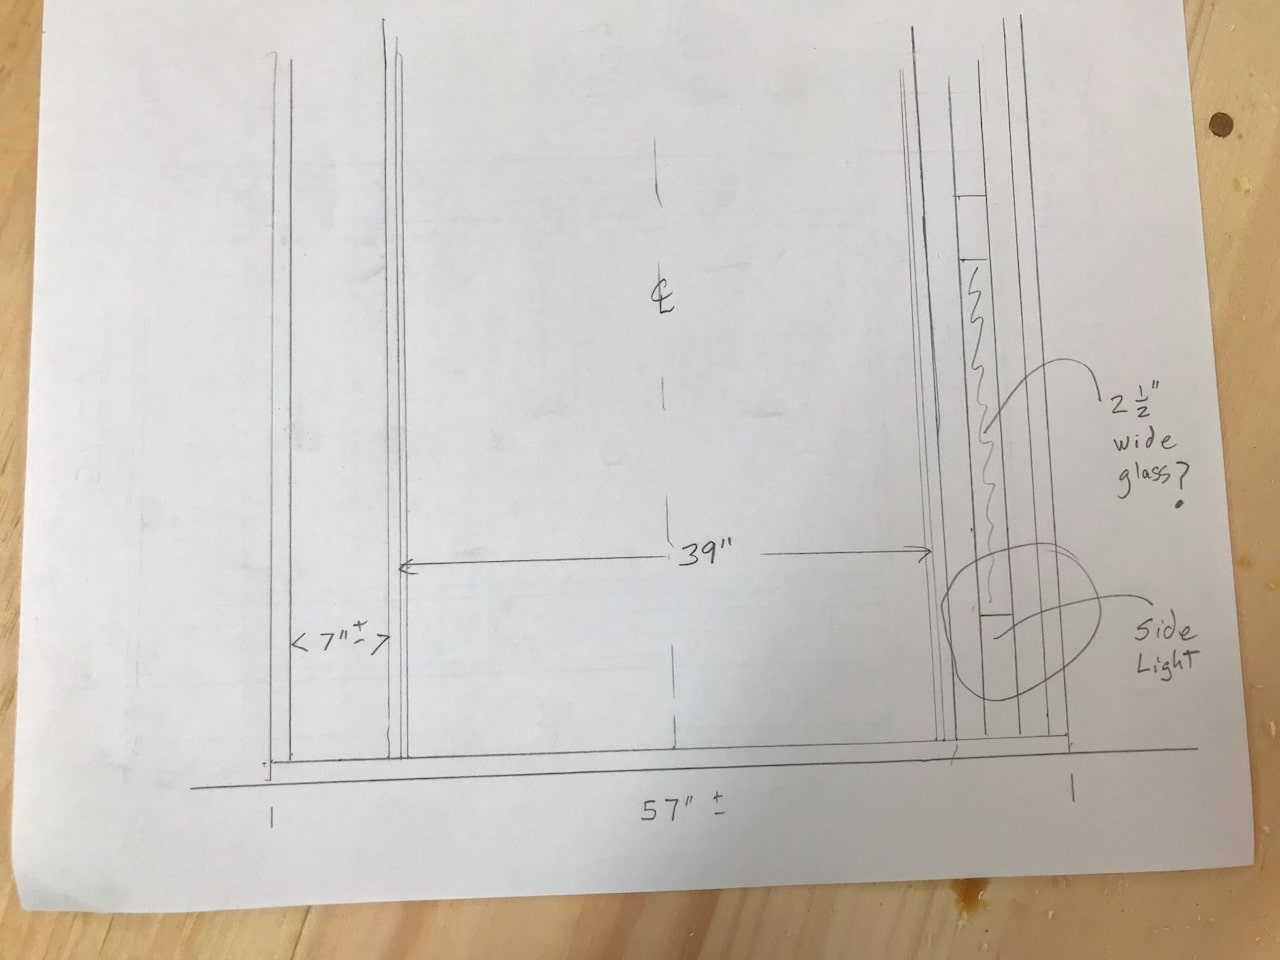
We decided to enlist the help of the talented Josh Finn to build us a new door frame and to install the door. Josh’s initial sketch (below) shows that with the current door opening the side windows would only be 2.5″ wide which isn’t very much so I’ve been working on making the door way gap a little larger. As it turned out the pressure treated wood I added to either side of the newly extended wall wasn’t square – not sure how that happened, user error or maybe the mortar pushed it out, anyway it was bugging me so I ripped both of them off, which in effect undid a couple of days work – bummer but I want to get it right.

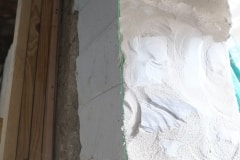
I then got back to my least favourite task of chiseling and grinding away at the wall, annoying as we had just rebuilt one side of the wall. Grinding away the lime mortar is easy as it still reasonably soft (lime mortar takes weeks to cure), but the rocks are really tough to grind down. From the pictures there doesn’t look like there are many rocks, but if you scroll to the bottom, you can see them after I sprayed the lime with water. I estimate 12 hours to finish the grinding. It’s also very messy, with stuff going everywhere and clouds of dust.
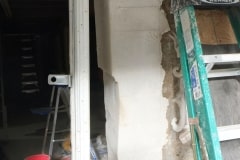
First pass of the grinding removed 1″ – 2″ of the new wall and then I decided to remove another 1″ – 2″ but this time, not extending to the outside so the pressure treated wooden door jams aren’t visible from the outside. You can see the the laser line I’m trying to keep to in the photos below.

Hopefully now, our side windows will be at least 4″ wide which I think is reasonable.

Because the ground walls aren’t perfect, we sprayed them with lime mortar and then I plan to grind the surface flat so the door jams fits snugly. Lime mortar is fast to grind away, just very messy. While we’re spraying mortar we also started to spray the few remaining untreated walls in the house. There was a bit of prep as we had to remove all the lose stuff which covered most of the surface.

Repairing floor joists

So having just repaired the rim joist, it’s now time to replace the rotten floor joists, three to be precise. Due to rot, none of these attached to the rim joist and were just hanging mid air and two of them had huge chunks cut out of them, possibly for duct work so they were severely compromised.

Like most projects on the house I wanted to do a respectful job so instead of butt jointing in a new piece and sistering on a 2×8″ (adding extra wood to strengthen a damaged beam), I thought I’d do some joint work. I’ll still add a 2×8″ but only on one side as my joint will be stronger than a butt joint. I’m not sure this joint has a name, it’s slightly similar to a scarf joint.

I probably would have done a fancier job if it wasn’t so difficult to cut, standing on a ladder is not the easiest position to cut from. For the first beam I made some templates which I attached to the beam and used a Sawzall to rough cut, finishing off with a hand saw and plane – that was hard work. I then had the idea of using a trim router and that worked out great. I did have to to do multiple passes as a trim router as the name suggests isn’t supposed to remove a lot of wood in one pass. It probably took me about 3 – 4 hours to cut a single joist like this, luckily I only have three.

As I didn’t have any wood with similar dimensions to the joist, I laminated three pieces of old growth lumber together. I used West System epoxy so this will be a stronger than wood bond, plus I’m running 3/8″ bolts vertically through the joint as an extra safe guard. The reason the center piece is lighter is because I planed it down.

And this is how they finally turned out and I will secure these floor joists to the rim joist with 3/16″ thick steel angle brackets. I know these aren’t the finest or strongest joints, but I think they are decent, plus the addition of another sistered 2×8″ will make every rock solid.

This whole job, repairing wall, replacing rim and floor joists has taken me a few months – I wasn’t expecting it to take this long, but in most endeavours the first time you do something there’s a learning curve.

Improving front doorway

The ground floor door isn’t original, it’s pretty beat up and doesn’t align vertically with the arched door above it. When it was installed they removed 6″ – 12″ of the masonry wall to fit it in and as our new door won’t have such large side windows we needed to rebuild the wall.

You can see from the picture below that the right side of the lower door aligns with the above door, but the left side doesn’t, hence why we are fixing this. New door will be 3″ wider.

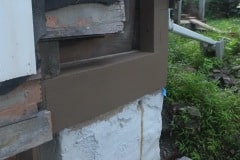
First step was to drill the existing wall and epoxy in a bunch of fiber glass rebar to help tie in the new section. This was followed by attaching a piece 2×12″ of pressure treated wood which will form part of the new frame. Into the 2×12″ I screwed in large anchor screws so when the mortar sets the 2×12″ will be fully secured.

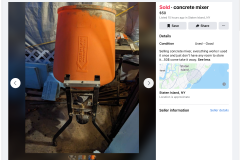
This weekend Aimee was in NYC so I started mixing the lime mortar on Saturday morning. I was on my third mix when I noticed smoke coming from the electric motor on the mixer. I switched it off immediately and basically had to stop work. In the evening I started looking for a new mixer, the box stores sold the mixer I was after but it would take a week or so to get delivered and I wanted the mixer tomorrow, so my search turned to second hand mixers on Marketplace and Craigslist.

There was nothing decent locally so I extended my search, the same mixer that failed (Harbor Freight) turned up in Albany for $150 so that was a contender, then I thought, well Aimee is in NYC and she has the Beast so my search turned south and bingo, a Kushlan mixer had just turned up in Staten Island for $50. I jumped on it and contacted Aimee and by Sunday afternoon we had a great mixer and what a great deal that was, thank you Ilya. This mixer has a slightly higher HP motor and is so quiet compared to the Harbor Freight mixer that Joe has been kindly lending to us.

I intend to fix the mixer that Joe lent us and a knowegable friend, Oli, suggested that it could have been the starter capacitor that had burnt out and and not the motor so today I ordered a new capacitor and hopefully that will fix the issue, if not it will require a new motor. We never mixed large batches and I think the biggest load we were making was less that a half a bucket full, however we were mixing for a long time. With Portland cement you can probably mix up a batch in a few minutes but lime mortar requires that you mix it for at least 15 minutes, so components probably got hotter.

As we added the shuttering we packed in as much stone as we could to help save on mortar and provide some strength.

There are some expected blemishes but those will all be cleaned up when we add a plaster coat to the walls and then it will be seamless.

I was expecting to get more done this last weekend, especially as it was a 3 day weekend, alas as usual we didn’t get as much done as expected. I did however remove the left hand panel and pretty much ground back the wall to where it needed to be. Grinding the mortar away is easy, but stone is hard, plus it’s terribly dusting with sand and grit flying everywhere.

The left hand side is now boarded up and this week I’ll be installing another 2×12 to match the left, with mortar etc.

Sill Joist Finally Finished

It’s taken a while but now it’s done and it’s even had two licks of paint. Overall pretty pleased with the result especially considering the state of it before. I also epoxied and screwed some pressure treated 2×10’s to the back of the beams which will help spread the weight over the wall.

As a reminder this is what it looked like after I had removed any crumbling mortar and rotten wood (note the lack of wooden sill joist which had completely rotted away, leaving corner of house hanging for about 10′),

and after I had repaired the wall and ground the top flat.

My first attempt to replace the beam used pressure treated, didn’t like it so that got replaced by old growth timbers from the house.

I didn’t dimension the old growth timber so there were minor gaps etc. but those got filled in with an epoxy paste towards the end.

Here you can see the beams reinforced with 2×10 pressure treated. The original beams were placed on the very edge of the wall and some are even over hanging so it was good to spread the weight inwards.

Finally the completed rim joist, with all cracks and gaps filled with West Systems Epoxy and then two coats of exterior paint. Eventually this will all be covered with the sidings. The wall will be parged again as the beam is still over hanging in parts, plus I spilt a fair amount of epoxy on it. Good for another century.

Next project is to replace the rotten floor joists and I’ve already started to cut the joints as can be seen in the following image. I’ll epoxy and bolt everything and possibly that would be enough, but will probably sister in a 10×2 or a LVL beam just to be sure. Tricky cutting these as they are awkward to get at, one down and two to go. Using a sawzall to rough cut and then a trim router with template. Finishing off with a combination of Tenon saw, Japanese saw and hand plane, basically trying everything until I find what works best.

Still replacing the sill plate

This project is taking me much longer than I had anticipated. Reason for this is that none of the angles of the wall are square so everything needs to be measured and cut multiple times, including various shims and some additions where I measured once, cut twice. The new beam consists of six individual pieces of timber (not including shims and bodges) which I plan to epoxy and screwed together and I feel it’s almost ready to install.

Today, Saturday, I finished all the final fitting of the beams and as the wall wasn’t flat on top I added a layer of lime mortar for the beams to bed into. It was a long day, started at 9am and finishing at 8pm.

Today, Sunday, I got up, looked at it and said no, this is all a bit crap. Didn’t really like the pressure treated, plus is wasn’t as wide as the existing beams (maybe 1/4″ to 3/8″ narrower), all the joints had shims as the angles were funky and it generally didn’t look that great. So I ripped it all out and sat down with a sketch pad and looked at the problem which was that the bottom of the two beams I was trying to reconnect had a vertical deviation of about 1.5″.

The easiest solution was to start with a level playing field so today I spent most of the day grinding down the top of the wall so it’s flat. I think I got it to with +/- 3mm which is good enough. The lime mortar is easy to remove but the rocks took some time. A big thank you to Oscar Soliz for inventing the laser level.

With the wall flat I don’t have to deal with any weird angles and I can use some of the spare old wood from the house which are “real” 2×4’s so they match the existing beams. The first layer will get set in a bed of construction adhesive, adjusted so it’s level and then bolted down onto the wall. After that it will be like building a log cabin. It feels appropriate to use spare wood from the house for this task and I’m glad we saved it.

Sure the wood has some cracks etc. but it’s still in great shape. The clamps you see in the picture are to glue some splintered corners. The nails are only on one side and they were made when the lath and plaster were applied.

We’ve hit a wall

A rock wall to be specific. We’re not really sure how we’ll treat the path around the back of the house, but we decided to build a rock wall to help support the bank and to plant shade loving plants such as ferns, grasses, hostas and others. We also planted some mosses in the cracks between the stones so we hope these take root. The rocks were ones that we had dug up in the garden so it’s good to re-use them. We don’t have enough rocks for the complete wall but additional rocks can be had from just up the road where they’re abundant and just sitting by the side of the road. Bit of a struggle getting them up our garden as one of them must have been around 200lbs. What’s nice about this wall is that it can easily be modified or removed if we ever have a change of plan.

When we eventually move into the ground floor this will be the view out of the back windows so we want something lush and refreshing. Aimee did most of the wall and it is crude, but in a nice way, solid and I think it will age nicely. We’ll publish additional photographs when it’s finished and the plants have had time to settle in..

We do need a few more plants but Aimee put out a request on facebook and we should have some more ferns and grasses soon.

A Wall is a Wall

Before we can replace our sill beams the corner of the house needs to be repaired, it had some really funky repairs done on it in the past so I’m glad we’re fixing it. Weather is just about decent enough to risk doing lime mortar.

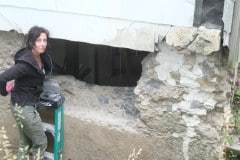
From the photos you can see it was in pretty bad shape and even worse by the time I removed all loose and flaking mortar. A lot of the mortar was of very poor quality and would crumble in you hand, hence the huge hole you can see.

On Saturday we rebuilt the main structure of the wall by hand, filling in small cracks & gaps and on Sunday we used our mortar sprayer to finish the job off. We had to spay a lot on as in some places the mortar is a couple of inches deep. We did push in stones whenever we could and we do add fiberglass strands to the mix – in the old days they may have added horse hair.

I’m not great at finishing the surface but my trick is to go over any irregularities with a diamond polishing/grinding disk which will give great results. I’ll grind the top nice and flat and it will also have to be at an angle as the two beams are at a slightly different height, probably due to subsidence etc.

The last couple of nights have dipped below freezing (disastrous for lime mortar) so we built an outside tent around the wall and left a small fan heater inside. Each day we’ll spray the wall with water which helps the lime to cure.

The reason why we look like we’re not doing much in the video is that each batch of mortar takes about 25 minutes to mix – it’s a lime thing. Also the SD card ran out of space, hence the abrupt end.