
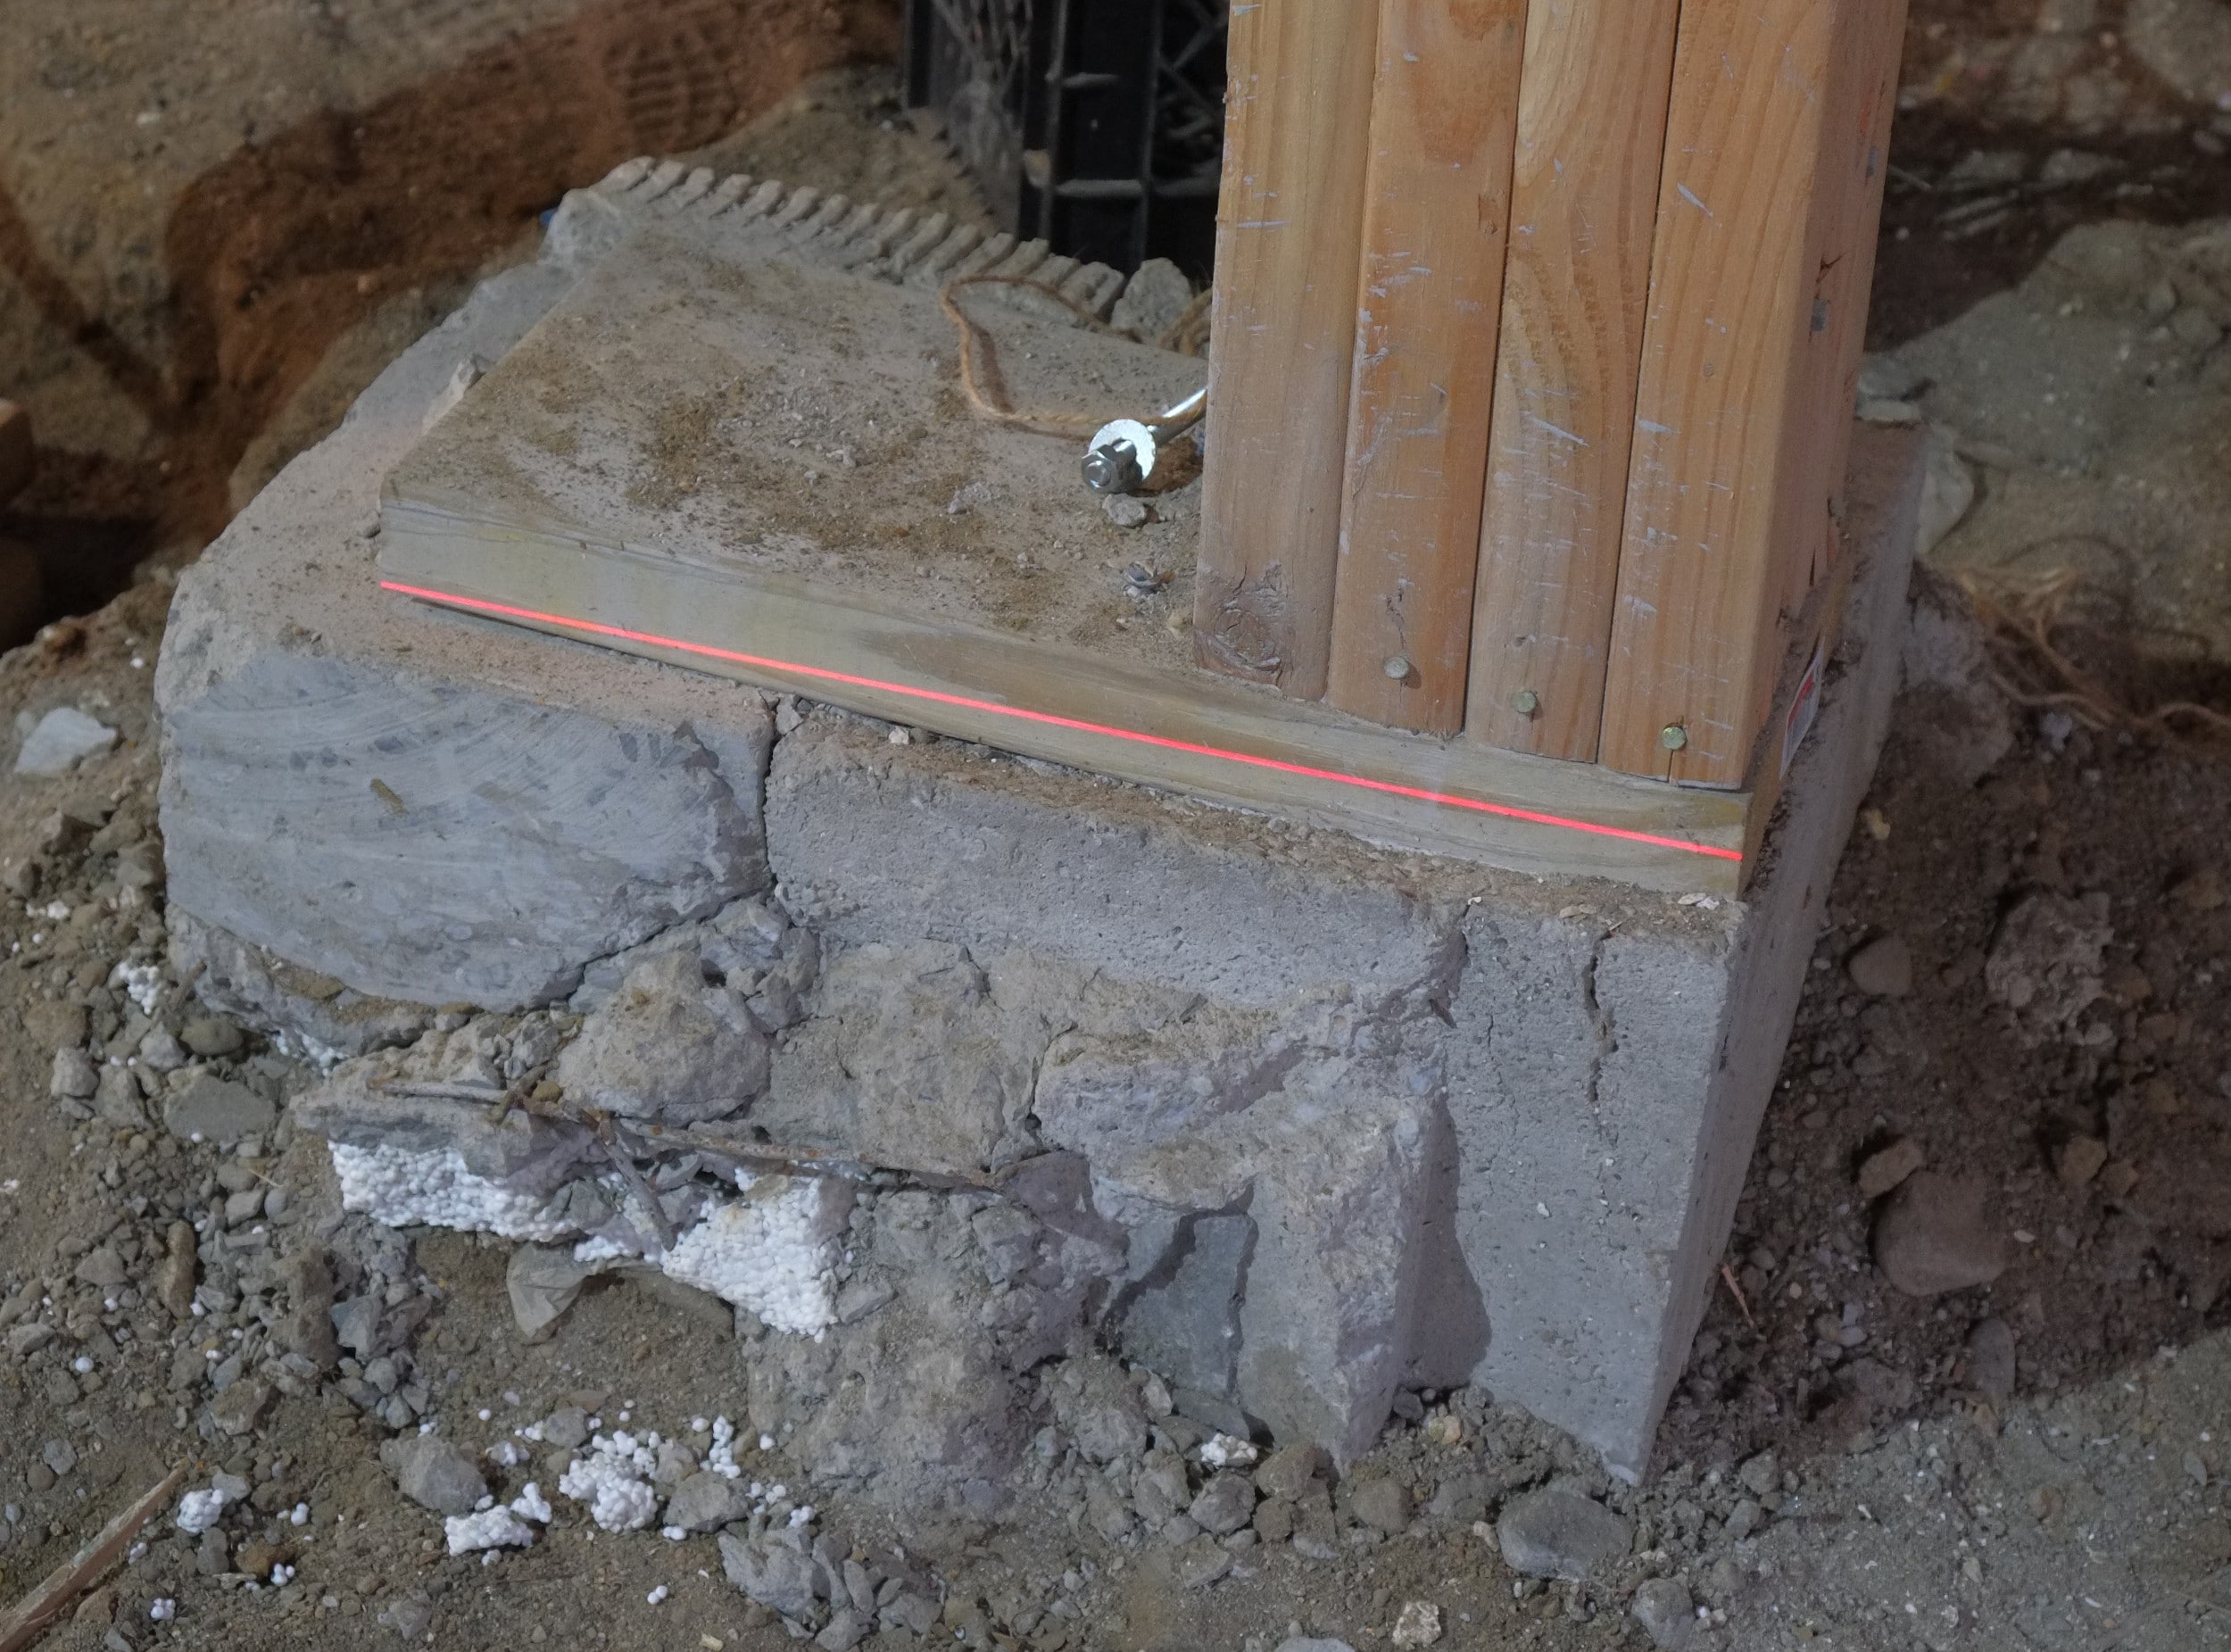
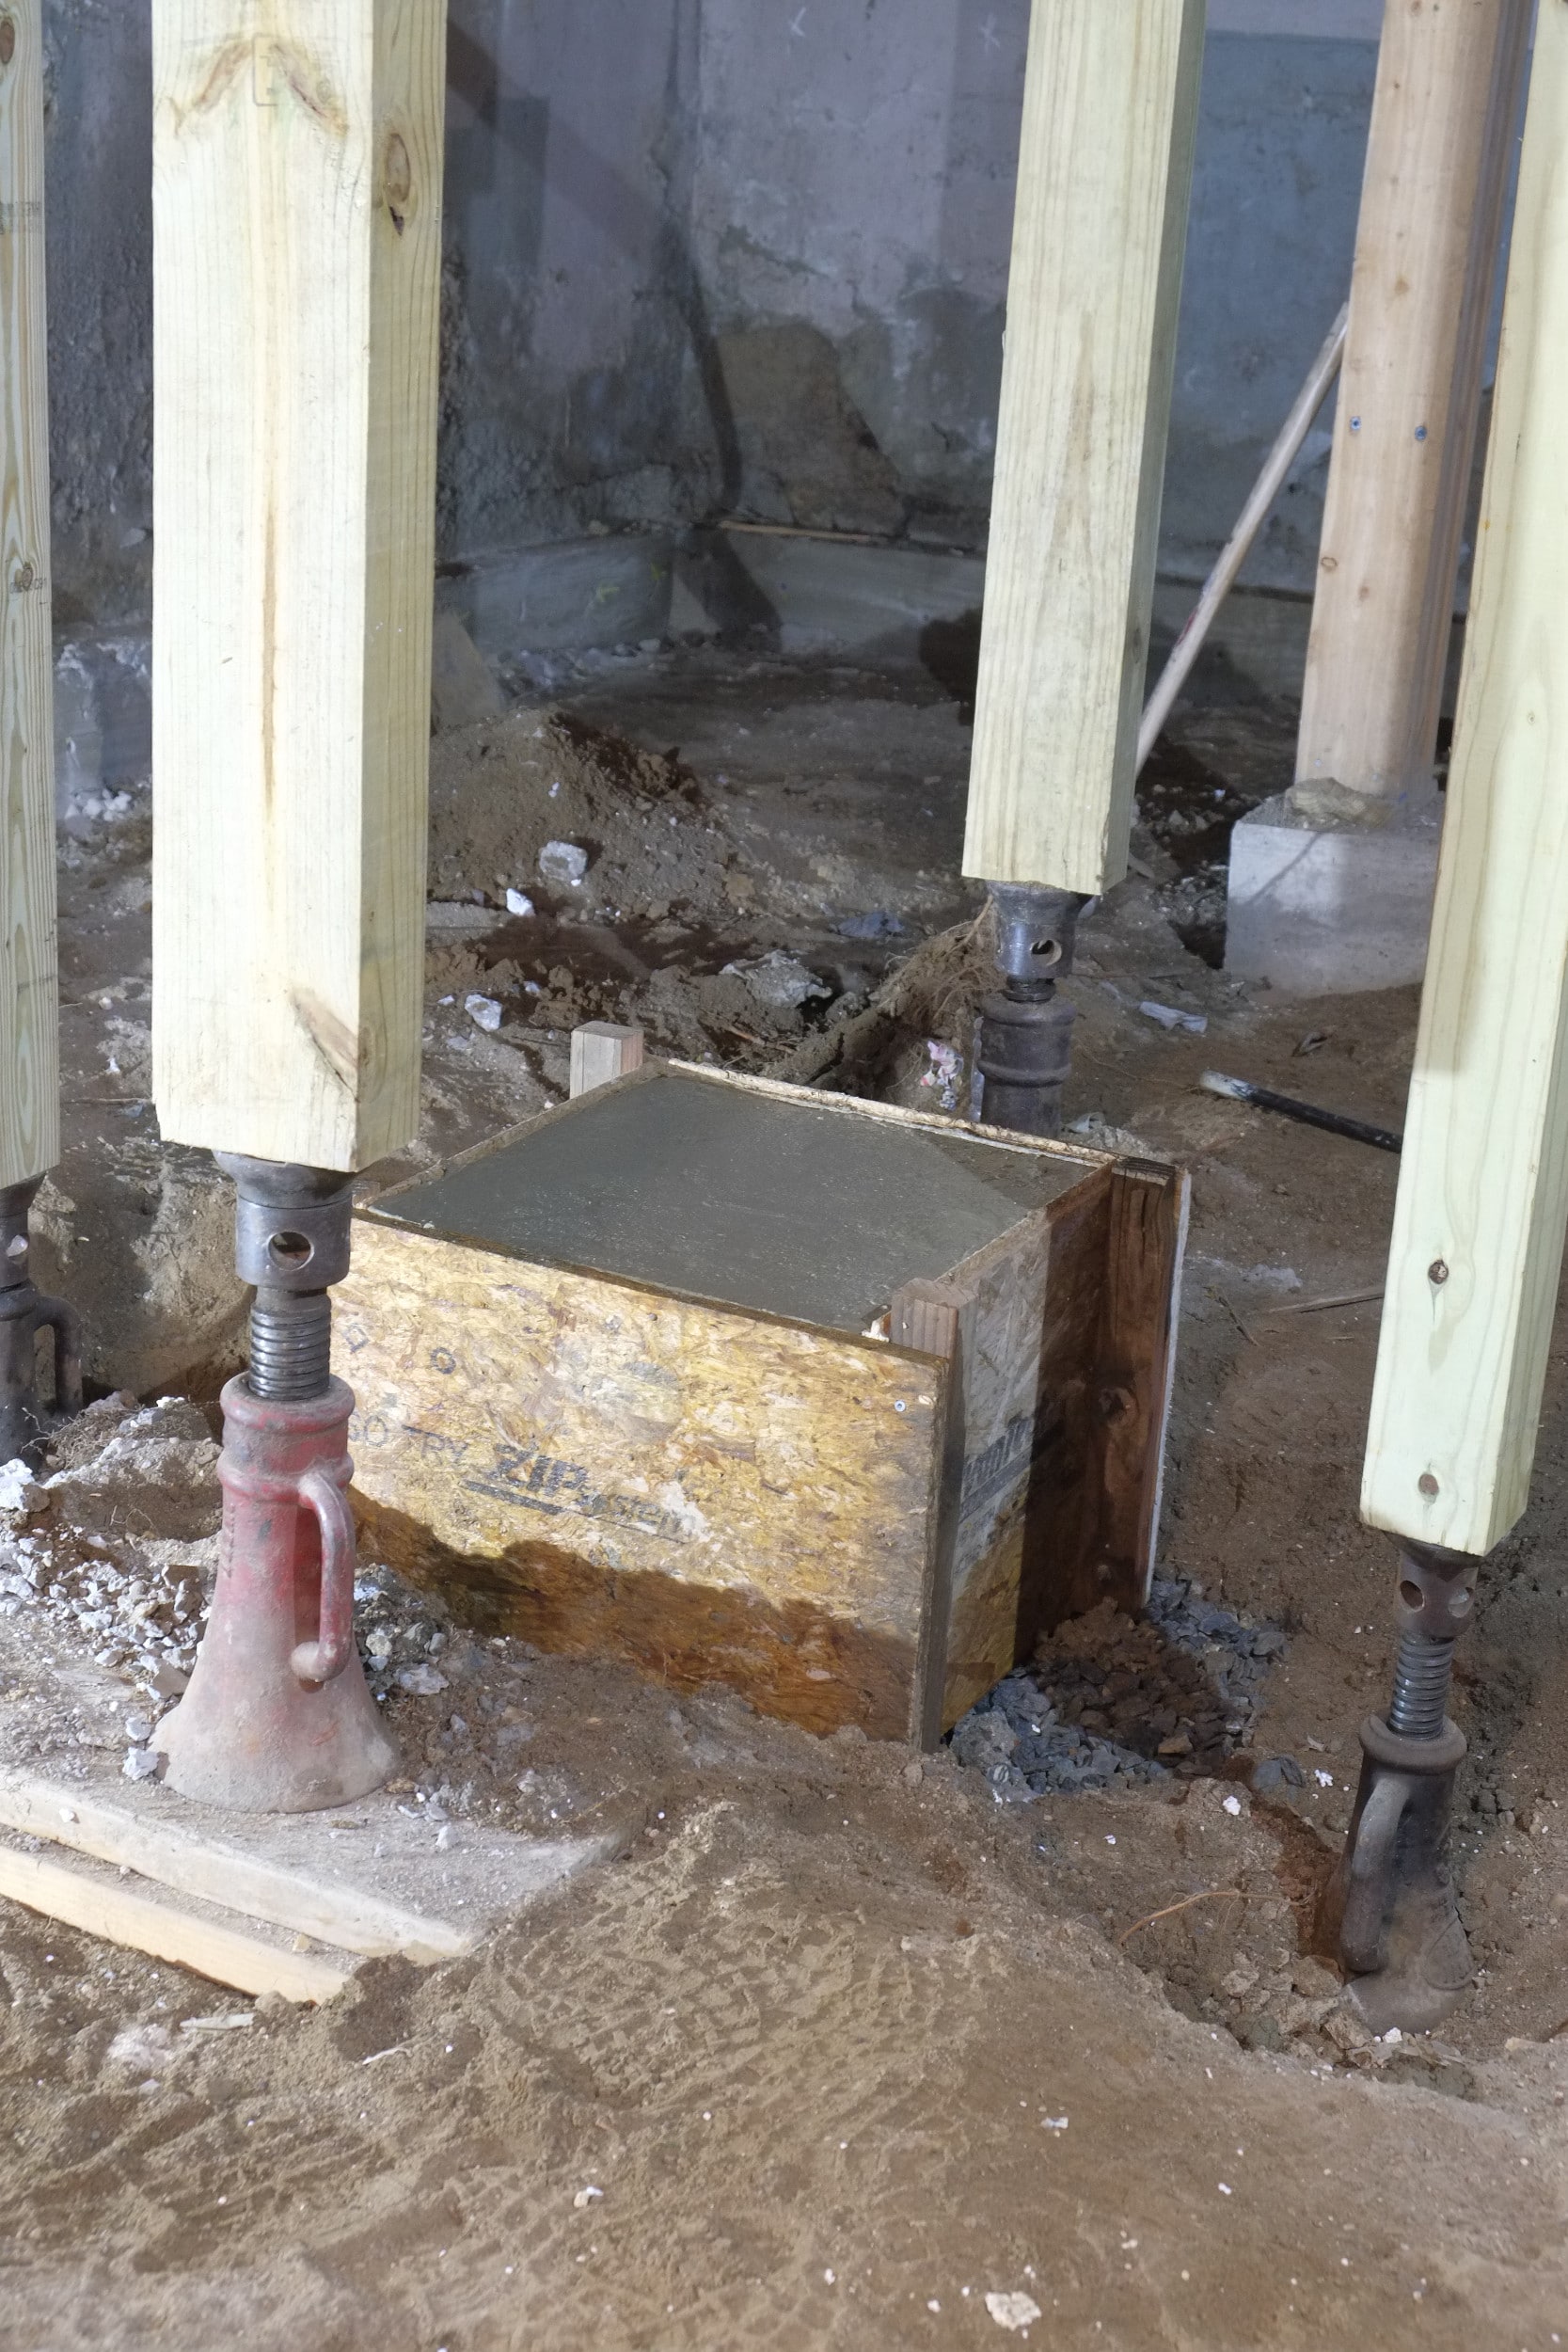
Some day we’ll have a nice concrete floor on the basement instead of of a big sand pit, however, before that can go ahead we have to have the plumbing roughed in and fix anything that will be hidden beneath the concrete floor. Once such item is a load bearing pillar support which the builders put in to support our new LVL beam. This carries a lot of weight and not something you want to see fail. As you can see in the first photo, the laser levels shows that the concrete support block has already sank by 1/2″ on the right and to the left you can see that half the support was built over a 2″ polystyrene sheet and the block has already cracked in half.


I would have liked to have started on this project earlier but we had to wait until the temperatures got consistently to 50°F and above. Winter lasts too long here and we even had snow earlier this month.
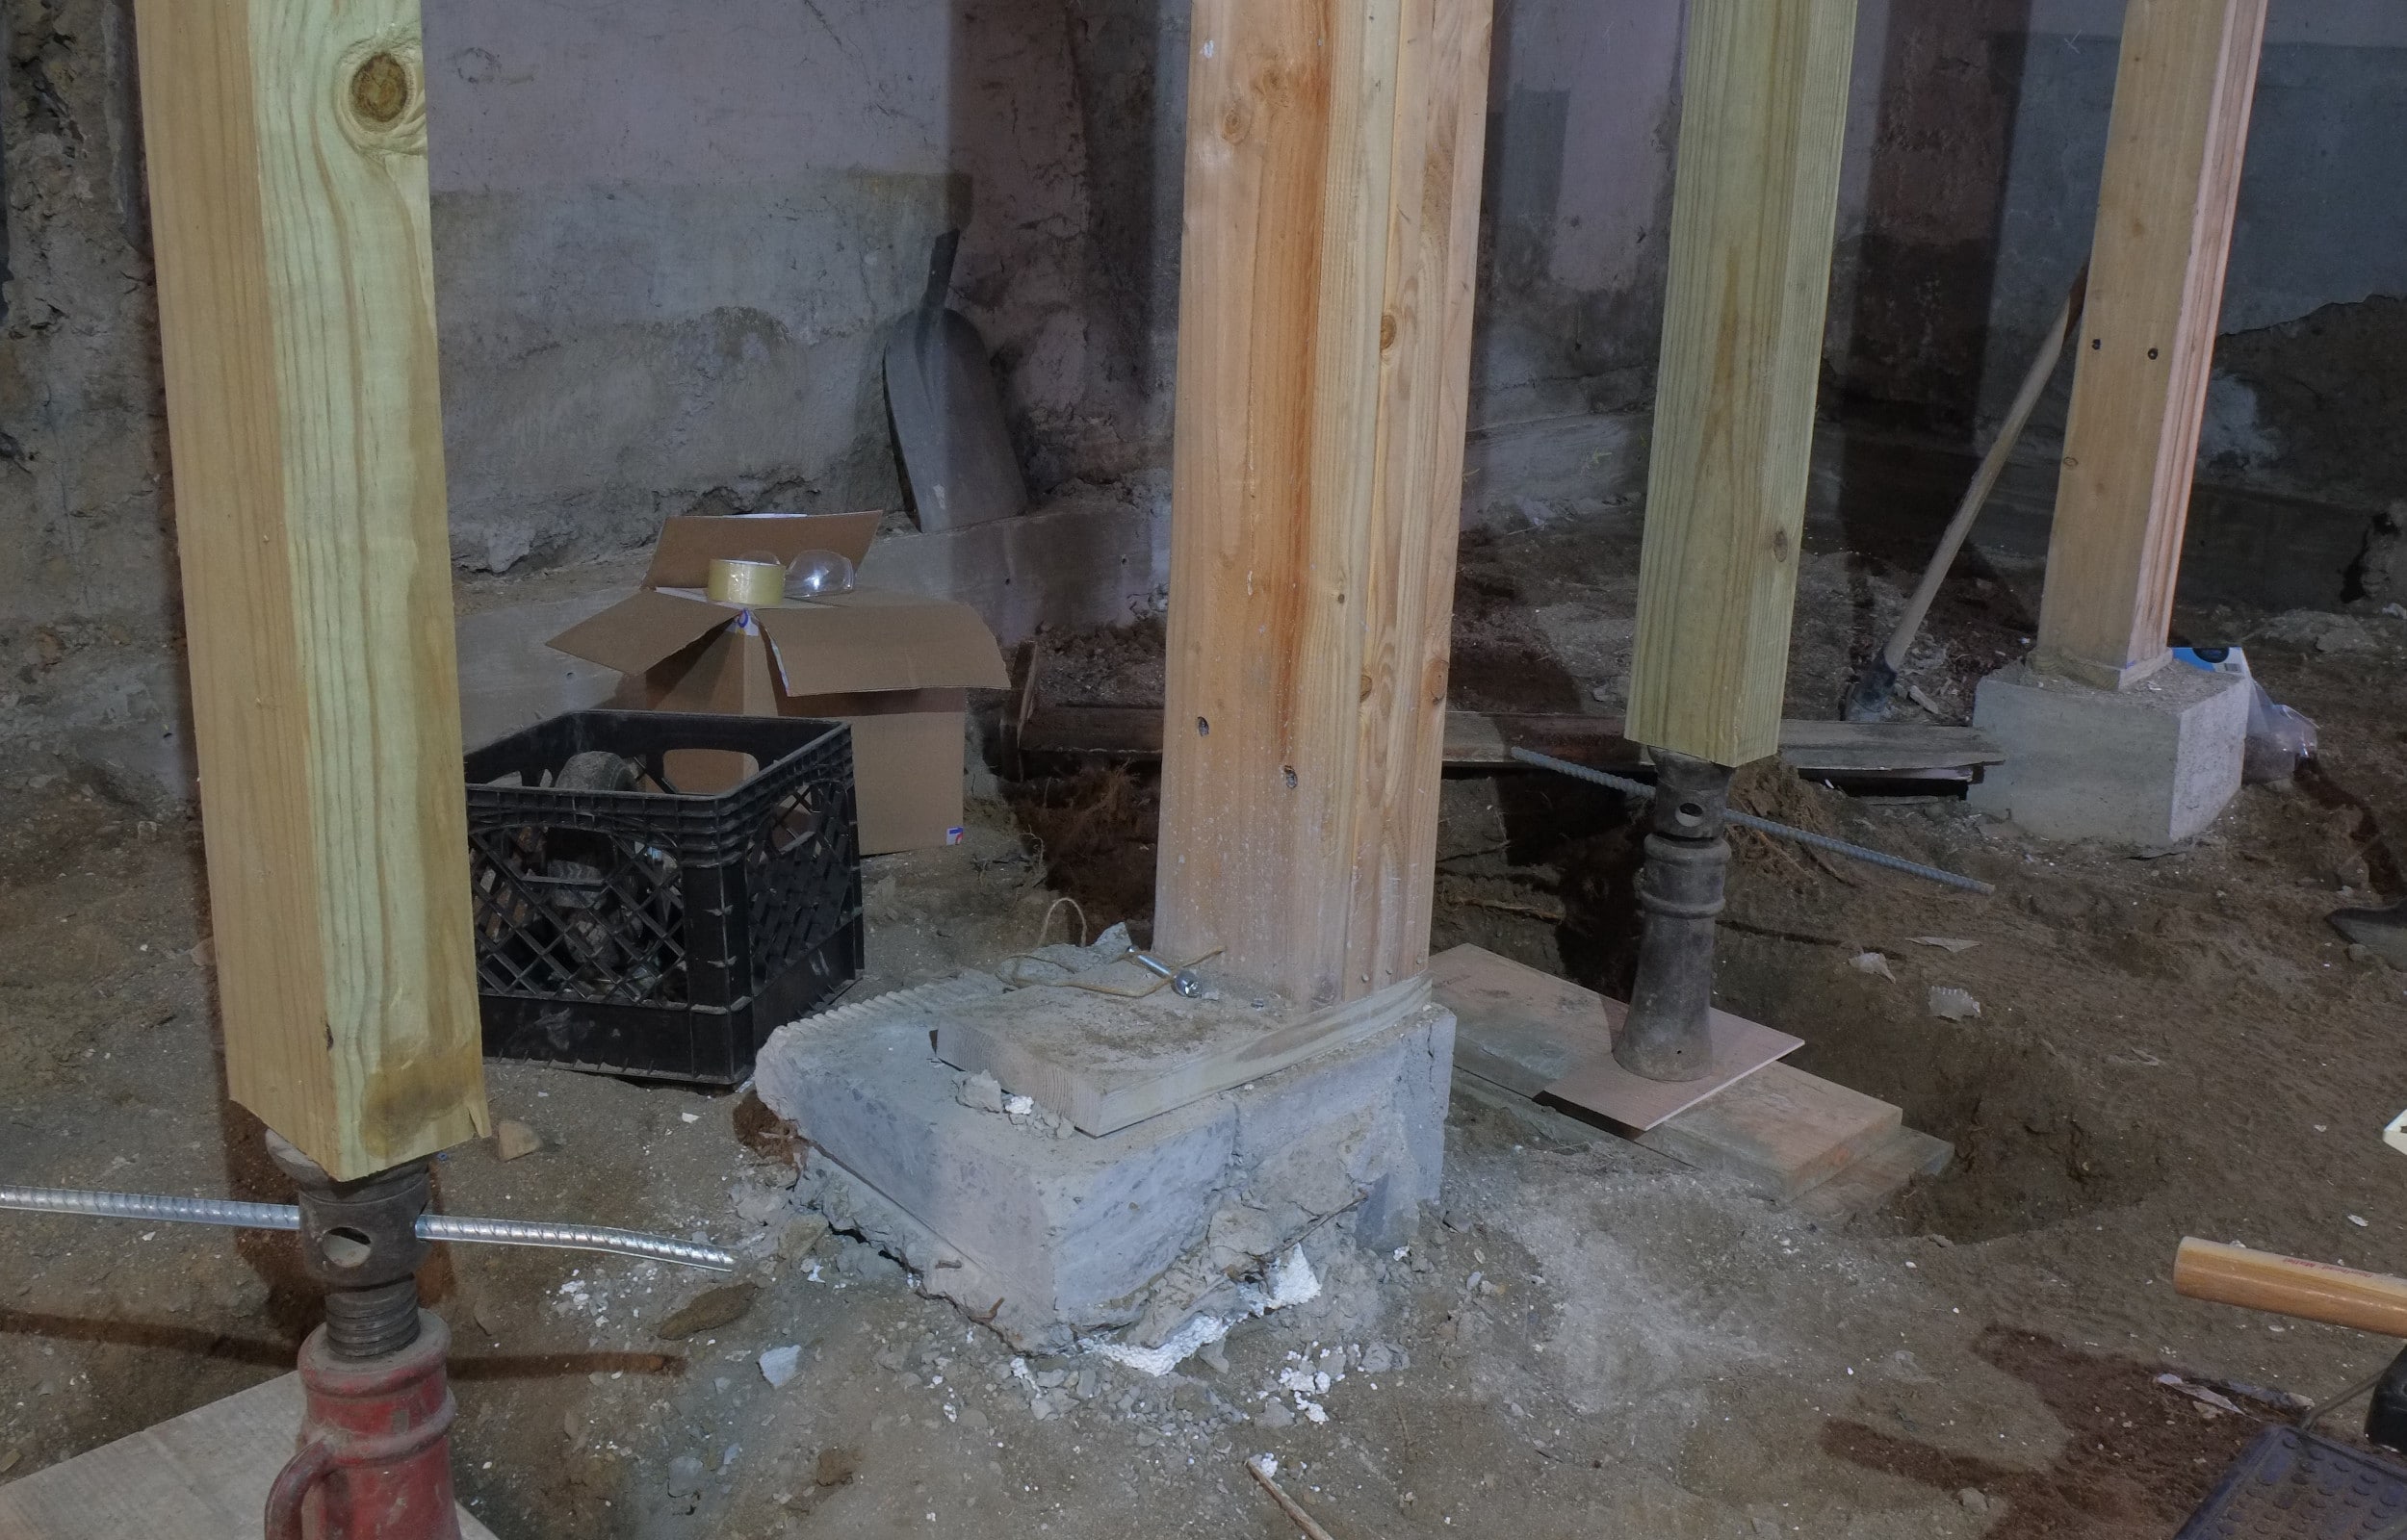
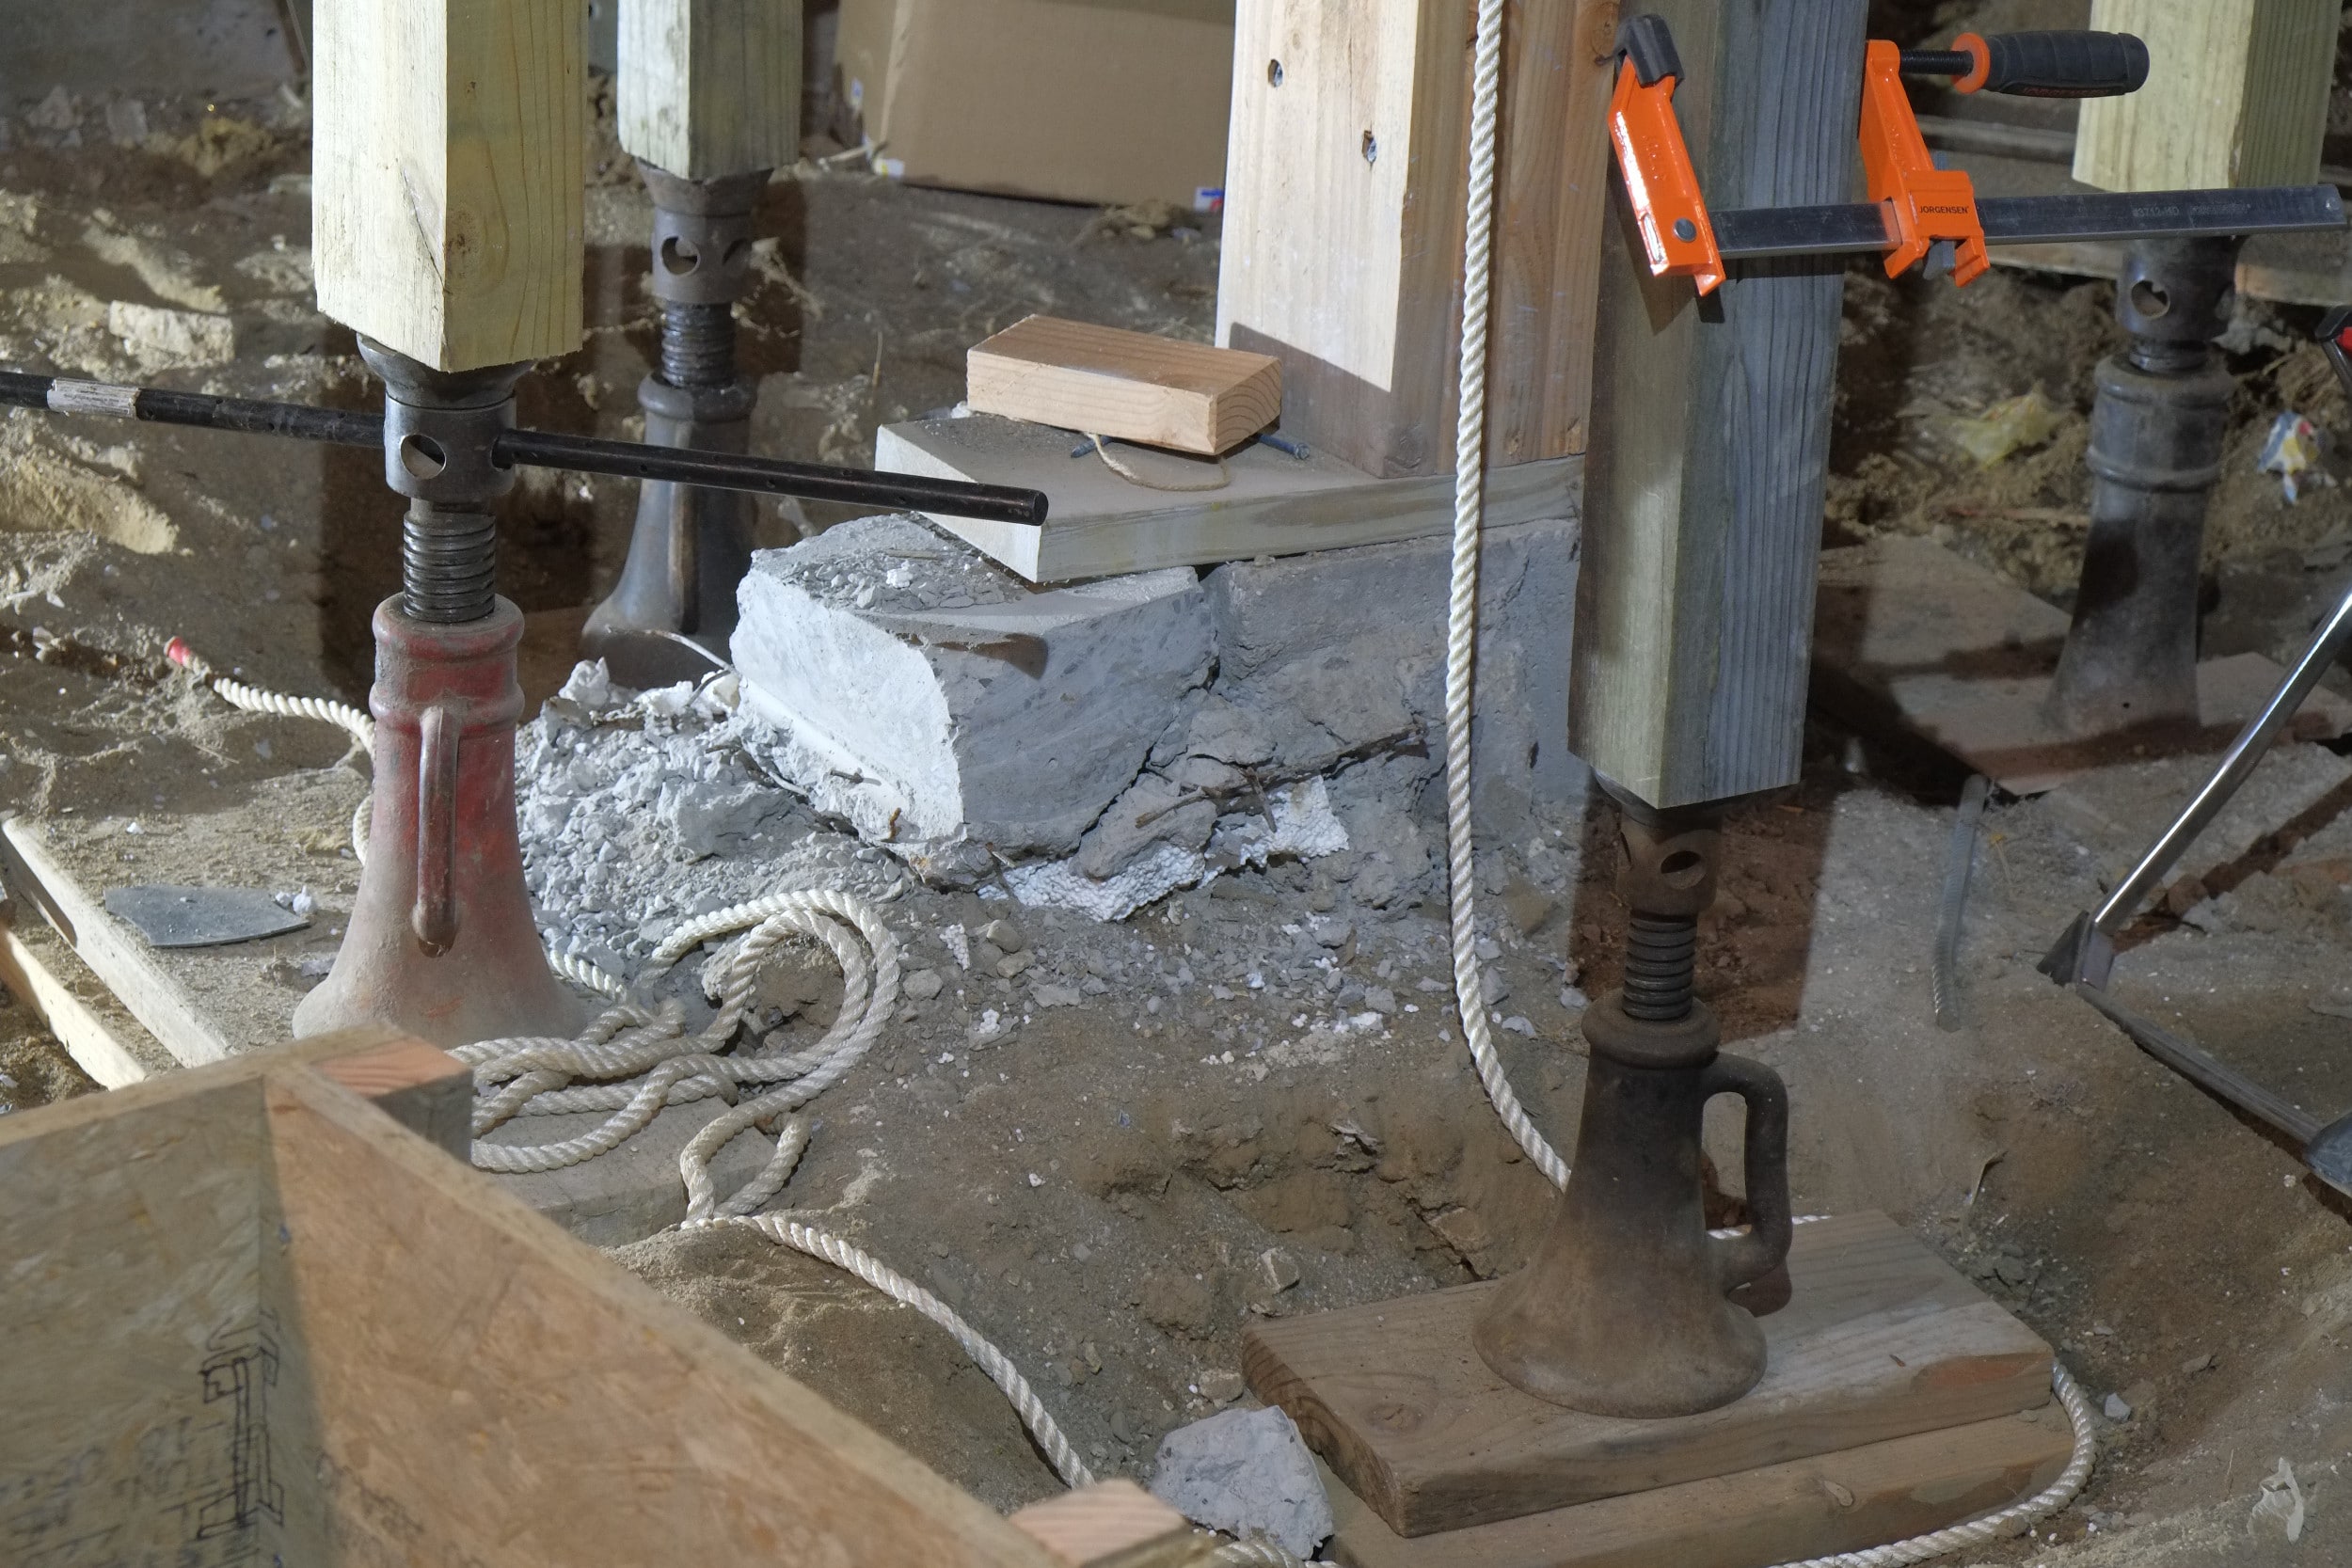
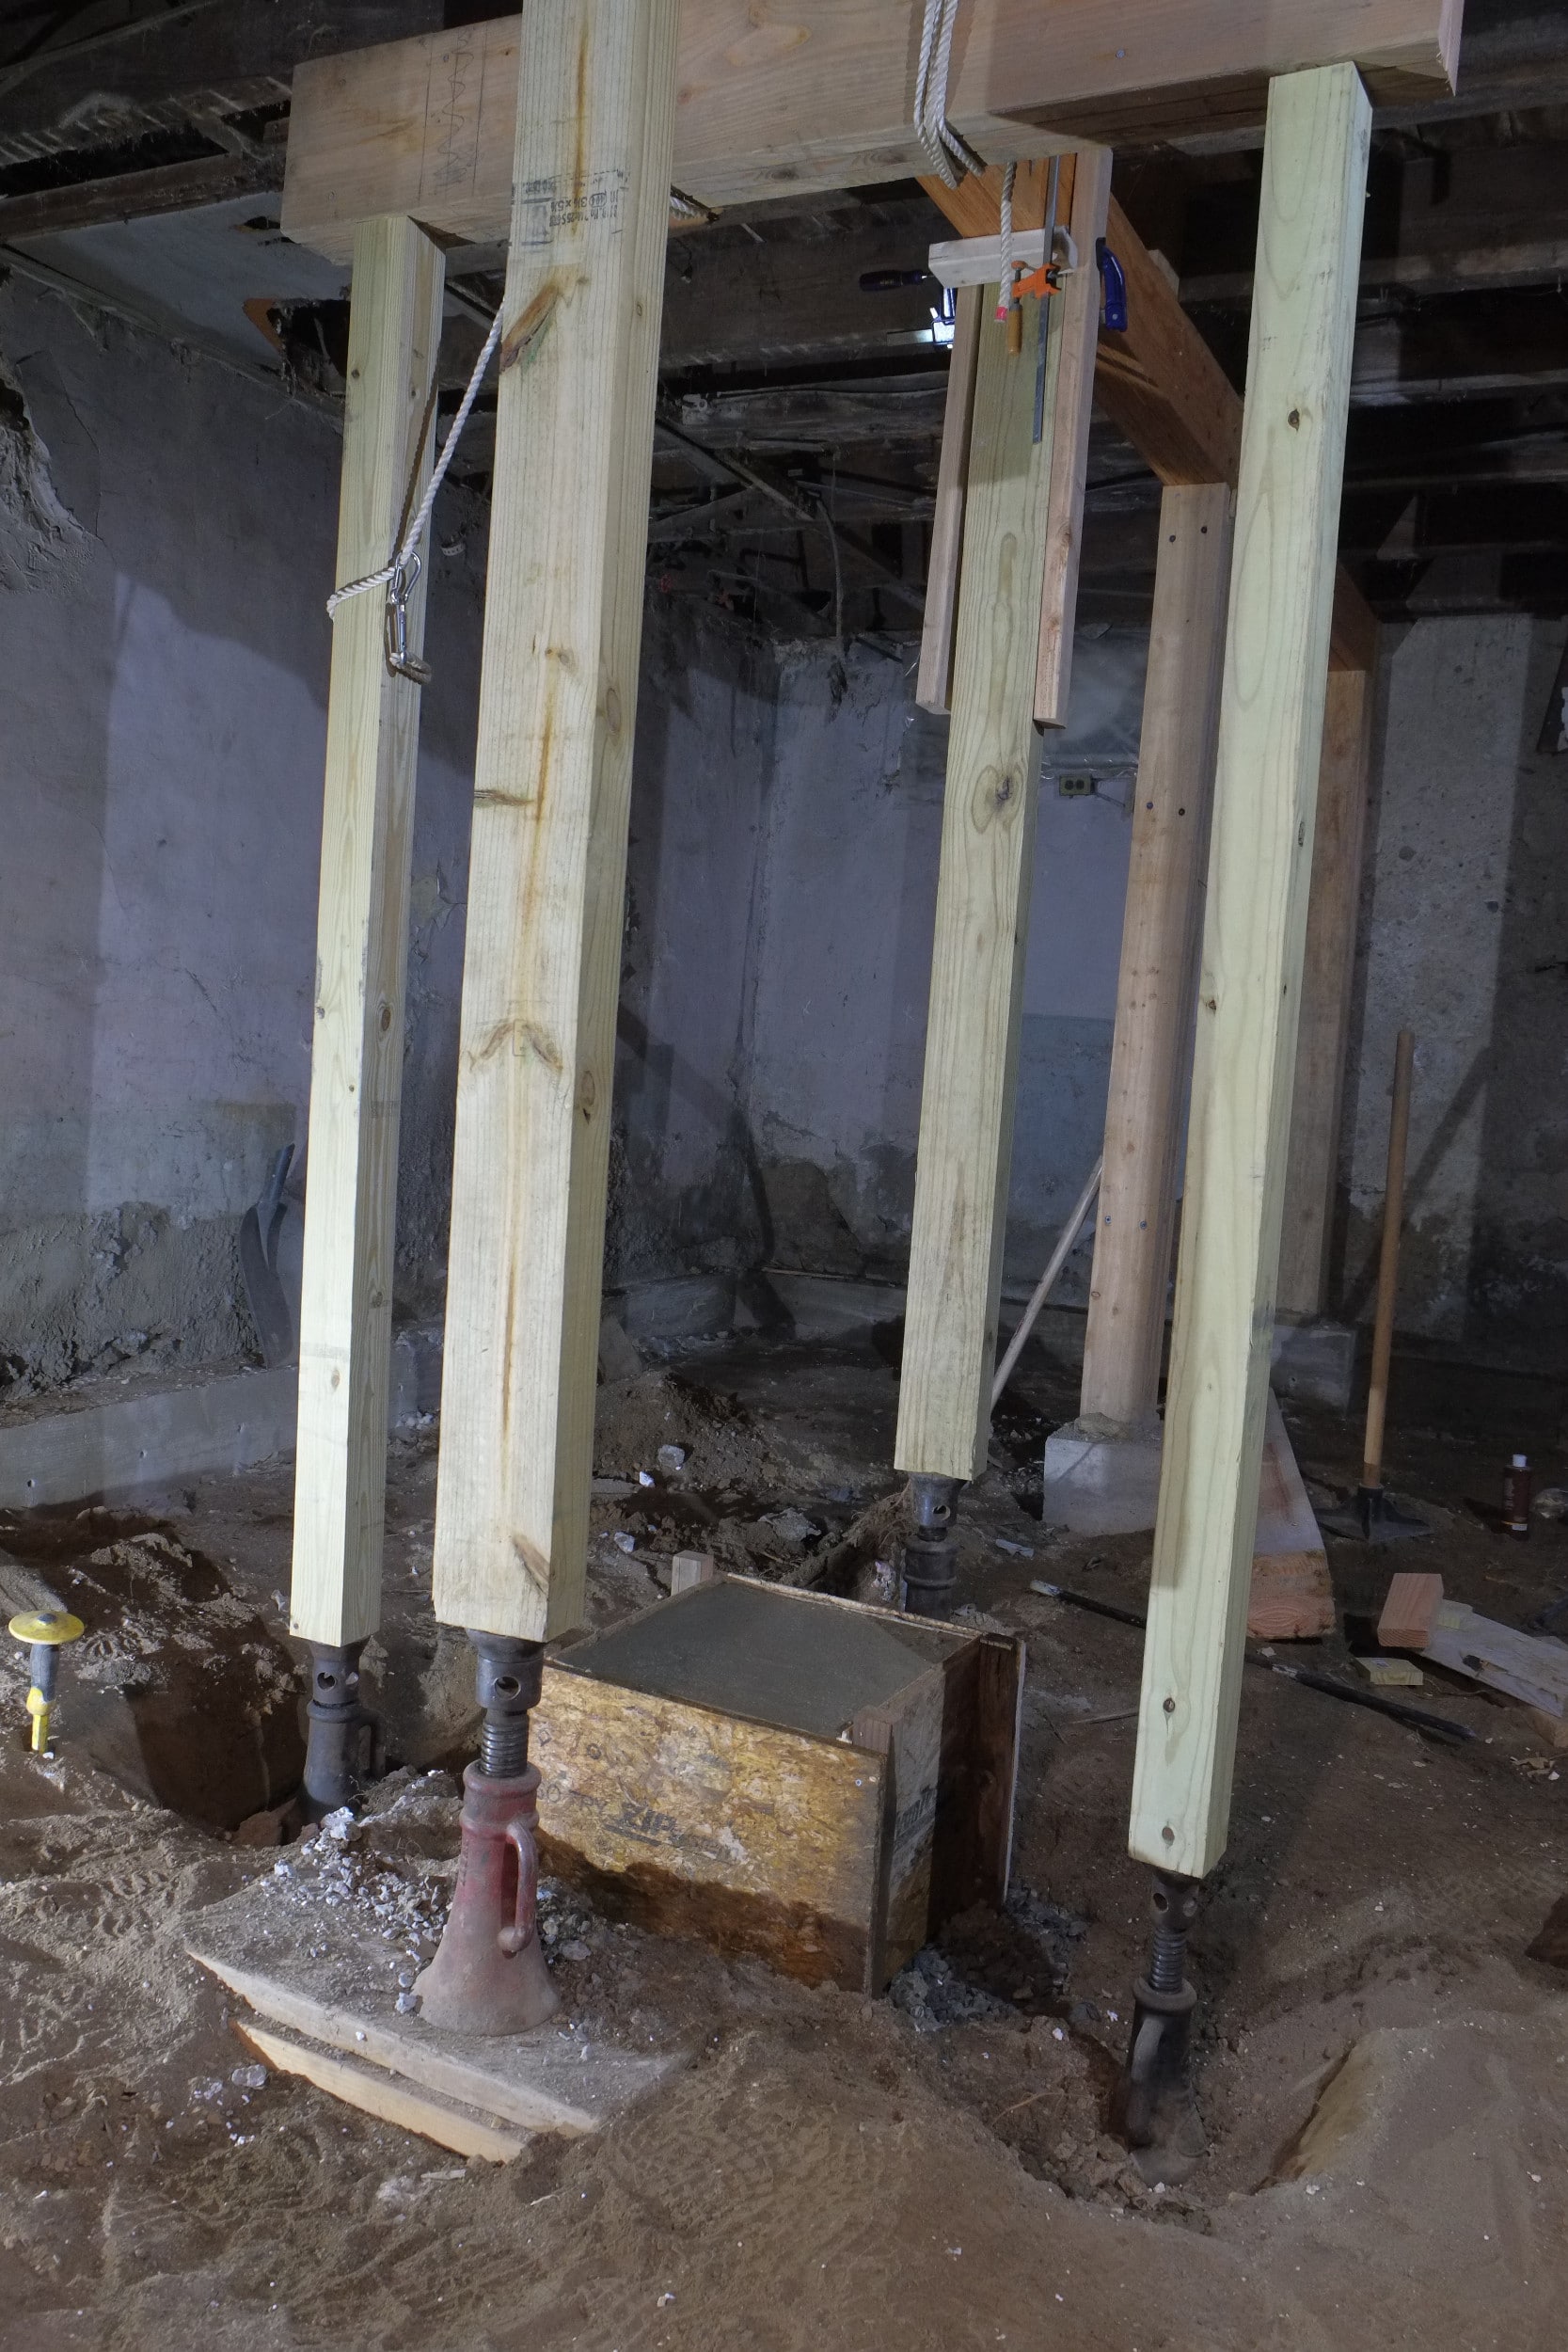
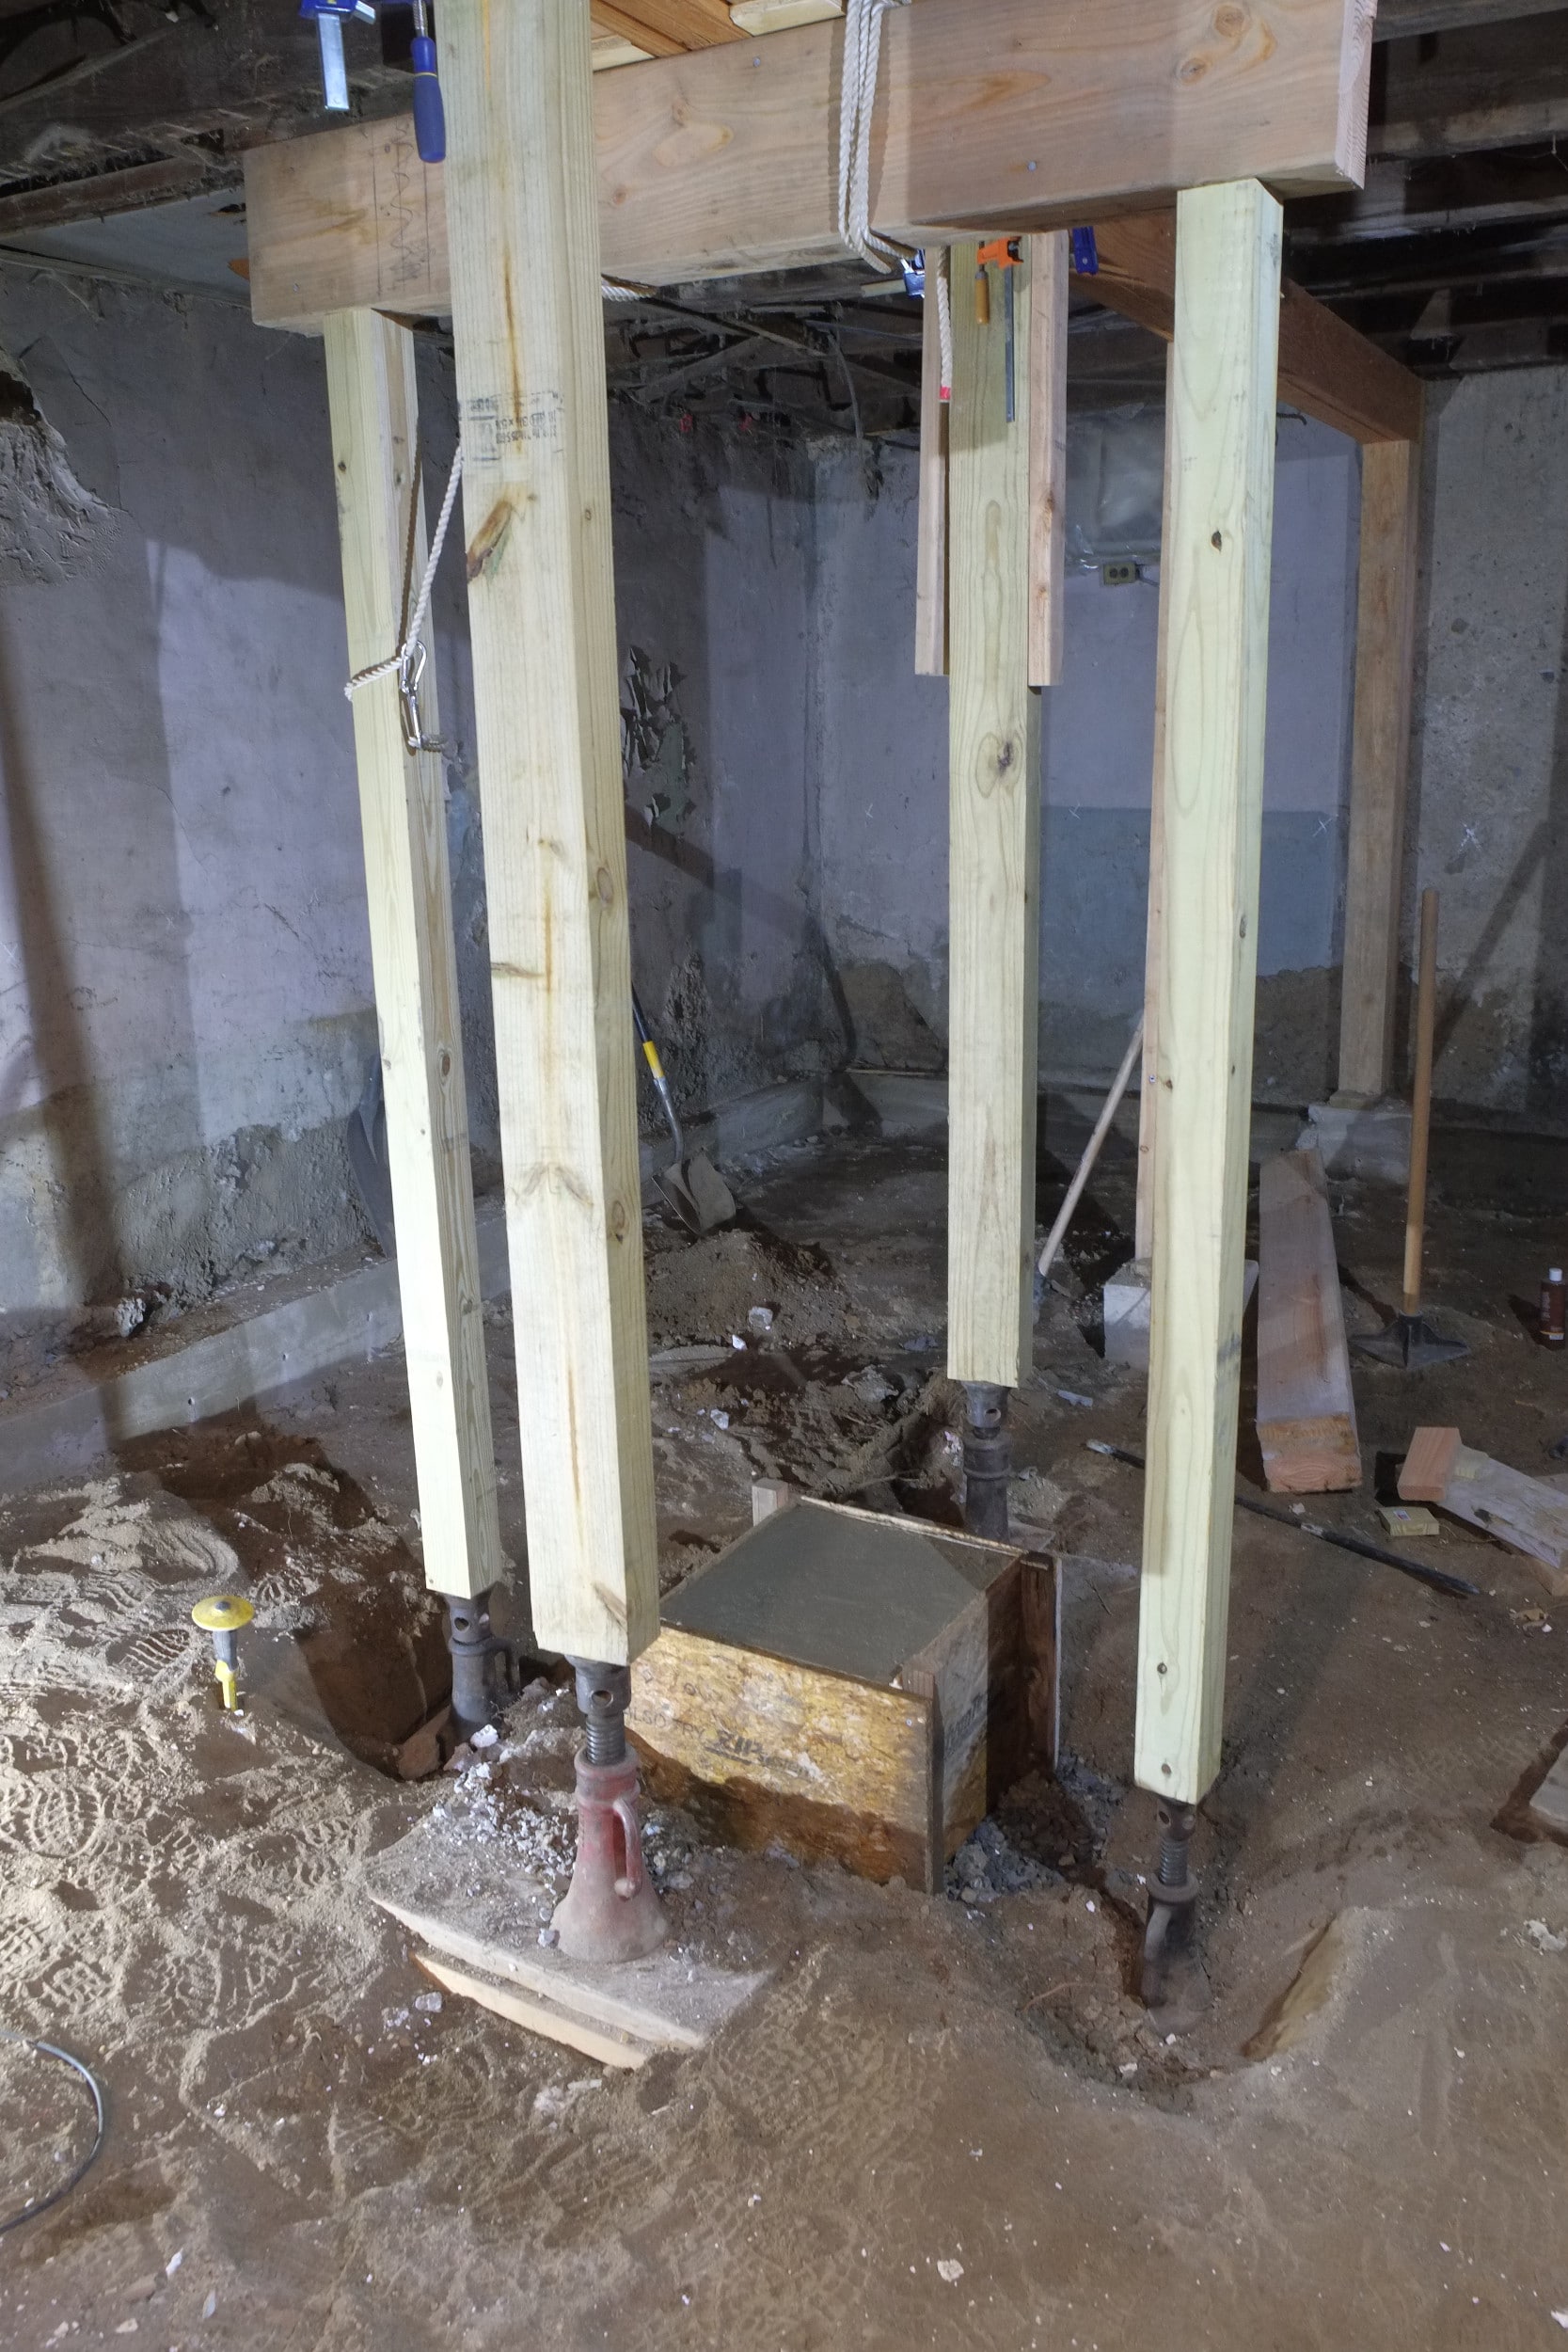
To replace the concrete block we needed to install temporary supports to reduce the load on the existing pillar. After talking to our friends and advisors Derrick and John Paul we jacked the beam up on either side with a couple of screw jacks which Derrick kindly lent us. I slowly cranked up the jacks, checking regularly to see whether the load had been taken off the existing pillar until it got to the point that I couldn’t turn the jacks any more and the existing pillar still wasn’t free. Luckily John Paul stopped by and suggested we add an additional two temporary supports. For this I need two more jack screws, I managed to buy one locally on craigslist and the other on ebay. By the way I wouldn’t recommend hydraulic jacks for this kind of work as they leak down over time.
With the four jacks I eventually managed to free the old pillar and set to work removing the old concrete block with the trusty jack hammer. I made the forms for the new block as an 18″ cube with an ample supply of 1/2 rebar, kindly cut by our resident rebar cutting expert Aimee. We used 5,000 psi pre-mixed mortar (just add water) and got through about seven 80lb bags. My dad used to tell me that when he was young the weight of the bags was double that – glad I didn’t live then as 80lbs is quite heavy enough. We mixed the cement by hand which also gets hard after a time!!! Maybe down the road we’ll buy a cement mixer as it would get plenty of use. The new support is probably at least 4 times larger in volume than the old block and we left it to cure for about 10 days.
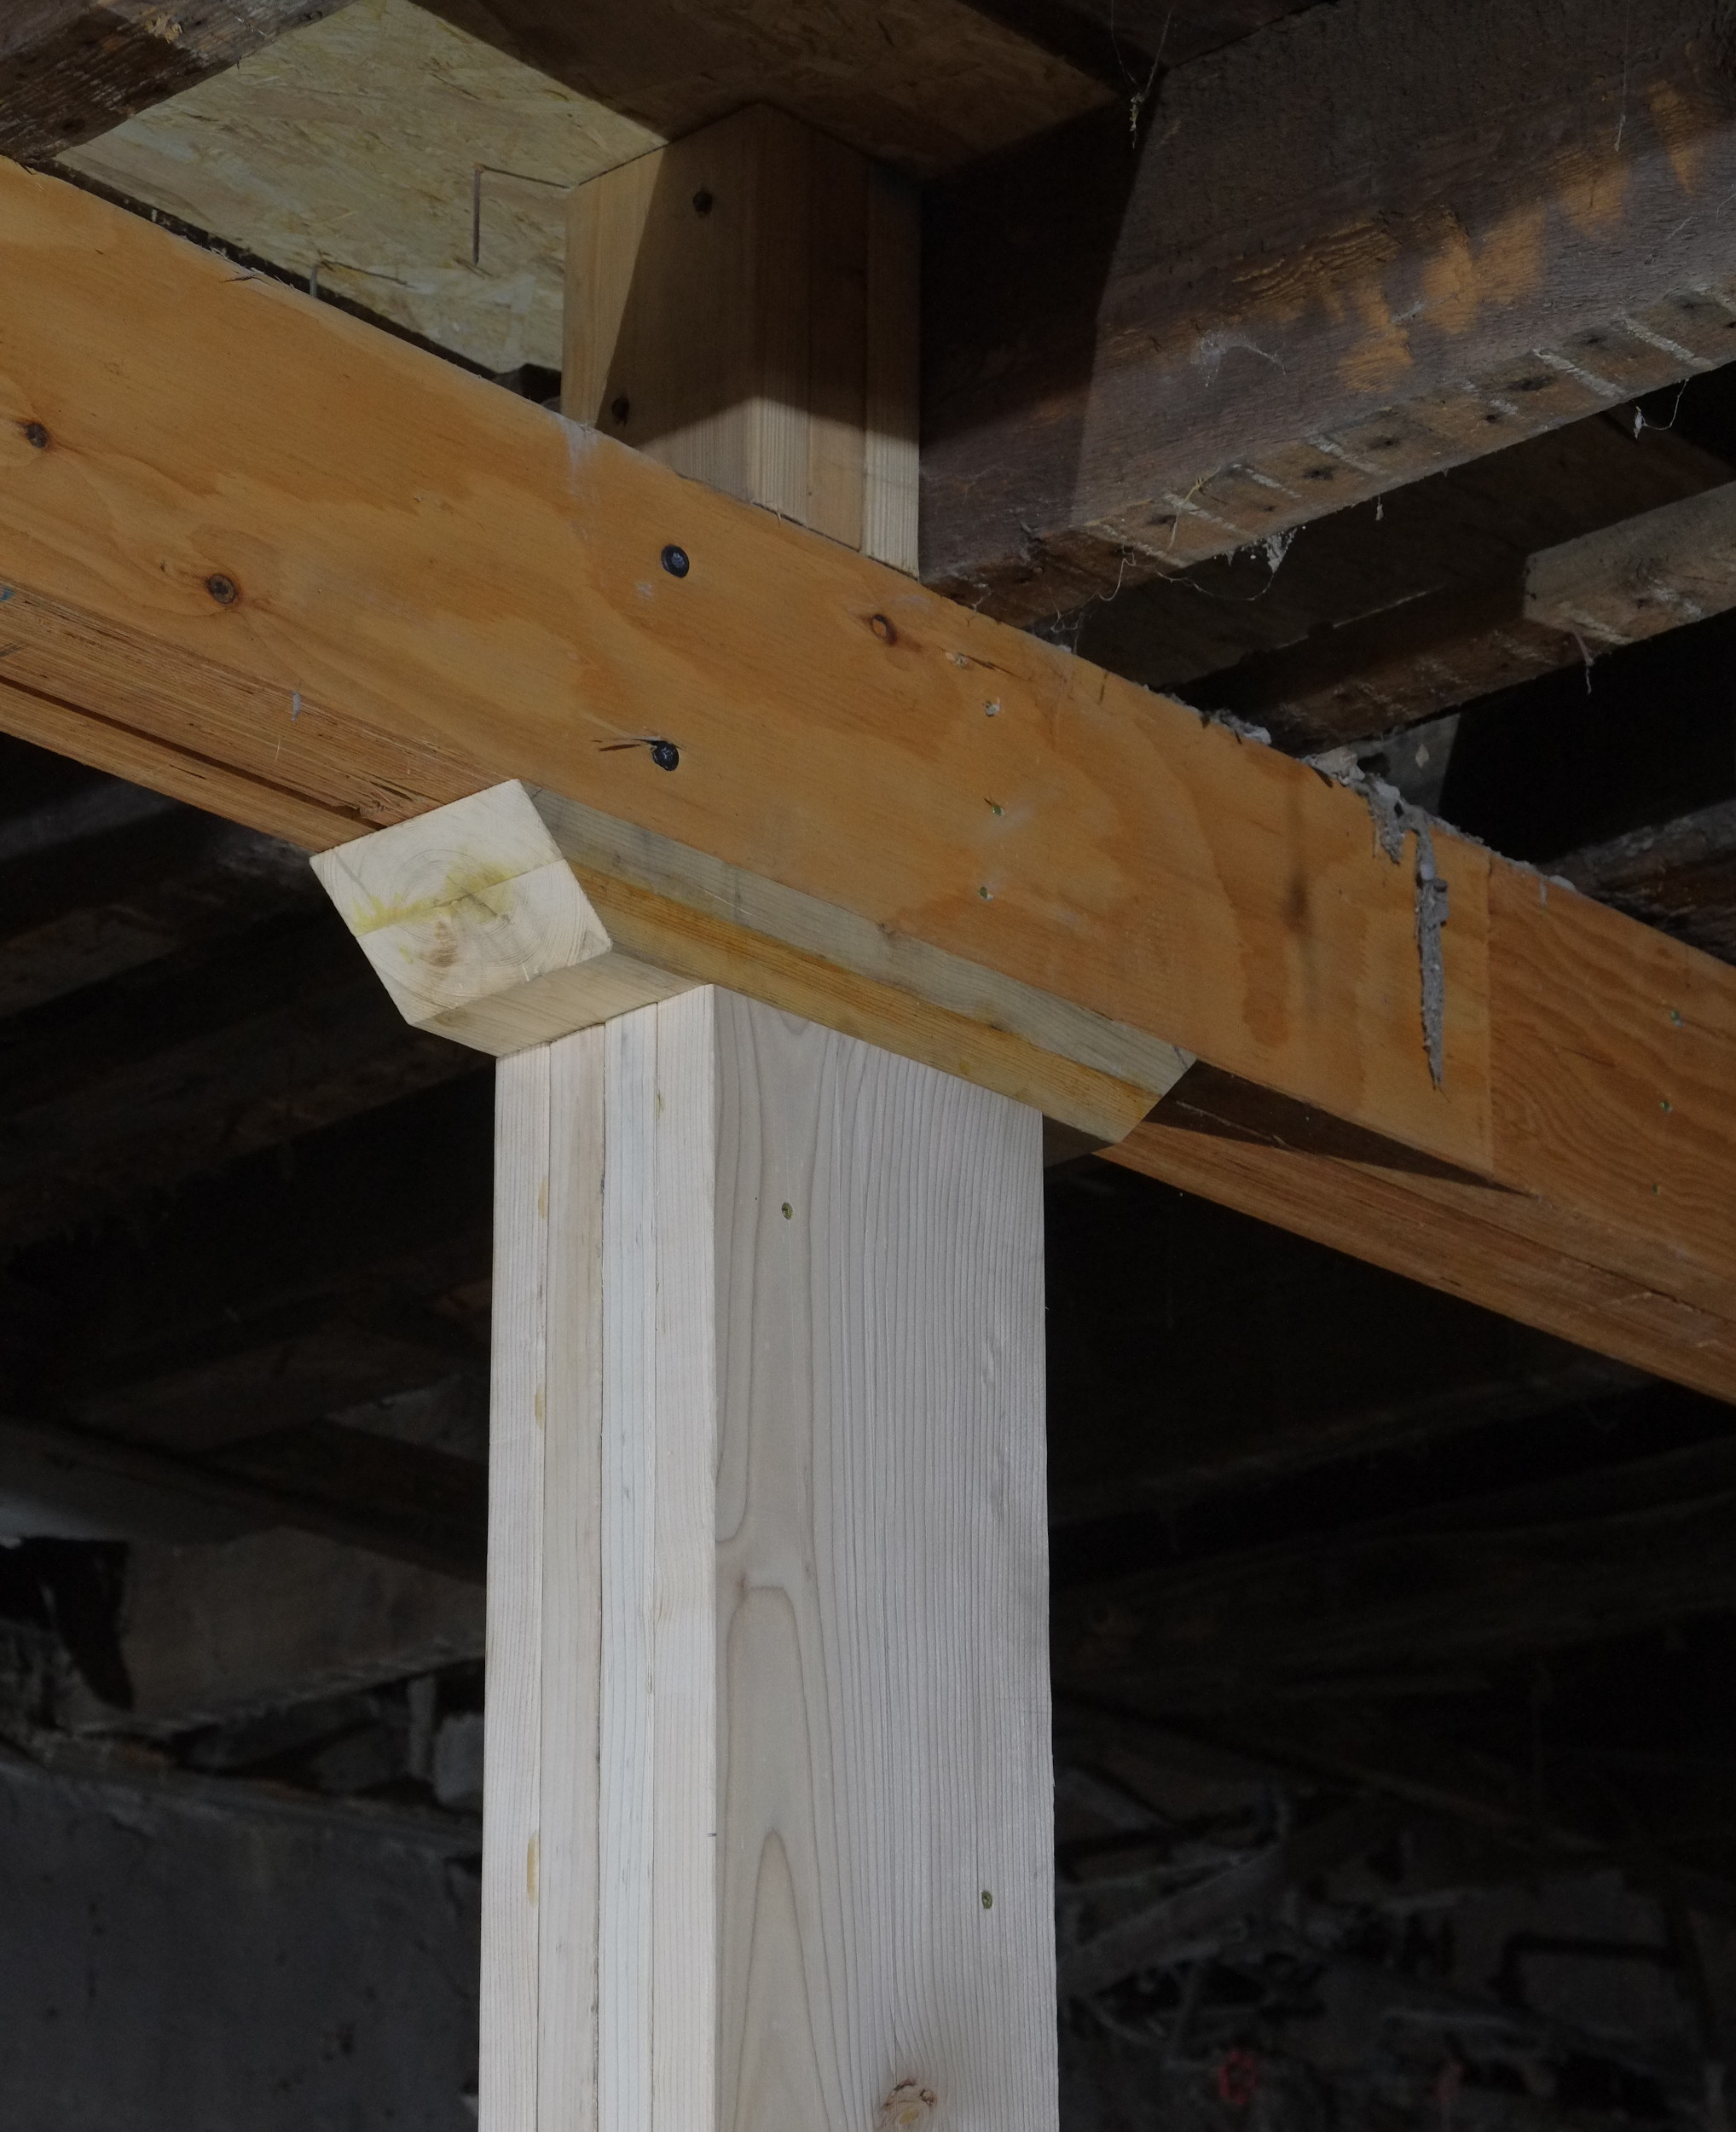
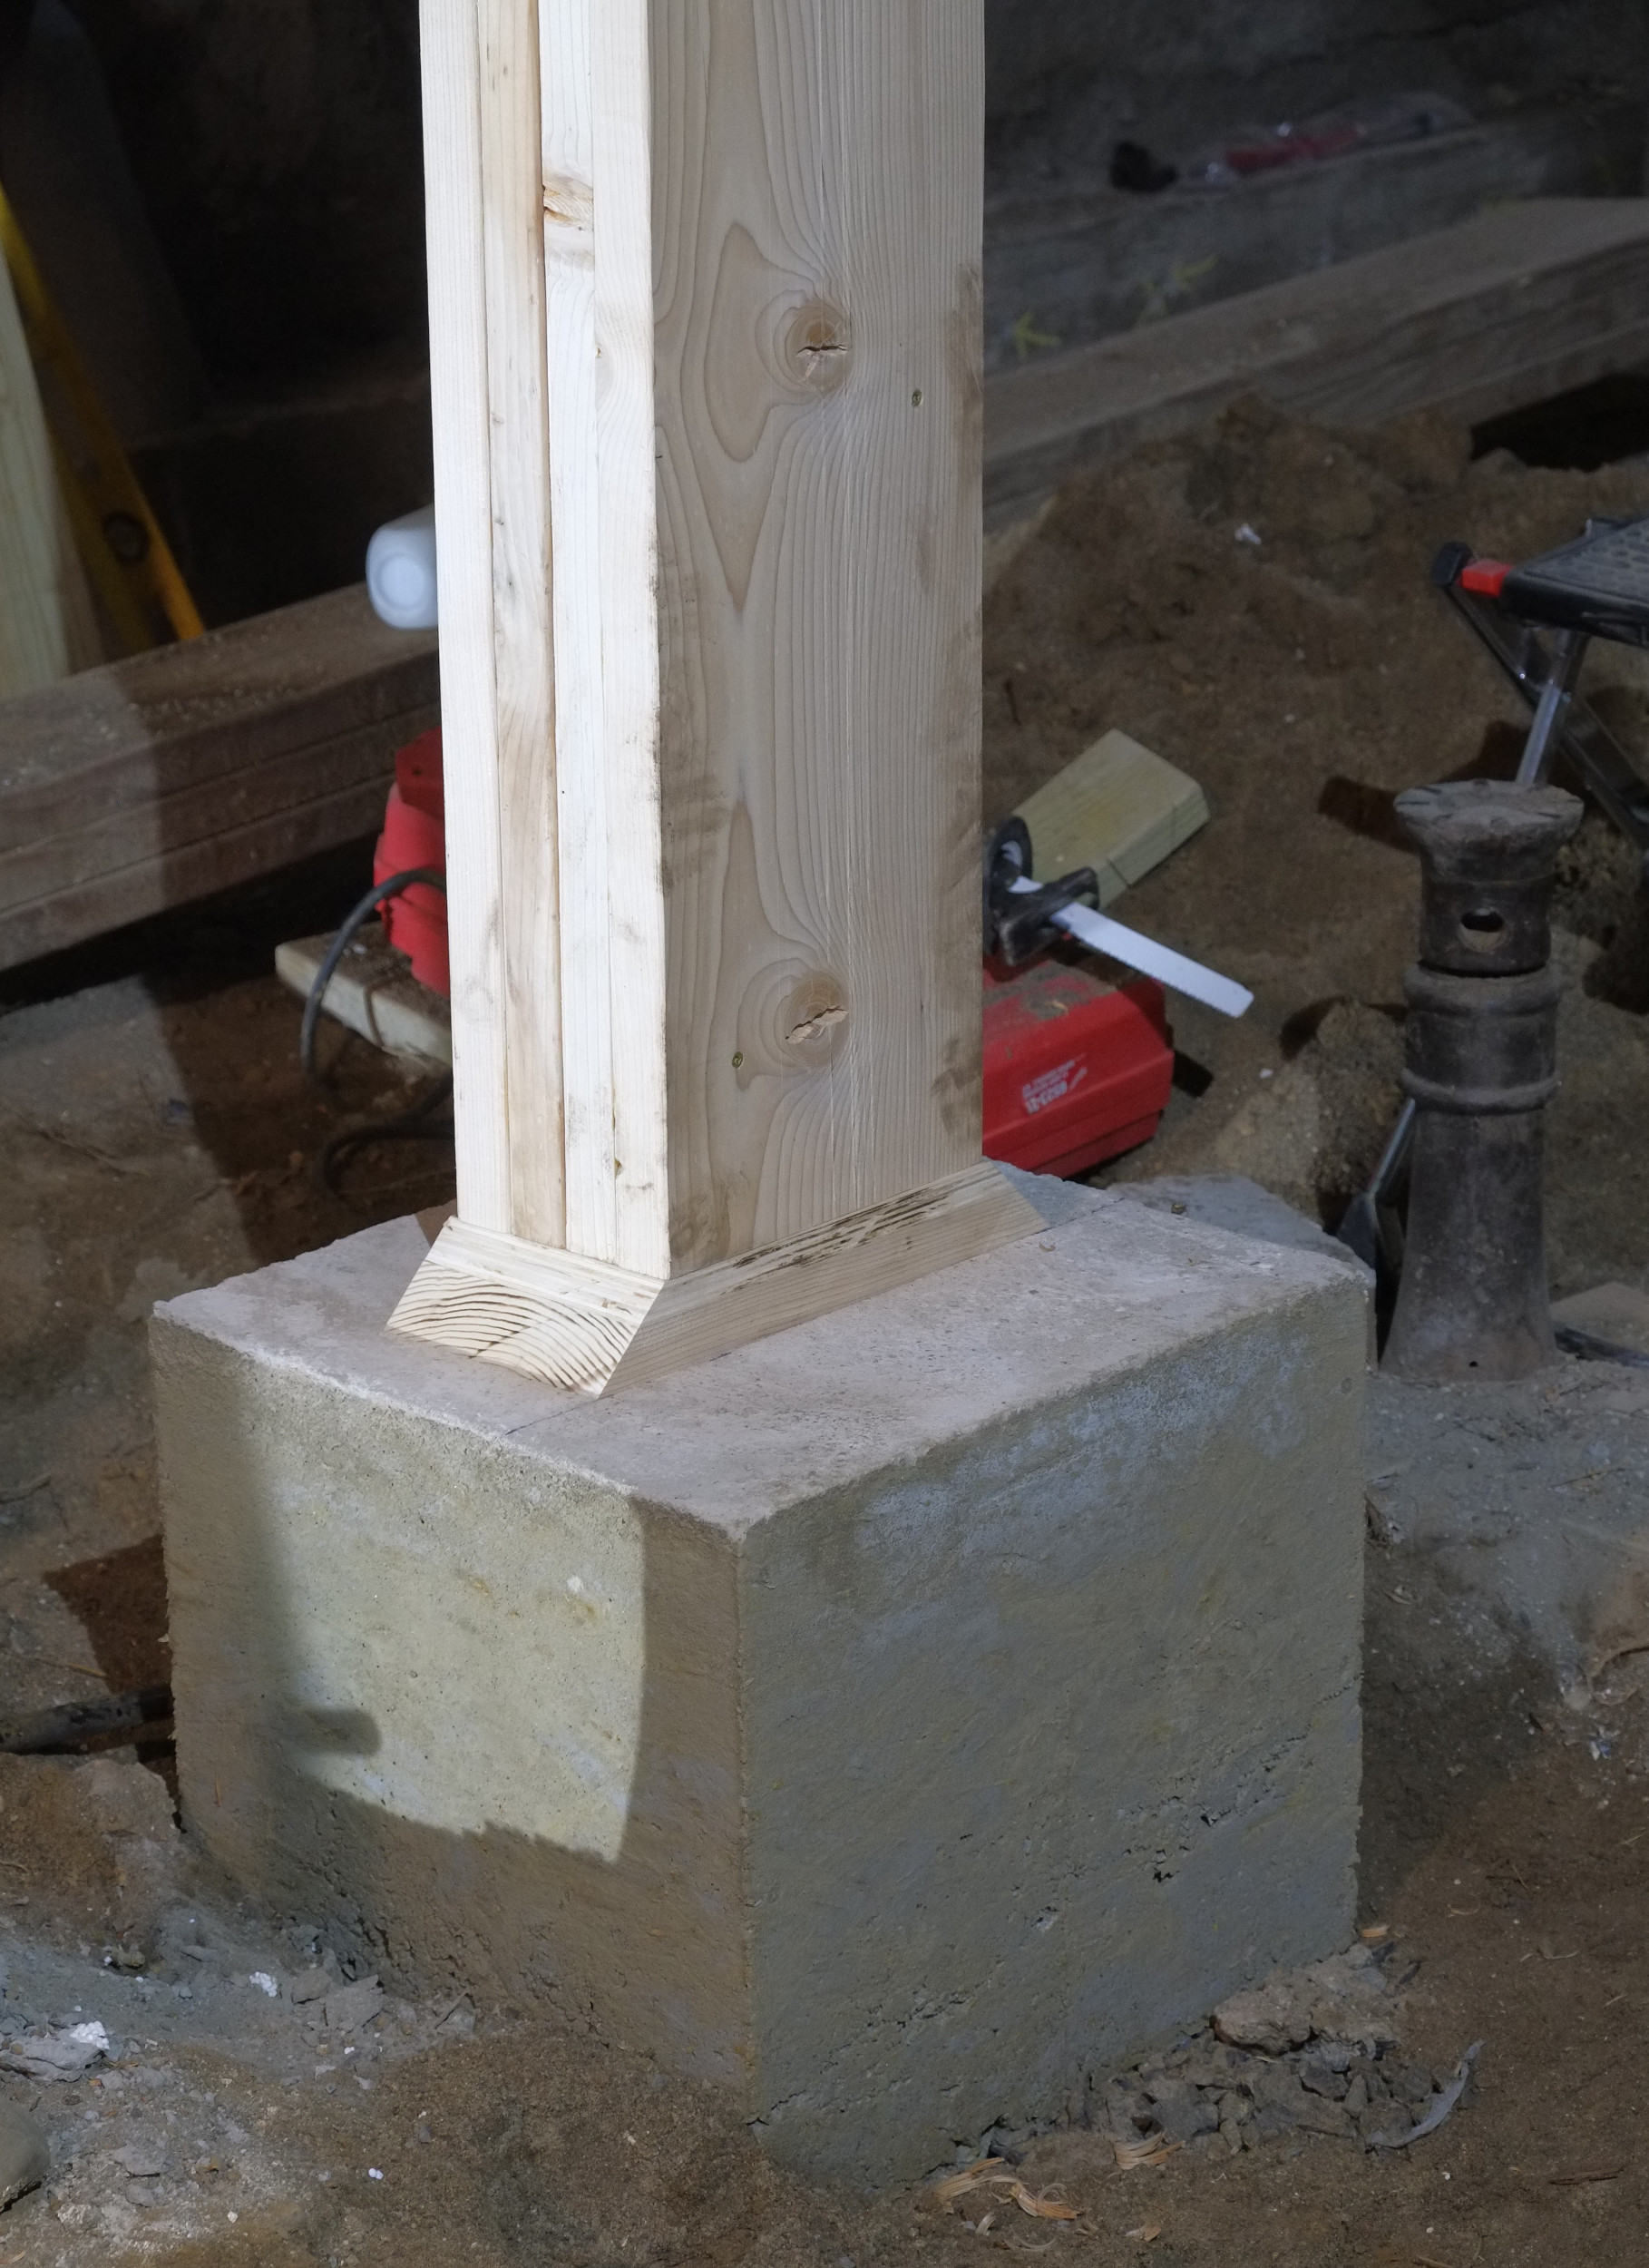
I was hoping to re-use the old support but that didn’t work out so I laminated four 10″x2″ planks together and made some nice headers and footers to help spread the weight. The new pillar is probably about 15% beefier than the previous one.
Today I installed the new pillar and released the pressure on the temporary jacks. There was some groaning noises but that’s probably just the wood settling in and I did re-add one of the temporary supports just in case. Tomorrow, I’ll bolt it down to the concrete block.
I’m glad that’s over with as jacking up your house can get a tad stressful! All in all I think this was a good job worth doing, just a shame we had spend our time, energy and money to redoing it. There are also another two supports resting on polystyrene which will need replacing but they can wait.


Good stuff
Thanks Chris
That not only looks professional it even looks good on the eye. A nice job.
Thanks Ian – I’ll add some bolts and screws which will fix it in place and make it sturdier.