Wood for the porch rebuild has arrived

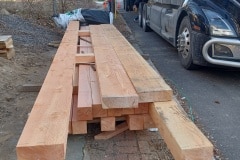
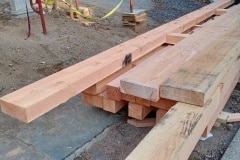
The wood for the porch rebuild has finally been delivered and it’s pretty impressive. I think the porch will out live the house.

Andre has spent a lot of time finding good wood at a good price and in the end we ended up with Douglas Fir from Quebec which is where a lot of the wood in the US comes from anyway, so by ordering direct from the timber yard we will have saved. It was still expensive though and we’re talking 5 figures. The order also included some lovely camura wood for the decking.

Incidentally Douglas Fir isn’t a fir tree, it get its name from  David Douglas, a Scottish botanist who first reported the species and what a tree it is. Grows up to 300′ tall and very much reminds me of the Californian Redwoods.

As mentioned in a previous post we plan to rebuilt the porch as close as possible to the original, notable exception being that we are making everything a little bit stronger, for example, the vertical posts are being upgraded from true 4×4’s to 5×5’s and hopefully it won’t be too noticeable.

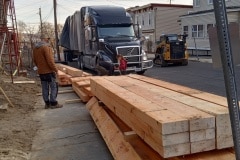
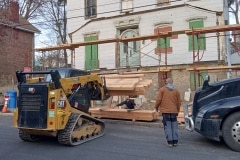
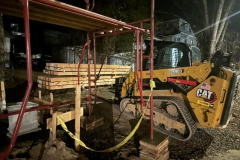
Delivery day was a bit of shambles, the wood was supposed to be delivered between 8am and 12 noon but didn’t turn up until a little after 4pm due to custom holdups, during which time we had four people hanging around, including Aimee. Sucks that in this world of instant communication that the delay couldn’t have been passed on. Andre did try and call the shipping company but no joy. On top of this we had to hire a bobcat skid steer so overall quite an expensive day.

The lorry from Canada has numerous stops on its way, ours was the first and then down to Long Island and then the Carolinas. Aimee said that it was the longest lorry that she’s ever seen and it took quite a while to negotiate the turn at the bottom of the road. Cute that driver took his two young kids along for the adventure.


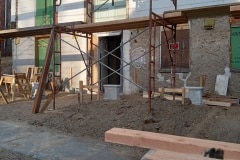
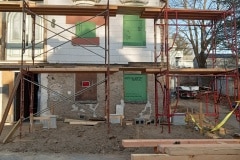
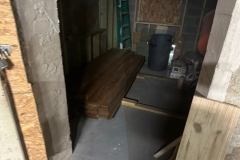
I couldn’t be there for the unloading but Aimee and Andre snapped a good number of pictures. I didn’t realise what a big operation it was, so in no particular order, voila!

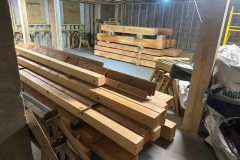
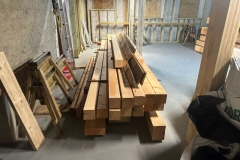
These timbers are huge and the majority of these timbers have been stored indoors. Being a timber frame builder, Andre had a clever way to move them about, once on the ground, using a bunch of heavy duty rollers so carrying was down to the minimum.

It was dark by the time everything was tucked away.

Sistering the floor joists

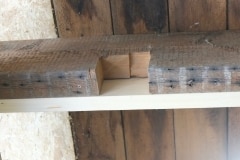
A while back we were discussing some joist repairs I was doing with our carpenter, Andre, and he thought the original floor joists over the main span of the ground floor probably wouldn’t be up to modern building code, especially as in places the joist had been badly butchered with 3-4″ notches cut out of them.

We could have left it as it was, and building inspectors would have probably grand-fathered it in etc, but then someone, maybe Derrick, John Paul or Andre mentioned that houses now have to carry a greater load, basically because we cram in more physical stuff, just look around and imagine how sparse your place would have been a century ago. In addition people socilaised differently a century ago, what may have been a tea party for ten could now be a party for forty, anyway you get the idea. So if you’re doing a major renovation of an old house it’s probably wise to think of what loads the house was designed to bear and plan for what you expect the new loads to be.

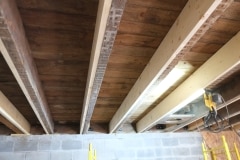
To cut a long story short Andre thought that it would be a good idea to strengthen these floor joists by adding extra wood along the whole length of them, a process known as “sistering”, why that name, I have no idea and a google search wasn’t conclusive but it does reminds me of the bill board on the show, Schitt’s Creek, “Welcome to Schitt’s Creek Where everyone fits it“. If you know, you know.

Our floor joists are about 8 – 9″ tall so Andre did a good job of cutting 2×10’s back to size, plus any necessary shimming. It does take a lot longer but now the new sistered joists are flush top and bottom with the originals. I’m pleased with the work Andre and Jerrid did, thank you. This is another job off our hands.

We really only had one shot to do this work before the electrician and plumber starts pulling wires and pipes through the joist so I’m glad we did it. This work will benefit the house and occupants for decades if not centuries. I appreciate you bringing this up Andre.

Repairing floor joists

So having just repaired the rim joist, it’s now time to replace the rotten floor joists, three to be precise. Due to rot, none of these attached to the rim joist and were just hanging mid air and two of them had huge chunks cut out of them, possibly for duct work so they were severely compromised.

Like most projects on the house I wanted to do a respectful job so instead of butt jointing in a new piece and sistering on a 2×8″ (adding extra wood to strengthen a damaged beam), I thought I’d do some joint work. I’ll still add a 2×8″ but only on one side as my joint will be stronger than a butt joint. I’m not sure this joint has a name, it’s slightly similar to a scarf joint.

I probably would have done a fancier job if it wasn’t so difficult to cut, standing on a ladder is not the easiest position to cut from. For the first beam I made some templates which I attached to the beam and used a Sawzall to rough cut, finishing off with a hand saw and plane – that was hard work. I then had the idea of using a trim router and that worked out great. I did have to to do multiple passes as a trim router as the name suggests isn’t supposed to remove a lot of wood in one pass. It probably took me about 3 – 4 hours to cut a single joist like this, luckily I only have three.

As I didn’t have any wood with similar dimensions to the joist, I laminated three pieces of old growth lumber together. I used West System epoxy so this will be a stronger than wood bond, plus I’m running 3/8″ bolts vertically through the joint as an extra safe guard. The reason the center piece is lighter is because I planed it down.

And this is how they finally turned out and I will secure these floor joists to the rim joist with 3/16″ thick steel angle brackets. I know these aren’t the finest or strongest joints, but I think they are decent, plus the addition of another sistered 2×8″ will make every rock solid.

This whole job, repairing wall, replacing rim and floor joists has taken me a few months – I wasn’t expecting it to take this long, but in most endeavours the first time you do something there’s a learning curve.

Sill Joist Finally Finished

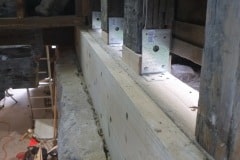
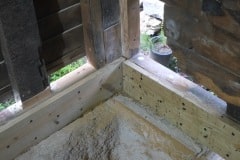
It’s taken a while but now it’s done and it’s even had two licks of paint. Overall pretty pleased with the result especially considering the state of it before. I also epoxied and screwed some pressure treated 2×10’s to the back of the beams which will help spread the weight over the wall.

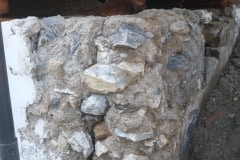
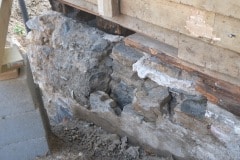
As a reminder this is what it looked like after I had removed any crumbling mortar and rotten wood (note the lack of wooden sill joist which had completely rotted away, leaving corner of house hanging for about 10′),

and after I had repaired the wall and ground the top flat.

My first attempt to replace the beam used pressure treated, didn’t like it so that got replaced by old growth timbers from the house.

I didn’t dimension the old growth timber so there were minor gaps etc. but those got filled in with an epoxy paste towards the end.

Here you can see the beams reinforced with 2×10 pressure treated. The original beams were placed on the very edge of the wall and some are even over hanging so it was good to spread the weight inwards.

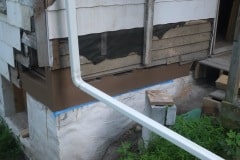
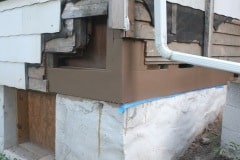
Finally the completed rim joist, with all cracks and gaps filled with West Systems Epoxy and then two coats of exterior paint. Eventually this will all be covered with the sidings. The wall will be parged again as the beam is still over hanging in parts, plus I spilt a fair amount of epoxy on it. Good for another century.

Next project is to replace the rotten floor joists and I’ve already started to cut the joints as can be seen in the following image. I’ll epoxy and bolt everything and possibly that would be enough, but will probably sister in a 10×2 or a LVL beam just to be sure. Tricky cutting these as they are awkward to get at, one down and two to go. Using a sawzall to rough cut and then a trim router with template. Finishing off with a combination of Tenon saw, Japanese saw and hand plane, basically trying everything until I find what works best.
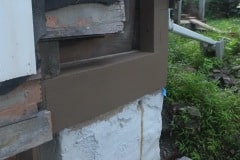
Still replacing the sill plate

This project is taking me much longer than I had anticipated. Reason for this is that none of the angles of the wall are square so everything needs to be measured and cut multiple times, including various shims and some additions where I measured once, cut twice. The new beam consists of six individual pieces of timber (not including shims and bodges) which I plan to epoxy and screwed together and I feel it’s almost ready to install.

Today, Saturday, I finished all the final fitting of the beams and as the wall wasn’t flat on top I added a layer of lime mortar for the beams to bed into. It was a long day, started at 9am and finishing at 8pm.

Today, Sunday, I got up, looked at it and said no, this is all a bit crap. Didn’t really like the pressure treated, plus is wasn’t as wide as the existing beams (maybe 1/4″ to 3/8″ narrower), all the joints had shims as the angles were funky and it generally didn’t look that great. So I ripped it all out and sat down with a sketch pad and looked at the problem which was that the bottom of the two beams I was trying to reconnect had a vertical deviation of about 1.5″.

The easiest solution was to start with a level playing field so today I spent most of the day grinding down the top of the wall so it’s flat. I think I got it to with +/- 3mm which is good enough. The lime mortar is easy to remove but the rocks took some time. A big thank you to Oscar Soliz for inventing the laser level.

With the wall flat I don’t have to deal with any weird angles and I can use some of the spare old wood from the house which are “real” 2×4’s so they match the existing beams. The first layer will get set in a bed of construction adhesive, adjusted so it’s level and then bolted down onto the wall. After that it will be like building a log cabin. It feels appropriate to use spare wood from the house for this task and I’m glad we saved it.

Sure the wood has some cracks etc. but it’s still in great shape. The clamps you see in the picture are to glue some splintered corners. The nails are only on one side and they were made when the lath and plaster were applied.

Old Growth Lumber

Whilst Aimee was building the rock wall I was working on replacing the rotten sill beam. I was reshaping the end of the old beam to except the new beam when I removed a small section and noticed the incredible grain of the old wood. I had know our house would have been made from old growth lumber but I never really appreciated it until I saw this piece of wood.

In the following pictures we have the old wood I removed and a new 2×6 for you to compare the grain. For the last three pictures I increased the contrast so you can see the grain better and what a difference between old and new.

Old growth wood came from a forest that had never been harvested before. In these “virgin” forests the trees aged gradually due to partial sunlight and competition from surrounding trees. The gradual growth rate leads to the formation of tightly crammed growth rings which are highly beneficial, increasing strength, stability and rot resistance.

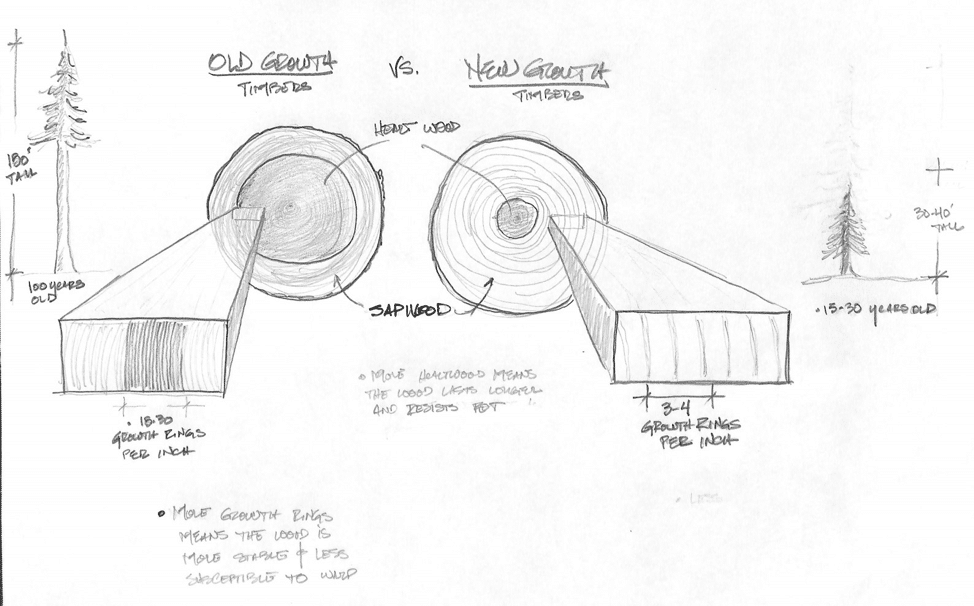
Stability isn’t the only advantage. This slow growth also yields more heartwood. Heart wood is the longest lasting part of the tree, whereas sap wood will rot very quickly. You can see in the diagram below that the slow growth lumber is mostly heart wood, where as modern lumber is all sap wood.

Old growth versus new growth wood. Credit Hull Works architectural millwork, residential construction & historic restoration

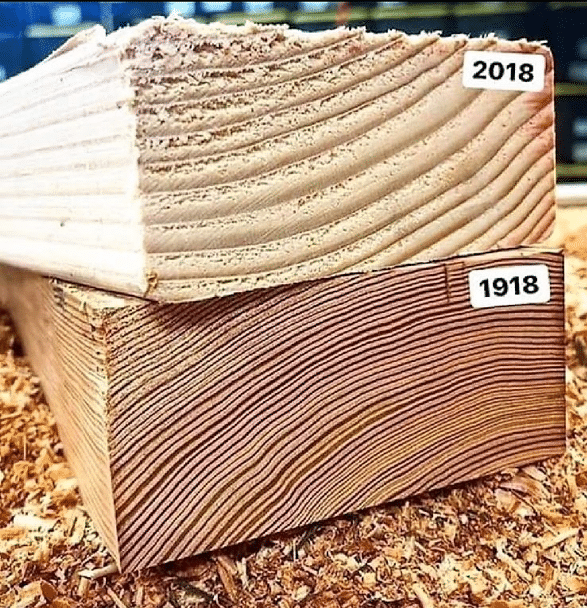
In the picture below, the wood from 1918 is all heart wood, the wood from 2018 is all sap wood.

Old growth versus new growth wood. Credit Hull Works architectural millwork, residential construction & historic restoration

So what happened to old growth lumber? Well I’m not an expert so it’s easier to quote.

In America, we began seriously depleting these virgin forests during the industrial revolution, and by the 1940s, most of them were gone. Lumber prices began to spike as Americans looked for substitutions for our lumber addiction. Enter second-growth and new-growth wood.

Tree farms began to produce lumber for the growing demand and the fastest growing species like Pine were selected for this reason. The trees grew in open areas with little to no competition for sun, which caused them to grow very quickly so they could be harvested in 10-20 years as opposed to old-growth wood, which may be from trees as old as 200-300 years old before being harvested.

Credit: https://thecraftsmanblog.com

Old growth forests still exist but they are usually in protected state parks. The best source for old growth lumber nowadays is reclaimed wood from old houses, barns etc.

I’m tempted to try and find some reclaimed old growth wood to use to fix our sill beams and ditch the pressure treated pine I was planning to use. I’ll ask about and maybe someone local has some.

If you’re interested, this is a good video explaining old growth lumber in greater detail.

I’ll show you my mortise if you show me your tenon

Hi, Aimee here!! I usually just dictate to David but today I find myself writing as he’s polishing my boots and scythe.

As you’re probably aware our house project requires lots of different skills, particularly woodworking which isn’t surprising considering it’s a wooden house. In particular most of our sash windows need to be replaced or repaired and we do have a quite a few of them. Yes we could have gone with modern energy efficient PVC windows, but they lack the charm and we feel the look of them wouldn’t suit this house. Yes they aren’t as energy efficient but we’ll make sure that we build them with draft excluders as well as having storm windows for winter.

By the way if you ever need to restore a sash window we can highly recommend this Youtube series, Sash Windows Restoration – “Don’t Trash the Sash”. It’s a ten part series and it does explain a lot as well as pointing out that well looked after sash windows can last 100 years or so, would PVC last that long?

Anyway, I diverge. Getting to the point: woodworking isn’t my one of my fortes, in fact I know next to nothing about wood apart from the fact that it comes from trees. Currently David does most of the woodworking and I’m left to to do the more tedious tasks, which is fine most of the time but sometimes I want to be creative and make something also. To remedy this I’ve enrolled in a bunch of woodworking classes at the Kingston Wooden Boat School which is part of the Hudson River Maritime Museum. I pretty much enrolled for all the classes which are:

  • Understanding Wood
  • Woodworking Tools-Their Use & Care
  • Basic Joinery
  • Machine, Tool, & Shop Safety
  • Advanced Joinery
  • Build Your Own Adirondack Chair

I’ve just finished Machine, Tool, & Shop Safety and about to start Advanced Joinery next week. Finally I’ll round it off with a chair building course where I’ll combine all that I’ve learned.

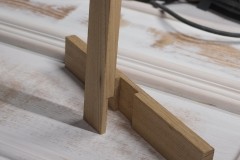
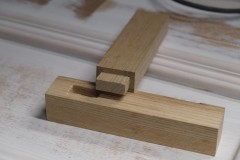
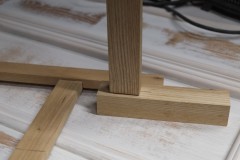
By the way, the Hudson River Maritime Museum is a cool museum which I highly recommend. Below are the results of my handiwork from the Basic Joinery class, the first is a half-lap joint and the second is a mortise and tenon. My teacher, Michael Puryear, is one of my favorites (besides Udo Guddat from high school German).

Unhinged

We’re edging closer to being able to paint our new downstairs front door. We’re anxious to get it painted before it gets too cold to paint, plus we don’t want the paint we mixed up to go to waste. When we were trying to color match earlier this year we probably added about $130 of artists acrylic to an already expensive can of paint.

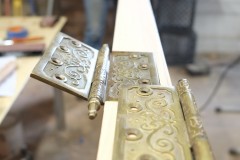
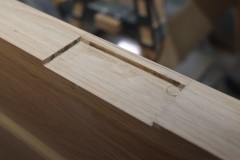
We’re using three hinges for this brute, not vintage but brass re-creations. I did acid-etch them to get rid of some fake antique coating and they look better. To cut the recesses we used a Porter Cable door hinge template kit combined with a compact Makita router, both of which do a fine job. I did the first hinge and then Aimee took over and did the remaining two. Placement of the hinges was 7″ from the bottom, 11″ from the top and one between the other two. We trimmed out the corners of the recesses with hand chisels.

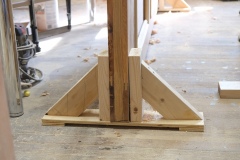
Check out the clamps we used to hold the door upright. Note that the clamp base is only supported at the ends and because of this when the weight of the door presses down the base bends and the two uprights clamp tightly to the door and it’s pretty rock solid, not my idea, I found it on a Youtube video. If I can find the video I’ll add a link. These clamps are super useful.