It’s a Cover Up

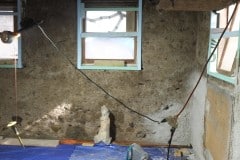
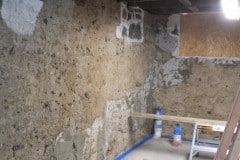
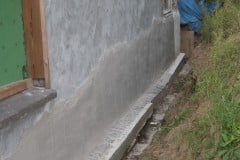
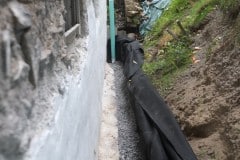
This weekend we fixed up the remaining footings and tried our hand at plastering.

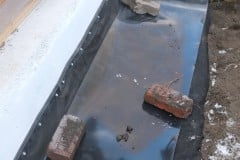
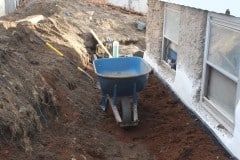
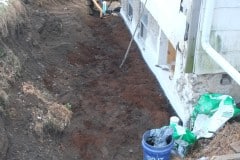
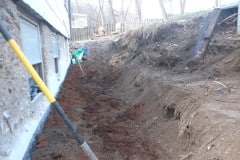
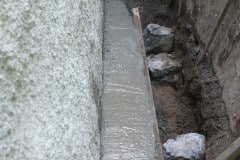
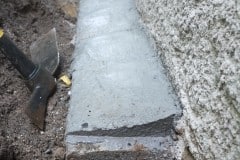
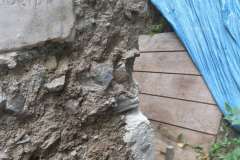
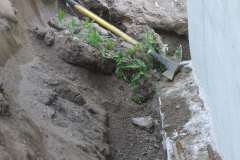
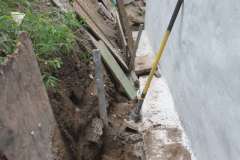
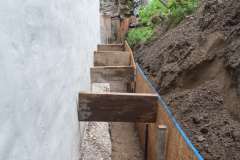
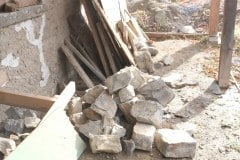
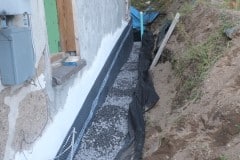
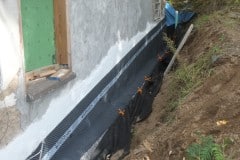
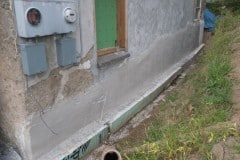
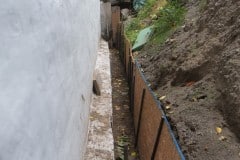
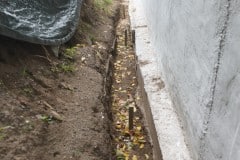
On Saturday I finished off chiseling away the huge stones that were preventing me from continuing the footings repair at the rear. I added extra rebar and again rust treated the existing rebar. Around the corner we discovered huge gaps (you could put your arm in up to your elbow) between the wall and the footings so we filled these in and added a chamfer.

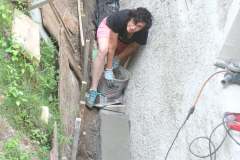
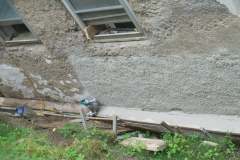
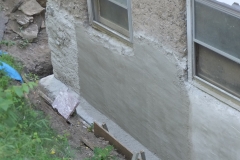
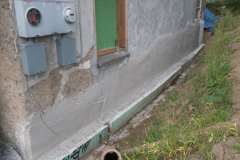
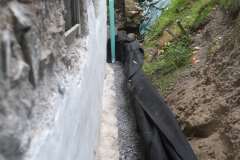
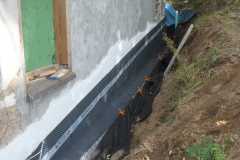
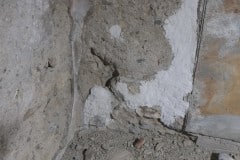
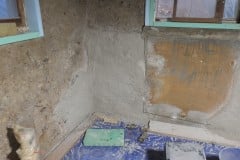
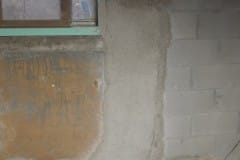
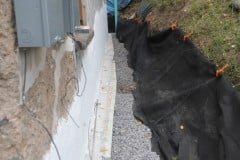
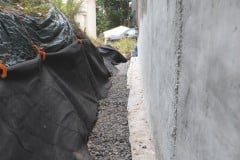
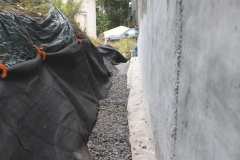
On Sunday we tried our hand at plastering and we think it went pretty well. Adding this coat was a lot slower as the wall undulates quite a bit and in parts I was probably spraying over an inch thick of the lime mortar, troweled it flat after I emptied each hoper. It’s not perfect but it’s a great thick coat which will be underground anyway. This now has to be left exposed to the air for a month to allow it to cure but after that we can start to fill up the trench. We’ll probably apply a coat or two of lime wash which we’ll do once we finish the whole wall.

Again, so pleased we found the mortar sprayer, what a mess it would have been without it and the time….

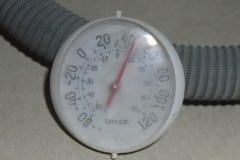
Should have worn a long sleeve shirt as I was splattered with a lot of lime which gave me some irritating burns on my arm, also the temps were in the triple digits so I was perspiring profusely whilst Aimee was glowing.

We returned on Monday night and managed to do another 6′ or so. We’ll complete it by the weekend.

ToolCrete to the Rescue

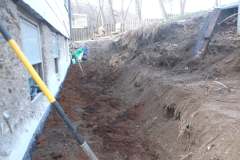
Our latest project has been to fill in the trench behind the house but before we can do this we need to:

  1. Repair the footings
  2. Remove flaking lime mortar from wall and replace
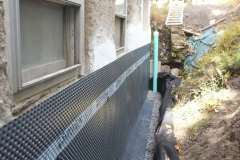
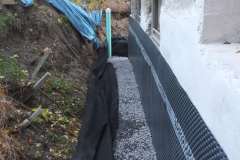
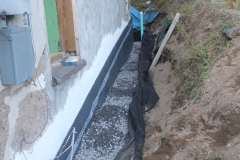
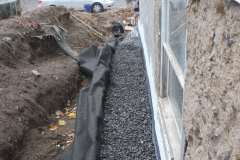
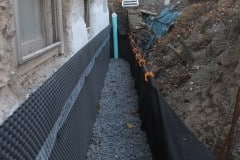
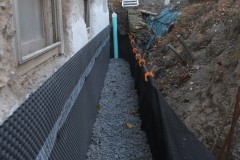
  3. Install foundation drain

This is how we currently stand:

1) Repair the footings. We’ve repaired the majority of the footings but have about five foot to go. The five foot section has some huge rocks in the way and these rocks are part of our footing so can’t be removed completely. I’ve been trying to trim them down with a combination of hammer drill, hammer chisel and diamond bladed grinder. Getting there but it’s slow and uncomfortable work. I’m currently about 4/5 of the way so light at the end of the tunnel 🙂
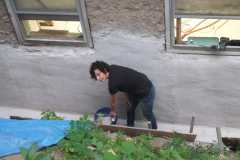
Aimee has been working on adding a concrete fillet/chamfer to prevent any water settling on the footings and to divert it into the yet to be installed footing drain.

2) Remove flaking lime mortar from wall and replace. We’ve made a lot of progress in the last few weeks, removing loose mortar, repairing holes and cracks etc. This weekend we managed to get a coat of new lime mortar on the wall. One of the traditional methods of applying the first coat is to literally throw it on, hence the name harl coat. If you’re interested this is a good video from Mike Wye explaining the harling process. You might think that just slapping it onto the wall with a trowel would be just as good, but I’ve been told that it isn’t and the bond will be poor and soon fail. We did apply a harl coat earlier this year and we found it pretty slow and hard work.

We didn’t fancy harling the back wall as it’s pretty large and the space is a bit confined which would make harling tricky, especially low down the wall. After some research I came across the ToolCrete stucco and plaster sprayer which is sold by Mortar Sprayer. I watching some encouraging videos so I ordered one and boy are we pleased with it. It’s powered by a compressor which we could luckily borrow from Joe and Deborah. The compressor wasn’t as powerful as they recommended (7cfm @ 90psi versus our 4cfm @ 90psi) but the ToolCrete sprayer allows you to block up one of the three nozzles and it worked great. We did make the lime mortar a bit wetter than usual and again added chopped fiber glass strands.

It took us maybe three hours to do the wall but that was because you have to mix lime mortar for about twenty minutes per batch. If we had a continual supply of the mortar I think we could have been done in about 30 – 40 minutes. Compare that to a couple of weekends if we had done that by hand and I don’t think the results would have been as good as with the ToolCrete sprayer.

We’re going to do the rest of the remaining walls with this sprayer both internal and external and this sprayer will save us so much time. Maybe if we can get a third person to help then they can devote themselves to the mortar mixing.

We have to leave this first coat to cure for a week before we apply a second coat and that may be the final coat. As most of this will be underground it doesn’t need to be perfect.

Lastly the sprayer is easy to disassemble for cleaning. Wish the hoper had a small lip so I could have hooked it on the window frame when Aimee was loading up as it does get a bit heavy after a while, that said I can always drill two holes and add two protruding bolts. All in all a great product which is very satisfying to use and it’s made in the USA 🙂

3) Install foundation drain. No progress on this yet but we know what we need to do.

Repairing the footings

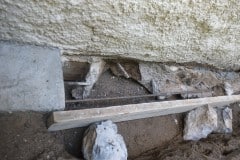
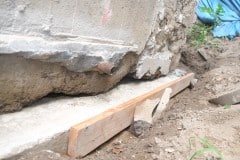
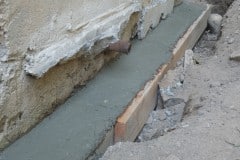
If you read the previous post you’d know that our rear wall footings weren’t up to scratch and needed repairing. It was a bit tricky as the space was limited but passing buckets of concrete out of the window worked well. We prepped well and I rust treated the existing rebar, added new rebar and pressure washed it a few times. After the concrete had set I did go along the bottom of the wall and filled up any gaps that still existed and as suggested by a few, I might seal the joint at the bottom.

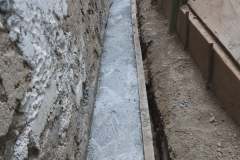
We’re pretty pleased with how it worked out and it’s a major improvement over what Thomas Motzer left us with, see below. Just a shame we had to spend the time and energy to correct this mistake. With this done we can move on to apply a new parge coat of lime to this wall which we will probably start this weekend.

P.S. the white stuff on the walls is new lime mortar and as this will be hidden or white washed we didn’t bother color matching it.

P.P.S. Hope you’re feeling a bit better Chris 🙂

They promised the earth, but delivered crap; again

The Contractor, and I don’t mean to insult any decent contractors out there.

Recent rainy weather has shown that we get pretty major water ingress into the ground floor, bad enough to soak carpets and cause major mould, so it needed to be addressed. The leak isn’t through the walls but where we had footings placed under our stone and mortar walls.

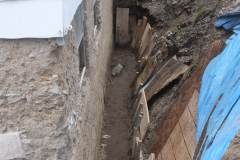
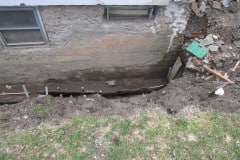
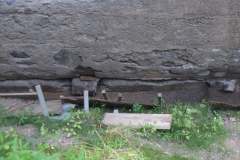
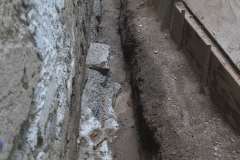
Investigation required more digging which revealed a real hodge-podge of a footing which Thomas Motzer installed. To be honest I’m not really sure you could call it a footing as in places it doesn’t extend any further out than the wall they were trying to support, plus you could put your hand at least 10″ under the wall in many places. Lastly they had left unexposed rebar sticking out and when this rusts it will expand and start cracking the concrete which just accelerates the problem. We spoke to an architect last night and he confirmed than rebar should be completely enclosed by the concrete – thanks A2.

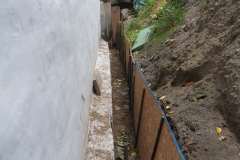
If you don’t really understand what you’re looking like, the footings should look like the corner section (last two pics) which Thomas did get right.

I’m pretty sure that this wouldn’t have passed the building inspection so I’m guessing, like us, they didn’t see what was going on outside. Admittedly it was difficult to access and earth had probably collapsed into the trench by the time the inspector looked at it. Anyway we decided we had to do something about it not least because of the leak, so we cleared out more soil, cut back the rebar and rust treated it as well as adding additional rebar pieces so we could get a better key into the existing concrete. Sucks that we have fix this after spending probably tens of thousands getting it fixed in the first place. The weather didn’t help with temperatures hitting triple digits on the weekend, that said we were out of the sun for most of time and there was a slight breeze.

We’ll mix inside and then have to bucket the concrete out of the window, fun times!!!! We need to get this done so we can plaster the rear wall, install a french drain and get this pain in the ass trench filled in.

Fixing Door Openings

It seems a good idea that we fix our doorways before we parge/plaster the interior walls. The doorways are pretty uneven so we added some shuttering and slowly filled up behind with lime mortar mixed with a bit of fiberglass and as many stones that we could fit in. You can see Aimee hammering in the mortar to reduce voids.

Progress is a bit slow but at least we’ll have a pretty square opening for a door to be installed. This door is to the bedroom and we had the builders cut this opening in the wall for us. The second doorway we need to fix is to the boiler room and for this we plan to have an arch, how fancy is that and the arch should be a fun project. The reason for the netting is that the masonry above the door is extremely fragile and if it fell on you it would likely kill you.

We did have a plastering fail yesterday. I removed the shuttering and 90% of the plaster came away from the wall. Not sure what went wrong there but it could have been any combination of the following:

  1. Messed up the ratio of the mix
  2. Didn’t mix for long enough
  3. Removed the shuttering too soon
  4. Mix was too dry
  5. Didn’t pack in in well enough

We’ll probably never know why but I suspect a combination of all of the above with the possible exception of (5).

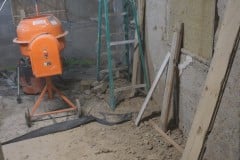
Thanks again Joe and Deborah for the loan of your cement mixer.

Brick Bat Box!!!

Aka some camouflaged bat boxes. This is my attempt to reduce the mosquito population, that said there is no guarantee that the bats will nest in the boxes. I built these last year but with so many other projects on the go they’ve sat for a while. Had to get them up soon otherwise another year will have passed so we made the effort and got them up.

Wood is the same wood we are using for our windows which has been thermally modified so very rot resistant. It has a beautiful mahogany color but I decided to paint them so they would blend in. Okay the colors don’t quite match and they should probably should have been positioned under each chimney but I think they will fade and weather in time and I was using existing hooks in the wall.

Last few pictures are some tracks we found in the lime mortar dust. I suspect some of them are Millipede/Centipedes.

She came in through the bathroom window…

We had a letter box style bathroom window that needed to be enlarged to meet modern building standards (NY Egress Standards). Code requires an unrestricted window of no less than 5sq ft so we enlarged the gap to allow for a 3 x 2 ft window.

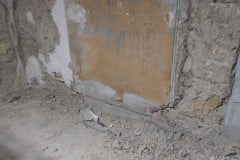
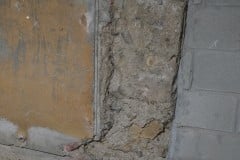
Took a while to remove the extra masonry and then we had to repair a lot of the wall which had previously crumbling away, as can be seen in the last photo.

To repair the window opening I used shuttering on either side of the horizontal and then re-used them on the verticals. For the verticals I added 4-5″ strips of shuttering, filling up behind each with lime mortar (reinforced with chopped fiberglass) and rocks before adding the next strip of shuttering. This was pretty much the only way I could do this without creating large voids etc.

There were some small holes and wrinkles that the plastic made but these don’t matter as there will be at least one more coat of mortar over this. Overall I think it turned out pretty well.

We will also be parging the outside walls so any blemishes there will disappear.

Tips for using self-leveling

These are our tips on applying self-leveling compound and I’d read it only if you are planning to do something similar [editor: It’s boring]. We applied ours over ≈ 800 sq ft of floor so some of the following may not be applicable if your area is a lot less or more.

First off it’s good to understand what self-leveling compound is and what it can and cannot do. For starters it’s basically very fine Portland cement, fine enough that the particles can be suspended in a pancake type mix. So imagine you poured a bucket of pancake mix on a floor, yes it would spread out and self level to a certain degree but don’t expect it to suddenly spread out and cover all of your floor. So if one half of your room is 1″ lower than the other and you poured your bucket of pancake mix on the higher side, don’t expect it to suddenly rush down to the lower side. Sure it will start to move in that direction but that’s all you can expect. Workable time for this product is about 20 minutes max, so no dawdling.

Hopefully these tips will help if you have a similar project, so in no particular order here we go:

  • Get an idea of the levels, i.e. where are the high and low spots. We did this with a laser and created a contour map. If I were to do this again I probably would have just used the Ardex self-leveling pegs. After discovering the product I placed them in a 3×3 foot grid pattern, set the laser at the desired height and cut them down to height.
  • Use the above mentioned self-leveling pegs. Without these it’s difficult to know when you’ve reached the correct depth.
  • Get a laser that creates a beam close to the ground. I eventually bought this one as it could place the beam about 6mm off the floor. The one I was initially using could only go down to about 10mm.
  • If you have deep areas consider doing multiple pours. In fact without a pump and a cement truck we couldn’t have done the main room in one pour (≈ 650 sq ft). If you do multiple pours remember to re-prime each time.
  • Make sure the surface is clean prior to applying the primer and follow instructions exactly.
  • Start early in the morning before it gets too warm. We also added ice to cool down the water as that gave a slightly longer working time.
  • Assemble a team of competent people. I thought a team of 5 was ideal for our job and this is how this is how we split the team up:
    • One person measuring out water.
    • One person mixing.
    • Two person opening compound and adding it with water to mixing bucket.
    • Same two people carrying mixed compound and pouring it on floor.
    • One person spreading and rolling the compound and deciding where the next bucket should be poured.
  • You need your team to work like clockwork so explain to each person what their tasks are and walk them through the process. Once you start mixing you shouldn’t have anyone asking you what to do next.
  • Assemble the correct tools:
    • A paddle mixer with the correct paddle for self leveling compound. We used a Collomix.
    • Serrated rubber squeegee for spreading compound.
    • Spiked roller for removing bubbles and blending in of different batches.
    • Scrappers to remove any unmixed product from building up on the mixing bucket
    • A good serrated knife for cutting open the bags of compound. You’d be surprised what a big difference such a simple tool makes especially when you have to hold the 40lb bag up when cutting it open, multiplied by 50 bags.
    • Spiked shoes which allow you to walk over the poured compound without messing it up. Super slippery though so you have to tread lightly.
    • A couple of 17 gal mixing buckets. Having two meant that we could mix and pour faster.
    • Safety equipment, latex gloves and dust masks.

And that’s about it folks. Ultimately you’d want to get your initial concrete pour as flat as possible. As it was we used about 125 bags of the self leveling compound and at $41 a bag, you’re talking over $5k.
Ultimately I’m glad we got it done, sure there were sleepless nights, but now we have a fantastic flat floor and if anyone reading this wants some tips on this process we will gladly share our knowledge.
Floor finished and flat

Finally finished the self leveling of the main room and we are pretty pleased with it. In total it has taken 115 bags and at $41 a bag that adds up. We just have the bedroom to finish off but this is relatively small so Aimee and I can finish that off. It’s a real shame that Al Riozzi (AJR Masonry) hadn’t ordered a bit more concrete as compared to the self leveling compound, concrete is dirt cheap. The lesson I learnt from this is to get all your expectations written down and signed off.

It might not look like it but the floor is super smooth and we’re very pleased with it. Thanks to every one who has helped with these pours, Joe, Deborah, Aimee, Rob, Jessica and Brian. We all worked really well together and I think we could even hire our services out!!!

Next steps is to apply a protective coat and we have decided to epoxy coat the floor. First coat will be a solid color, after which we’ve decided to apply a stencil pattern followed by a final coat of clear epoxy. It was Aimee’s idea to do the stencil and Aimee got that idea off our friend Deborah who recommended this amazing stencil site, Royal Design Studio. I know is might seem a bit naff but check out the site, the results look fantastic, plus we will probably color them differently depending on room.

Please help us decide our floor pattern by voting for your favourite pattern. Colors are yet to be decided, though we think we will have three colour schemes, bathroom, entry hall and rest of the floor.

(Will help me decide if this is spam or not)

Poll is now closed and here are the top three picks:

  1. Starry moroccan night with 8 votes: Holly, Emily Taylor, Eric, Deborah M.P., Kate McGregor, Brian and 2 anonymous
  2. Aragon damask: 1 (Maria R), 1 (Molly), 1 (Chris), 1 (Eric), 1 (Deborah M.P.), 1 (Kate McGregor), 1
7
  3. Duomo: 1, 1, 1 (Chris), 1 (Deborah M.P.), 1, 1 (Brian Mac)
6

Je Suis Très Fatigué

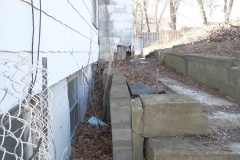
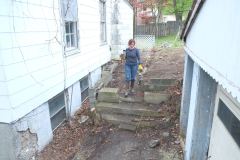
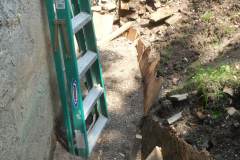
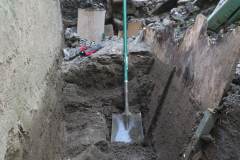
If you remember, last month I had a post titled, “Digging is over“, well you can imagine my joy when I noticed that it wasn’t, a couple of feet deep of muck now sat at the bottom of the previously cleared trench. Not sure how it got there, but the plot thickens!! At it’s deepest it was a little over 2′ deep and even the ladder was buried.

It was caused by a serve storm earlier this week and today I decided to dig it all out and to make the parge coat and a french drain a top priority as I don’t really want to dig it out again. It probably took about 5 hours with a few breaks. Luckily I was in the shade and there was a slight breeze as temperatures today were hitting the low 90F/32C. The hard part was throwing it out of the trench, but fortunately this thankless task is over.

PS. The title of this post comes from a line in a British comedy show, do you know which one? I bet Jason knows.

[Spoiler alert. The answer: https://www.youtube.com/watch?v=kulkUAUEWrs ]