Old Growth Lumber

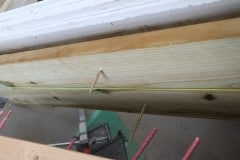
Whilst Aimee was building the rock wall I was working on replacing the rotten sill beam. I was reshaping the end of the old beam to except the new beam when I removed a small section and noticed the incredible grain of the old wood. I had know our house would have been made from old growth lumber but I never really appreciated it until I saw this piece of wood.

In the following pictures we have the old wood I removed and a new 2×6 for you to compare the grain. For the last three pictures I increased the contrast so you can see the grain better and what a difference between old and new.

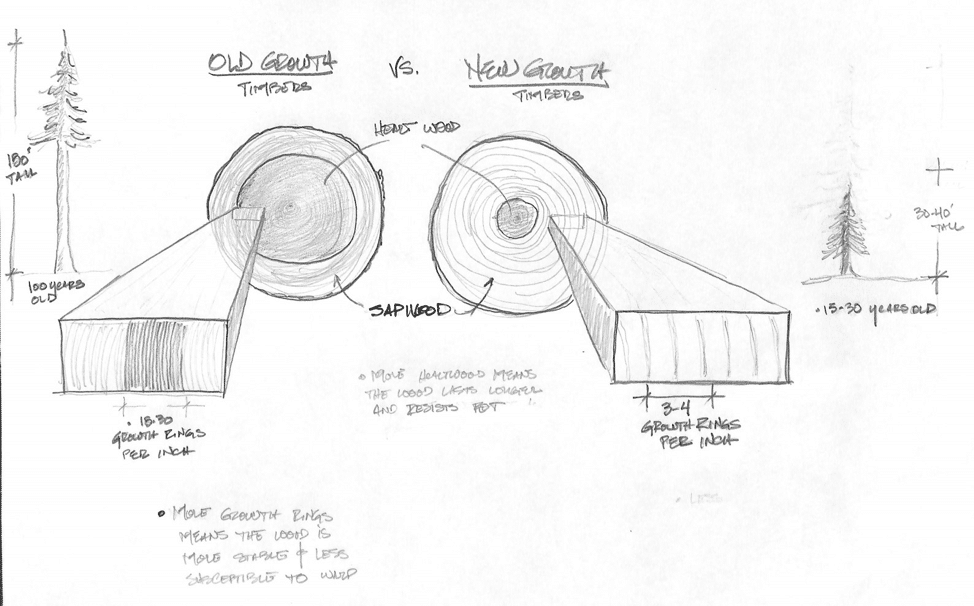
Old growth wood came from a forest that had never been harvested before. In these “virgin” forests the trees aged gradually due to partial sunlight and competition from surrounding trees. The gradual growth rate leads to the formation of tightly crammed growth rings which are highly beneficial, increasing strength, stability and rot resistance.

Stability isn’t the only advantage. This slow growth also yields more heartwood. Heart wood is the longest lasting part of the tree, whereas sap wood will rot very quickly. You can see in the diagram below that the slow growth lumber is mostly heart wood, where as modern lumber is all sap wood.

Old growth versus new growth wood. Credit Hull Works architectural millwork, residential construction & historic restoration

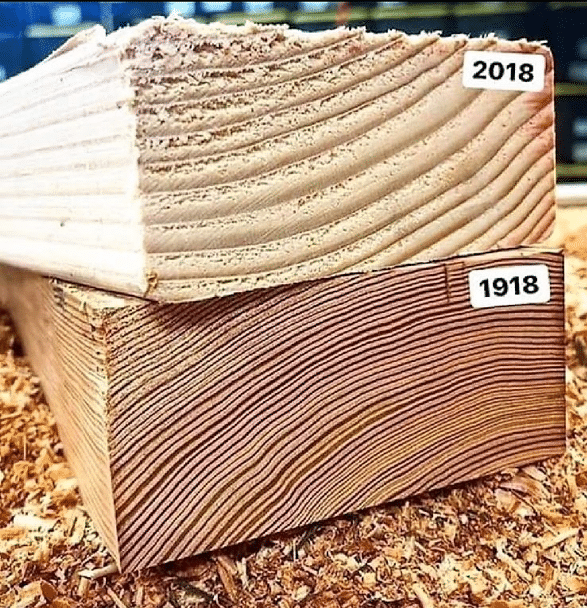
In the picture below, the wood from 1918 is all heart wood, the wood from 2018 is all sap wood.

Old growth versus new growth wood. Credit Hull Works architectural millwork, residential construction & historic restoration

So what happened to old growth lumber? Well I’m not an expert so it’s easier to quote.

In America, we began seriously depleting these virgin forests during the industrial revolution, and by the 1940s, most of them were gone. Lumber prices began to spike as Americans looked for substitutions for our lumber addiction. Enter second-growth and new-growth wood.

Tree farms began to produce lumber for the growing demand and the fastest growing species like Pine were selected for this reason. The trees grew in open areas with little to no competition for sun, which caused them to grow very quickly so they could be harvested in 10-20 years as opposed to old-growth wood, which may be from trees as old as 200-300 years old before being harvested.

Credit: https://thecraftsmanblog.com

Old growth forests still exist but they are usually in protected state parks. The best source for old growth lumber nowadays is reclaimed wood from old houses, barns etc.

I’m tempted to try and find some reclaimed old growth wood to use to fix our sill beams and ditch the pressure treated pine I was planning to use. I’ll ask about and maybe someone local has some.

If you’re interested, this is a good video explaining old growth lumber in greater detail.

We’ve hit a wall

A rock wall to be specific. We’re not really sure how we’ll treat the path around the back of the house, but we decided to build a rock wall to help support the bank and to plant shade loving plants such as ferns, grasses, hostas and others. We also planted some mosses in the cracks between the stones so we hope these take root. The rocks were ones that we had dug up in the garden so it’s good to re-use them. We don’t have enough rocks for the complete wall but additional rocks can be had from just up the road where they’re abundant and just sitting by the side of the road. Bit of a struggle getting them up our garden as one of them must have been around 200lbs. What’s nice about this wall is that it can easily be modified or removed if we ever have a change of plan.

When we eventually move into the ground floor this will be the view out of the back windows so we want something lush and refreshing. Aimee did most of the wall and it is crude, but in a nice way, solid and I think it will age nicely. We’ll publish additional photographs when it’s finished and the plants have had time to settle in..

We do need a few more plants but Aimee put out a request on facebook and we should have some more ferns and grasses soon.

A Wall is a Wall

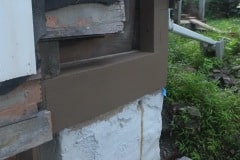
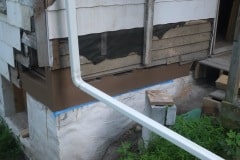
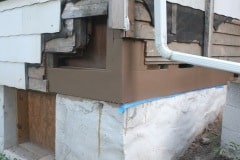
Before we can replace our sill beams the corner of the house needs to be repaired, it had some really funky repairs done on it in the past so I’m glad we’re fixing it. Weather is just about decent enough to risk doing lime mortar.

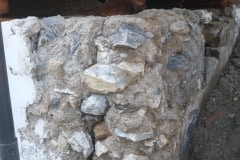
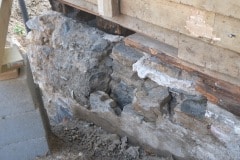
From the photos you can see it was in pretty bad shape and even worse by the time I removed all loose and flaking mortar. A lot of the mortar was of very poor quality and would crumble in you hand, hence the huge hole you can see.

On Saturday we rebuilt the main structure of the wall by hand, filling in small cracks & gaps and on Sunday we used our mortar sprayer to finish the job off. We had to spay a lot on as in some places the mortar is a couple of inches deep. We did push in stones whenever we could and we do add fiberglass strands to the mix – in the old days they may have added horse hair.

I’m not great at finishing the surface but my trick is to go over any irregularities with a diamond polishing/grinding disk which will give great results. I’ll grind the top nice and flat and it will also have to be at an angle as the two beams are at a slightly different height, probably due to subsidence etc.

The last couple of nights have dipped below freezing (disastrous for lime mortar) so we built an outside tent around the wall and left a small fan heater inside. Each day we’ll spray the wall with water which helps the lime to cure.

The reason why we look like we’re not doing much in the video is that each batch of mortar takes about 25 minutes to mix – it’s a lime thing. Also the SD card ran out of space, hence the abrupt end.

Replacing sill beams

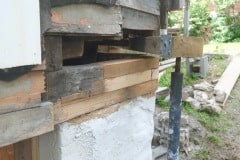
In a previous post I mentioned the rotten sill beams, still haven’t replaced it but the house is still standing. Last weekend I got down to the nitty gritty and started to cut the existing beam to accept the new one. A butt joint probably wouldn’t pass code so I made a staggered cut for more glue area. First I made plywood template and attached them to each side of the beams and then, using a Japanese hand saw, cut away the rotten wood, results were decent enough. There are still a few cracks and splinters in the existing beams but epoxy will eventually fill this. I also applied this treatment to the other end of the beam.

By the way if you’ve never used a Japanese hand saw, check out this introduction video. Very sharp and very useful for some certain cuts.

The replacement beam is made from pressure treated 4×4’s which are roughly the same thickness as the existing beam. I cut these out on my miter saw and trimmed up with a hand chisel. Before I can install them I’ll need to repair the wall such that it presents a smooth surface for the sill plate to rest on and as the weather is getting better I think I’ll be able to do that in a week or so.

Lastly I decided I should support the corner of the house in case it starts to sink, I don’t think it will as the rotten beams were no support, but better be safe than sorry. Not great shoring up but it will do for now but I may improve it and try and jack up the house a bit as it was obvious that this corner had sunk a few inches over the year.

A Mild Case of Demo

Weather is finally getting better so time to get stuff done!!!!

We were hoping to start work on repairing the wall so we can install the new sill beam but temperatures are still dipping below 40°F so we’re hoping to do that next weekend. To access the sill beam and wall I’d already removed a small part of the old deck but as it was a lovely day and we wanted to work outside so we decided to remove a lot more so we’d have more space to work. It’s not completely gone and we left the main structure and a 3′ square by the doors upstairs, just incase someone ever stepped out by mistake.

The deck and balcony obviously weren’t original and when we come to replace it we will add something that is in character with the house. The upper balcony will be triangular to match the roof line and on the ground floor you will step out the back door onto a blue stone patio which should last centuries.

Because we’re usually at the house on weekends we often get visitors and today we had Bianca, Seth, Rob, Randall and Richard, always nice to see folks.

Replacing Rotten Sill Plate and other Stories

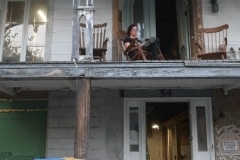
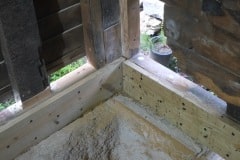
There has alway been something a bit funky about the rear right corner of our house. Looking at it, it was pretty obvious that someone had been up to some f#$%&ery† in the past. Today was the time to remove the band aid and find out what was going on – a few months ago I really wouldn’t have wanted to know, but now it needs to be addressed. Once we start framing inside and adding insulation, access to these areas gets harder.

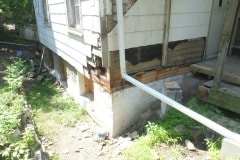
So in the photos you can see, going horizontally, that we have tile, tile, tile, some odd bit of concrete painted white, probably to make it look like tile. By the way beneath the tile is wooden sidings or cladding. So what was going on here was that the sill plate, a 5x”10″ beam that rested on top of the masonry wall (to which floor joists are connected to etc.) had rotted away. Two likely reasons for this, firstly the single gutter from the roof was vertically above this so any blockages or leaks would have sent water running down the outside walls. Secondly this is below where all the bathrooms were so any leaks would make their way down to the sill plate.

After removing the funky concrete it was obvious that the sill plates were totally rotted and in places completely missing.

If the beams weren’t so rotted and crumbling I would have been nervous about removing them. Anyway I took the risk and the house is still standing. It might not be obvious from the photos but the ends of the floor joists were so rotten that the ends don’t even meet the walls. As a precaution I did put screw jacks under the joists.

Currently we have about 7 linear foot of the house which is unsupported. We’ll be addressing this asap. We’ll also need to rebuild a lot of the corner wall but we’ll have to wait until temperatures are warmer.

Indoors we started on making some shelves for all our wavy glass. For years we’ve had piles of it dotted around the house and every now and again, we would end up breaking the odd pane. Some of these panes are pretty big at 3’x3′ and this glass is getting rarer and rarer so I’m glad it’s out of harms way.

The shelves took longer than we thought to make but they are pretty heavy duty and the vertical dividers can be removed should we want some workshop shelving in the future. Our workshop has become pretty cluttered so it was nice to have a good tidy up.

† Excuse the langauge.

Mystery Objects Revealed

In a previous post I asked whether anyone knew what these things were used for?

Well it turns out that two very smart readers do know and they are Troy Ellen Dixon and Abigail Simon. Congratulations and let’s connect so I can coordinate the delivery of your prize!!!

Their correct answers were

My father used them to match removable storm windows and screens to each window.
Troy Ellen Dixon

These are window number tacks. Actually, they may be called something more interesting — those Victorians were crazy — but that is what they are for — you put one on the frame and one on the window and somehow that is supposed to fend off window confusion.
Abigail Simon

Yes, the number tacks are to help match window screens and storm windows to the windows they belong to, hence the duplicate numbers. In the old days windows would have been handmade and probably varied in size quite a bit. These tacks removed the guess work out of finding the matching screen or storm. We have forty plus windows in our house so trying to match a screen or storm to the correct window without these would involve a frustrating number of trips up and down the ladder.

If you have old sash windows then you may also have these numbers though it’s likely that they’ve been painted over. I did check our old windows but couldn’t see them so maybe this numbering system wasn’t that popular.

Individual sashes were also often numbered during manufacture to make sure they matched the correct window frame. For this numbering they would just stamp a number onto the sides of the sashes and frame as these parts of a window aren’t painted. You can see in the picture that they choice roman numerals to number the sashes, I’m guessing they did this so they could use a simple tool such as a chisel to make them.

I bought these vintage tacks from eBay, you can buy reproductions but why when you can recycle and often find them cheaper.

I’ll leave you with a poem which I just came across (thank you Wayne Plummer).

The Day We Argued About Roman Numerals

Even now in my mind,
that row remains VIVID.
I tried to stay CIVIL
but you ended up LIVID.
Brian Bilston

P.S. I have bought a few more tacks which include the missing No 20.

What’s all the stink about?

Over the last few days we’ve noticed a very strong skunk smell in the house, so strong that Aimee thought we had a skunk living in the house – I hope not. Today Aimee got a text from our neighbour, Lisa, to inform us that a skunk had shuffled off ‘is mortal coil next to our house. I checked tonight and indeed a poor skunk had met her/his demise in a shallow trench next to our house.

Today in day light I took a better look and it looked like the poor thing had a broken rear leg so I suspect it had been hit by a car and either crawled or was picked up and thrown there. I moved him/her to a sunny spot, put them the right way up and will let nature take it’s course. Apart from the stink, they are pretty cute animals. Hope it didn’t suffer.

RIP A.Skunk

Mystery Objects. What are these?

I bought these for use on a future project at the house. Can you guess what they are used for?

I’ll give you some clues:

  • These items were probably produced in the 40’s, 50’s and 60’s.
  • Very unlikely to find them in a modern house.
  • They would typically be used in twos or threes, i.e you may use two or three of the same numbered tacks together.

Winner receives a jar of our homemade DnA chili sauce. Local winners can pick it up, for others I will ship.

Winner to be announced next Friday.

Prominent Staff Member Caught in Vice Probe

Shock, horror probe!!!

This vice belonged to my Dad and possibly my Grandfather before that. It’s a Record No. 52 and it dates from somewhere between 1940 and 1960 and for as long as I can remember it’s been sitting unused on a shelf under a work bench in Dinas Powys, Wales.

We’ve been looking for a woodworking vice for a while now and it made perfect sense to bring this back from the UK. I disassembled it and Aimee and I both bought parts back in our luggage. It had quite a bit or surface rust so I removed that before reassembling it. The last picture is after I removed most of the surface rust. The blue painted pieces were just washed and will retain their patina.

Here it is assembled, incorrectly I may add, and it took me maybe 10 minutes to figure out the quick release. Next step is to make some oak jaw pads from local wood supplied by John Paul. Odd that it didn’t have any jaw pads, maybe it was never used.

The idea to add leather to the pads was something I saw on a youtube video and should help stop the jaws from marring the wood. Holes were punched in the leather so that I could remove the pads without having to remove the leather.

I should think that with decent care, the vise will last for many more decades and I like the idea that my Dad and Grandfather used it. I wrote all the owners names on the inside of the pads so the next owner can see a bit of the vises history and add their own name.

Nowadays Record are owned by Irwin and they make their vices in China so it’s nice to have a good old, “Made in England” one.

You’ll notice that I interchange vice with vise and if you’re interested in grammar read on: