A Porch is Reborn

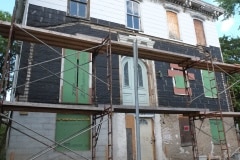
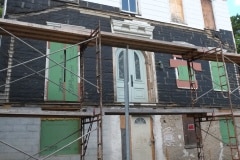
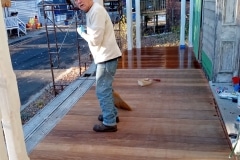
After some setbacks and delays our porch has finally been raised and how majestic it looks. Craftsmanship is top-notch. From the amount of comments from passers-by, I think we have achieved our goal of re-creating the original porch. It’s not an exact replica as by modern standards the old porch was under-engineered but I think we’ve managed to strengthen the structure a lot, whilst still retaining the original aesthetics.

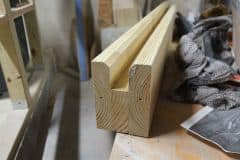
The construction techniques used were similar to the original porch, with some lovely pocket tenons, pinned in place with hardwood dowels. There are a few heavy-duty galvanised bolts here and there but they will be hidden by wooden plugs. It is a delight to look at.

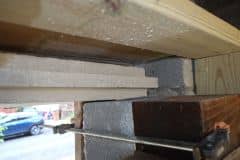
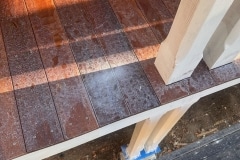
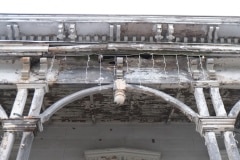
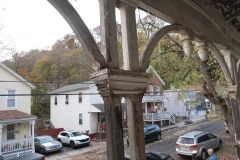
The porch is far from finished as the original had a lot of detail which you can see in the following. We’ve kept most of the original pieces, some we’ll restore and some we’ll remake. I’m glad that we’ve finally replaced the single ground-floor post (last photo) with double posts. I’m sure the porch originally had double columns on the bottom but they probably rotted away to be replaced with the single columns.

Currently, we’re prepping the wood for paint, sanding it, filling in any blemishes, etc., and then we will give it a few coats of primer, for which we will be using linseed oil paints.

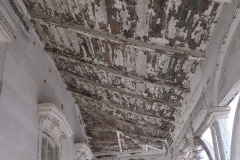
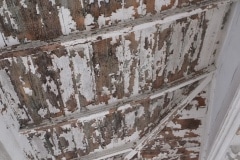
The porch roof, which had a beautiful concave structure made of laminated beams will be untaken next year as we’ll need to save up for that. It was a complex roof and the gutter was built into roof contour which I thought was very clever. You can see the hole for the down pipe in the last photo. Trick will be to hide the pipes.

Thank you to Andre and Brian of Hudson Valley Timber Frames, you were the best people for this job.

Parging and foundation drains

While our porch is still absent we thought it might be a good idea to parge the ground floor walls as they look a bit of a mess as well as put in a foundation drain to the left of the house. It will be no surprise to long term readers that when we reached the footings, we found another bodge. At the rear there was a 4′ length of wall that in most places you could stick your arm under past your elbow. I’d say that’s not good.

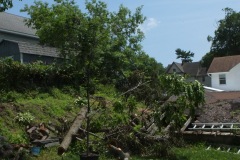
Again this took us a while to fix, mostly trying to stop the bank collapsing and clearing out all the dirt in the cavity. Glad to say that this has all been fixed. This bodge definitely wouldn’t have passed inspection by the building department had they seen it and why  they didn’t see it, I’m not sure. Fixed, moving on.

As you can see the outside is a bit of mess. We will be preserving our “Disaster Mansion” plaque and will try and frame it nicely in lime, but for now we’ll just cover it with plastic. Our first attempt at parging the front was last weekend but we didn’t get far as the air compressor we had wasn’t up to the task, but luckily we found a second hand, Honda powered petrol/gas, one for sale from a nice chap around the corner, however, this one in turn broke down after a few hours but that’s another story.

As you can see we first had to remove the cement plastering from the old lime wall. We did tell our old contractor to leave this wall alone, but did they listen, no, so not only did we have to pay for it, we had to spend our time and energy removing it. Fun times. As you can see the wall is a bit rough beneath the concrete but the parging will fix all of that.

By the way, the reason I’m drilling and grinding the wall was becuase it wasn’t flat (+/- 4″) and the membrane we install as part of the foundation drain is pretty rigid so best suited to a flatter surface. The black pipe by the way is connected to our down pipe from the roof.

We need to leave this first coat to cure for a week before applying a second coat, but fast forward a couple of weeks a second coat was applied and I tried to get it as smooth as possible, which isn’t that smooth. Too busy to spend the time learning to plaster so I cheated by going over it with a grinder and random orbital sander with a diamond pad and it comes out great, smooth but not flat to give that “Ye Olde” look, which was all the rage at the time, probably… First pic is my best plastering, second after a bit of elbow grease.

Apologies for the lack of posts, this year has been tough at my day job, new masters, which pretty much sums it up.

Work Resumes on Porch

I’m happy to say that work has now resumed on the porch. Delay was caused by a labour shortage but now Andre has employed a new apprentice, Brain. Over the last few weeks Andre and Brian have been cutting all the joints for the porch and I must say they look very nice. Apart from some bolts holding the porch to the house and the post bases I think it will all be pegged so possibly no nails involved – old school and I love it.

We were hoping to get a lot of these timbers painted or at least have a primer coat before they got erected, but all the wood was pretty much cut in the last week or two and we just didn’t have the time, Aimee has O+ fast approaching and I have tight deadlines at work which means I have to do day job work most evenings and a bit at weekends, yes it sucks. We did manage to get some timbers painted but the rest will have to wait.

We promised the city historical officials that we’d rebuild the porch as close to the original as possible.  Original pillars were true 4″x4″ with a chamfer width of 1″, new pillars are being beefed up to 5″x5″ so scaling up the chamfer we were looking at a width of about 1.25″. The ones Andre made were 3/4″ and although done well, they just looked underwhelming. In all fairness to Andre, he was using the largest chamfer bit he could safely use with a hand held router, any larger and it starts to get dangerous. Obviously I wasn’t happy, so last weekend I devised a jig (based off this jig), trouble was we had until Thursday (3rd Oct) to complete them as that was the day that Andre had hired extra hands to help raise the porch.

It took me half a day to make the jig and then an hour or two extra to refine it after initial test cuts. By the way, for situations like this I pretty much rely on Cyanoacrylate glue (super glue) as you have a strong bond in a few minutes.

Apart from the ends of the chamfers, which needed to be finished by hand, the results were surprisingly good, only issue was it was time consuming. The router used a 1/2″ bit and due to the jig design you had to make maybe 5 to 6 passes. I timed making the chamfers for one edge and it took about 45 minutes and an extra 20 minutes to clean up the chamfer ends by hand. So for one pillar we’re talking about 4 1/2 hours and we had 12 pillars to do. Ouch!

There was no way that we were going to finished them in time so I spoke with Andre and he kindly took over the task, which I think took him and Brian probably two days. I definitely think it was worth the extra effort, so thank you Andre and Brian.

First Sash Window Complete

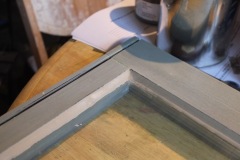
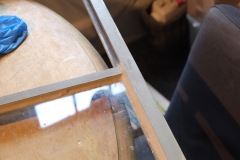
Well, almost complete, still need to finish painting it, screw in the sash locks, lifts and pulleys, cut the glass and then glaze them. Even though this is my third window (first two were test windows) it still took a while, in part because I made a few jigs along the way (to help me replicate cuts in future windows) and I also made pretty detailed measurements so I can make accurate reproducible cuts.

I can’t stress enough how useful this digital height gauge was for recording and setting router bit height and distance from fence, with this I could easily dial in measurements to 0.1mm which is pretty damn good.

We are painting all our windows with linseed oil paint from Sage Restoration, it’s more expensive than regular paint but has the following advantages,

  • It’s environmentally friendly
  • It allows the wood to breath. Currently modern paints aim to seal the wood against the elements, but if water gets behind it, it can’t easily escape which can cause decay.
  • You don’t need to re-paint it, you can just paint on pure linseed oil every 5 years or so to nourish the wood

If you want to know more about linseed oil paint, this is an informative resource.

I’ve also heard that the reason that the old and dangerous lead paint was so durable was that it was basically a linseed oil paint with the lead added as a pigment and/or to reduce drying time. The history of lead paint can be found here on Wikipedia.

For the first primer coat we mixed 50% linseed paint, 35% linseed oil and 15% pure pine turpentine. Some resource say you don’t need to thin the primer coat but it seems to make sense to me that a thinned coat will penetrate deeper into the wood. This isn’t the final colour as we’re still deciding that, though I think we’ll go with shades of green/blue, a lighter one for the sashes and a darker one for the frames or maybe the other way around, we can’t decide.

As this goes to print I’m already working on the second window.

If anyone is wondering how our porch rebuild is going, it’s going slowly, mainly due to Andre not being able to fine suitable help, so if anyone knows someone who wants to learn about timber framing, reach out and you could learn from an expert and get paid for it!

Finally got my hands on some Accoya

I’ve probably mentioned Accoya wood briefly in the past. It’s regarded as one of the better woods for making windows, due to it’s rot resistance and dimensional stability. Accoya owes these properties to the process of acetylation, which in a nutshell is pickling the wood.

Treating or modifying wood by subjecting a softwood to a vinegar, which turns it into a hardwood by preventing the cells in the wood from being able to absorb water.

So acetylated wood is… Pickled wood?

More or less. Yes.

Source: What is acetylated wood?

I’ve been trying to get some for a few years now but the suppliers won’t sell to the public. Luckily I bumped into a friend, John Paul, who told me that he had just got the local lumber merchant (Herzog’s Kingston) to order him some. I emailed them the next day and managed to piggyback my order on the existing order, thank you John Paul and Paul Gallo.

The wood arrived today and it will be a great help, especially the 2″ thick stock as this will be ideal for window sills. Currently I’ve had to laminate multiple layers of narrower lumber together to get the full thickness of a window sill (3.5″ tapering down to about 1.75″) but this is time consuming as every bit first needs to be run through the jointer and then the planer etc.

I’m hoping that this wood goes a long way as it isn’t cheap, this small order cost over $1600 (front pile). Incidentally when we were moving the wood inside, Aimee commented that the wood spelled of vinegar, so I guess it really was pickled!

By the way the original wood is nothing special, I believe its pine but the grade is high so no knots. It’s supposed to be easy to machine as well so I’m looking forward to working with it. 

Time for some pruning

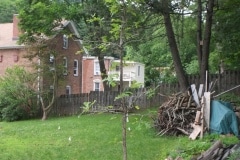
Of course wrong time of the year for pruning but that’s fine with me. Todays job was to cut up a large limb off our walnut tree. Neither Aimee and I are fans of the walnut and the fact that they produce Juglone, a toxic substance that prevents many plants from growing under or near them is another reason we’re slowly cutting it down.

I am a big, big fan of trees and the walnut will be replaced. I do have a bunch of trees that I’m growing and will start to plant shortly, these include Oak (English and Burr), Dogwood, River Birch, Silver Birch and a couple of types of pine tree. They won’t all fit but I’m looking forward to planting a couple of oaks best of all. As a kid it was my favourite tree to climb, so I have a fondness for them. I won’t be around to see it in it’s prime, but I’m glad someone else will. What is the saying? an Oak lives for 300 years, the first hundred it grows, the second hundred it matures and the third it dies.

Last week I got up on a ladder and with a small electric chainsaw I started to cut the branch. My intention was never to cut through, just enough to snap it. I think I was maybe 30% through when I heard a loud crack so I beat a hasty retreat. It didn’t break, but you could see a split opening up, so this week I cut a bit more, not much maybe 8 -10 strokes with a hand bow saw and it started to spilt again. No it didn’t fall, but I didn’t want to risk injury so I decided to wait and let nature do it’s thing. We had storms on Wednesday and on turning up to the house on Thursday the branch had snapped. We weren’t really bothered if it fell on the garage, but as it happened it landed perfectly on the lawn. Couldn’t have gone better.

The following photos illustrate the deep rich color of the walnut heartwood which is why it’s such a popular wood amongst wood workers. As I recently bough a lathe, I may try and make something with these logs.

By the way I can highly recommend the great Bahco bow saws, a Swedish company who also used to go by the name of Sandvik. With a sharp blade you can go through a 6″ log in about three minutes, highly recommend for small jobs.

Bryd Shelix cutter head + Dewalt 735 = $$$ – noise + peace and tranquility

If you own a Dewalt planer you’ll probably know I’m referring to the Byrd helix cutter head which cost close on as much as the planer did a few years back. So why did I plonk so much money down on a set of blades?

Main reason was the noise, if you’ve ever used a planer you know it screams when in operation and ear plugs do little to lessen this. It got so bad that I really didn’t like using the planer, plus the whole street can hear it, hence the self imposed 7pm curfew on its use. In short this machine is a howling banshee in operation which is not pleasant and the noise travels.

The original cutter head consist of three high speed reversible blades that span the full 13″ width, with the Bryd helix cutter head, you get about 40 blades arranged in a spiral. Each blade is carbide (holds its edge longer) and has four sides which can be rotated if you dull or chip one.

The helix blade will be quieter, in part due to the spiral nature of the cutter head as only one blade is striking the wood at any one time, compared to the original blade which would strike the wood over the full width of the wood.

Install isn’t trivial but as the Bryd cutter head is so popular there are plenty of quality installation videos on YouTube which helped alot. I relied mostly on two below. I did have issues removing the original cutter head, and I eventually removed the spiral drive gear and used a 1.25″ diameter wooden dowel to help with the removal (not my idea but can’t remember where I came across it).

So today I finally got to try the new cutter head out for the first try. For starters the Dewalt planer (the only planer I’ve ever used) is a bit noisy anyway even before you start feeding wood through it, I’m thinking noisy vacuum cleaner levels. With the new cutter head I thought the standing noise was a bit higher, but we’re still talking noisy vacuum levels.

My first test was 7.5″ wide pine and boy what delight it was, I had simple ear lugs in and it was really quiet, no high pitch screech of the old blades. I did notice some slight ridges in the wood so I will check the seating of the the blades.

So would I recommend this to other Dewalt owners, yes most definitely. I do think the resulting cuts are smoother but whats most important to me is the noise reduction which is a welcome blessing. Sure it’s still going to sound like a noisy vacuum in operation but no longer the banshee and I don’t think I have to curfew it now.

Thank you Bryd Tools.

Large stools/window sills

For a while I’ve been trying to figure out how to transition the window frames, which will be set within the walls, to the inside of the framing, a distance which varies throughout the ground floor of between 6″ to 9″. I spoke with Don the Johnson and he thought of building this into the window frames and then just slotting them in, interesting idea and one which eventually led me to extending the window bucks out with 2×12″ pressure treated wood. I know it sounds confusing, but it makes sense when you see the pictures.

We sanded the wood and filled any defect with epoxy putty as this pressure treated wood will eventually be a finished painted surface. You’ll notice that we decided to add a 45° angle to this so it will allow a bit more light in and improves the outside views from within. Like most things at DM nothing is straight forward, not much is square, parallel or level so making the beveled parts took quite a while. With one of these almost complete I’m thinking that the making of the actual sash windows will be pretty straight forward as they will be square. Looking forward to when I have one complete sash window under my belt.

The deep window sills will be great for house plants, glad we have them. By the way technically the window sill is the sloping part at the bottom of the window on the exterior side and what I’m referring to as the window sill is the the stool, but how many people know what a window stool is?

Despite common belief, the window sill is found on the outside of the home. Inside the home, the part of the window often called the “sill” is actually the stool. However, the stool is often described as the sill, even by window experts. As a result, it can be hard to tell which part of the window a person is referring to when the sill is being discussed.https://www.championwindow.com

Wood for the porch rebuild has arrived

The wood for the porch rebuild has finally been delivered and it’s pretty impressive. I think the porch will out live the house.

Andre has spent a lot of time finding good wood at a good price and in the end we ended up with Douglas Fir from Quebec which is where a lot of the wood in the US comes from anyway, so by ordering direct from the timber yard we will have saved. It was still expensive though and we’re talking 5 figures. The order also included some lovely camura wood for the decking.

Incidentally Douglas Fir isn’t a fir tree, it get its name from  David Douglas, a Scottish botanist who first reported the species and what a tree it is. Grows up to 300′ tall and very much reminds me of the Californian Redwoods.

As mentioned in a previous post we plan to rebuilt the porch as close as possible to the original, notable exception being that we are making everything a little bit stronger, for example, the vertical posts are being upgraded from true 4×4’s to 5×5’s and hopefully it won’t be too noticeable.

Delivery day was a bit of shambles, the wood was supposed to be delivered between 8am and 12 noon but didn’t turn up until a little after 4pm due to custom holdups, during which time we had four people hanging around, including Aimee. Sucks that in this world of instant communication that the delay couldn’t have been passed on. Andre did try and call the shipping company but no joy. On top of this we had to hire a bobcat skid steer so overall quite an expensive day.

The lorry from Canada has numerous stops on its way, ours was the first and then down to Long Island and then the Carolinas. Aimee said that it was the longest lorry that she’s ever seen and it took quite a while to negotiate the turn at the bottom of the road. Cute that driver took his two young kids along for the adventure.


I couldn’t be there for the unloading but Aimee and Andre snapped a good number of pictures. I didn’t realise what a big operation it was, so in no particular order, voila!

These timbers are huge and the majority of these timbers have been stored indoors. Being a timber frame builder, Andre had a clever way to move them about, once on the ground, using a bunch of heavy duty rollers so carrying was down to the minimum.

It was dark by the time everything was tucked away.