A Wall is a Wall

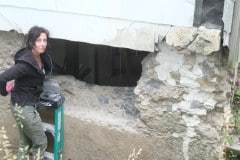
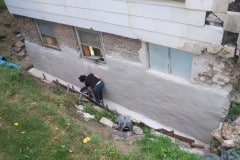
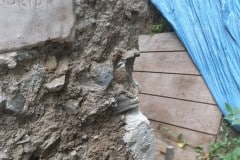
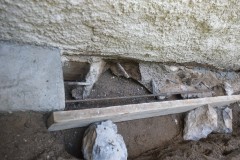
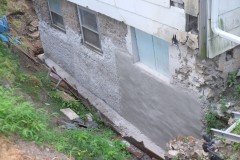
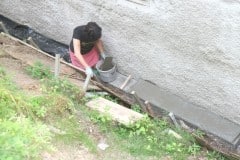
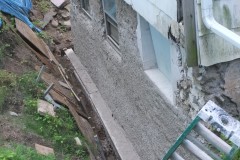
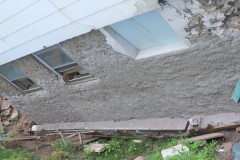
Before we can replace our sill beams the corner of the house needs to be repaired, it had some really funky repairs done on it in the past so I’m glad we’re fixing it. Weather is just about decent enough to risk doing lime mortar.

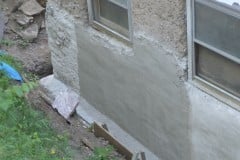
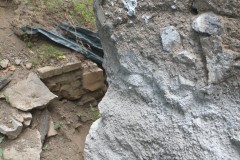
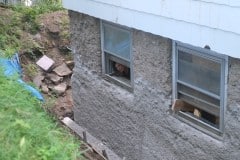
From the photos you can see it was in pretty bad shape and even worse by the time I removed all loose and flaking mortar. A lot of the mortar was of very poor quality and would crumble in you hand, hence the huge hole you can see.

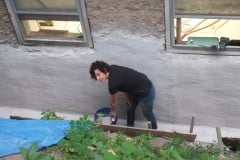
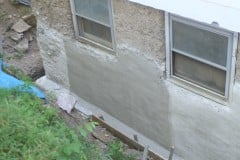
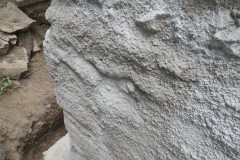
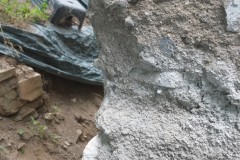
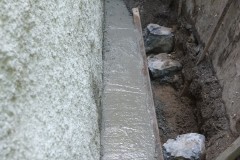
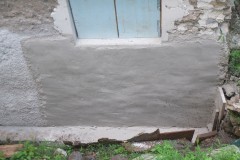
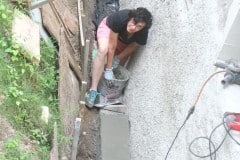
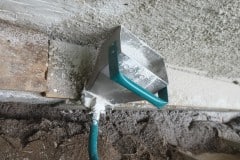
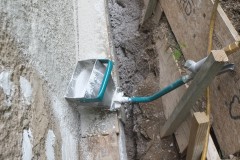
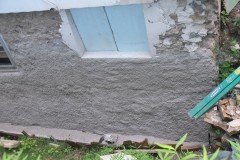
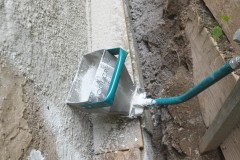
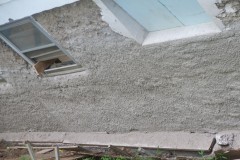
On Saturday we rebuilt the main structure of the wall by hand, filling in small cracks & gaps and on Sunday we used our mortar sprayer to finish the job off. We had to spay a lot on as in some places the mortar is a couple of inches deep. We did push in stones whenever we could and we do add fiberglass strands to the mix – in the old days they may have added horse hair.

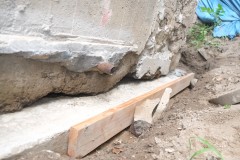
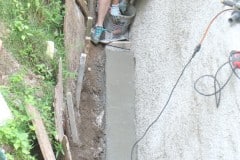
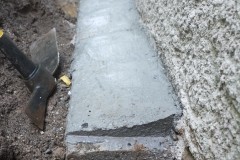
I’m not great at finishing the surface but my trick is to go over any irregularities with a diamond polishing/grinding disk which will give great results. I’ll grind the top nice and flat and it will also have to be at an angle as the two beams are at a slightly different height, probably due to subsidence etc.

The last couple of nights have dipped below freezing (disastrous for lime mortar) so we built an outside tent around the wall and left a small fan heater inside. Each day we’ll spray the wall with water which helps the lime to cure.

The reason why we look like we’re not doing much in the video is that each batch of mortar takes about 25 minutes to mix – it’s a lime thing. Also the SD card ran out of space, hence the abrupt end.

Tales from the crypt

Well the basement, have to spice these posts up a bit!

On Thursday we popped down to Hudson Valley House Parts to pick up some lime binder as we only had 1 & 1/2 bags left. Unfortunately they only had the pre-mixed in stock which is an expensive way to buy the product so we left empty handed, bit of a bugger as we really needed the lime so on Thursday evening we decided to get up on Friday at 5am and drive 3 hours to LimeWorks in Telford, Pennsylvania and pick up ten bags of NHL lime. Bit of a trek but it was really nice to visit the LimeWorks HQ and meet the highly knowledgeable staff. If you have an old house, it might be worth visiting LimeWorks, especially if you’re doing some of the work yourself as they as they have a great series of educational workshops.

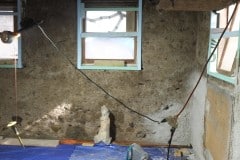
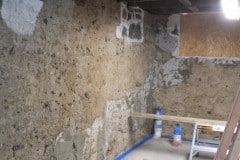
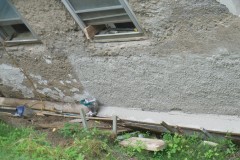
We started early on Saturday, but as the base of the walls had deteriorated quite a bit they required a lot of the mortar and stone, hence progress was slow and after seven hours we had maybe done a half of what we had hoped. Also our local historic preservation expert Derrick popped around and though that we should remove all of the sound plaster as he thought that it was Portland cement. You can see the plaster in the second picture. I’ve started removing it but it’s tough stuff and will probably take 3 or 4 evenings to complete.

Also of note in the second picture is the blocked up coal chute high up on the wall. The mortar had just crumbed so had to be replaced, hence why it looks new.

Sunday was a slower day for us but we did manage a good 4 hours or so and started to removing the plaster. This week we’ll hopefully prep all the remaining walls and be ready to finish the parging next weekend. Good timing as temperatures are starting to drop. 

Kingston weather for the next 10 days

I hear you Tom

Tom appeared on the sidewalk with a bucket of whitewash and a long-handled brush. He surveyed the fence, and all gladness left him and a deep melancholy settled down upon his spirit. Thirty yards of board fence nine feet high. Life to him seemed hollow, and existence but a burden.

Mark Twain, Tom Sawyer, Chapter Two, 1876

I have to say that as a kid I would have felt exactly the same as Tom and did so on many occasions, especially when my dad would order tons of soil/gravel or sand and we’d (myself and brothers Ian and Matt) wheel barrow it away to the project site. Having been through that as a kid I don’t seem to mind tedious tasks as long as I can take my time and I don’t include whitewashing as such a task. My Dad wasn’t a task master, he was the best Dad I could have wished for and looking back, these were just jobs my Dad needed help with. So in retrospect I don’t think I would have been able to tackle this house without having spent part of my youth shoveling huge mounds that never seemed to go down with my Dad and siblings.

So back to whitewash, rather than it we made our own, as suggested by our local expert, Derrick McNab. There are lots of recipes out there but this is the one we choose and is based on a recipe by Andy deGruchy of Limeworks.

Our lime whitewash recipe:

  • 10 lbs St. Astier Natural Hydraulic Lime (NHL 3.5)
  • 2 gallons of water
  • ½ cup of Borax (Won’t allow mold & helps repel insects along with the lime)
  • 3 lb common table salt (Salt is proven to harden lime whitewash.)
  • ½ lb of titanium dioxide pigment for a bit of extra whiteness
  • 1 oz Alum to help make the pigment become more colorfast

Before the whitewash went on I sprayed down the wall with water and then ran over it with my random orbit sander to remove any over spray etc. which worked great and in future I may use the sander technique to remove any blemishes. You’ll notice that the whitewash doesn’t look very white, in fact it looks like we are brushing on water. This is normal and it takes a few hours for the chemical reaction to take effect which I think is crystalline in nature which in turn increases its opaqueness. Aimee is working right to left and it’s difficult to tell the difference.

We’ll probably apply a three coats leaving each coat 24 hours to cure. If we were using regular paint then we would have had to wait a month for the lime mortar to cure but as whitewash is a watered down mortar it can be applied immediately.

By the way we will plaster the top section but are waiting until we can back fill the trench a bit so it’s easier to get.

Plastering Continues

This Saturday I continued plastering. I was on my own as Aimee needed to help prepare for an O+ benefit show (Amanda Palmer and friends). I was a lot slower as I had to mix and then go inside every time the hopper was empty (every couple of minutes) but still managed to do 8′ or 9′.

I was hoping to finish it off today (Sunday) but developed a bad sore throat last night and haven’t felt that great today. I tested -ve for Covid but will retest in a few days. Hopefully we can finish it off in the next few days and once that is done we will whitewash it and then leave it for a few weeks to fully cure. We’re going to the UK for two weeks at the end of August so that’s ideal timing and on our return we can start on the foundation drain and start to fill in the trench.

Today Tuesday we finished off what we wanted to do and that was to plaster around the corner a few feet. The corner was in pretty bad shape and in places it was pitted by at least 3″ and as the mortar is weak compared to stone I added extra stones in these areas.

In the beginning of the video I spray some mortar on these spots, push selected stones in and suction does the rest and by the time I got around to plastering that section, the plaster had semi set and the stones were holding well.

As you can see from the video, the corner could do with a little tidy up but since that will be beneath ground I may just leave it.

Again the ToolCrete sprayer is a great asset.

The plan for tomorrow is to make some whitewash and start applying it as that also needs time to cure.

It’s a Cover Up

This weekend we fixed up the remaining footings and tried our hand at plastering.

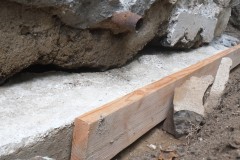
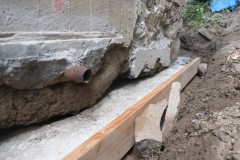
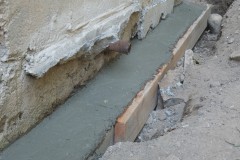
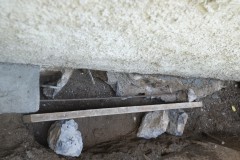
On Saturday I finished off chiseling away the huge stones that were preventing me from continuing the footings repair at the rear. I added extra rebar and again rust treated the existing rebar. Around the corner we discovered huge gaps (you could put your arm in up to your elbow) between the wall and the footings so we filled these in and added a chamfer.

On Sunday we tried our hand at plastering and we think it went pretty well. Adding this coat was a lot slower as the wall undulates quite a bit and in parts I was probably spraying over an inch thick of the lime mortar, troweled it flat after I emptied each hoper. It’s not perfect but it’s a great thick coat which will be underground anyway. This now has to be left exposed to the air for a month to allow it to cure but after that we can start to fill up the trench. We’ll probably apply a coat or two of lime wash which we’ll do once we finish the whole wall.

Again, so pleased we found the mortar sprayer, what a mess it would have been without it and the time….

Should have worn a long sleeve shirt as I was splattered with a lot of lime which gave me some irritating burns on my arm, also the temps were in the triple digits so I was perspiring profusely whilst Aimee was glowing.

We returned on Monday night and managed to do another 6′ or so. We’ll complete it by the weekend.

ToolCrete to the Rescue

Our latest project has been to fill in the trench behind the house but before we can do this we need to:

  1. Repair the footings
  2. Remove flaking lime mortar from wall and replace
  3. Install foundation drain

This is how we currently stand:

1) Repair the footings. We’ve repaired the majority of the footings but have about five foot to go. The five foot section has some huge rocks in the way and these rocks are part of our footing so can’t be removed completely. I’ve been trying to trim them down with a combination of hammer drill, hammer chisel and diamond bladed grinder. Getting there but it’s slow and uncomfortable work. I’m currently about 4/5 of the way so light at the end of the tunnel 🙂

Aimee has been working on adding a concrete fillet/chamfer to prevent any water settling on the footings and to divert it into the yet to be installed footing drain.

2) Remove flaking lime mortar from wall and replace. We’ve made a lot of progress in the last few weeks, removing loose mortar, repairing holes and cracks etc. This weekend we managed to get a coat of new lime mortar on the wall. One of the traditional methods of applying the first coat is to literally throw it on, hence the name harl coat. If you’re interested this is a good video from Mike Wye explaining the harling process. You might think that just slapping it onto the wall with a trowel would be just as good, but I’ve been told that it isn’t and the bond will be poor and soon fail. We did apply a harl coat earlier this year and we found it pretty slow and hard work.

We didn’t fancy harling the back wall as it’s pretty large and the space is a bit confined which would make harling tricky, especially low down the wall. After some research I came across the ToolCrete stucco and plaster sprayer which is sold by Mortar Sprayer. I watching some encouraging videos so I ordered one and boy are we pleased with it. It’s powered by a compressor which we could luckily borrow from Joe and Deborah. The compressor wasn’t as powerful as they recommended (7cfm @ 90psi versus our 4cfm @ 90psi) but the ToolCrete sprayer allows you to block up one of the three nozzles and it worked great. We did make the lime mortar a bit wetter than usual and again added chopped fiber glass strands.

It took us maybe three hours to do the wall but that was because you have to mix lime mortar for about twenty minutes per batch. If we had a continual supply of the mortar I think we could have been done in about 30 – 40 minutes. Compare that to a couple of weekends if we had done that by hand and I don’t think the results would have been as good as with the ToolCrete sprayer.

We’re going to do the rest of the remaining walls with this sprayer both internal and external and this sprayer will save us so much time. Maybe if we can get a third person to help then they can devote themselves to the mortar mixing.

We have to leave this first coat to cure for a week before we apply a second coat and that may be the final coat. As most of this will be underground it doesn’t need to be perfect.

Lastly the sprayer is easy to disassemble for cleaning. Wish the hoper had a small lip so I could have hooked it on the window frame when Aimee was loading up as it does get a bit heavy after a while, that said I can always drill two holes and add two protruding bolts. All in all a great product which is very satisfying to use and it’s made in the USA 🙂

3) Install foundation drain. No progress on this yet but we know what we need to do.
Harled a bit this weekend, but feeling better now

Harling is the process of throwing a lime slurry onto a wall. I’m guessing the name derived from the word hurl. We’re doing this to replace the flaking lime render on our walls. Lime mortar walls are porous and I believe it’s normal for the surfaces to flake like this over time. These walls probably haven’t been touched in 150 years so they deserve a little love. The harl coat isn’t a finish coat, rather it provides a good textured coat for subsequent coats. As we will be framing out the downstairs to add insulation we will leave the majority of the walls with just this harl coat. Only internal walls will have finishing coats.

It’s a bit of a messy and physical job with lots of the lime ending up on the floor. You have to wear eye protection as the lime is pretty caustic and will burn. Mixing lime is also pretty time consuming as a batch will take a minimum of twenty minutes to mix. Lucky our friends John Paul and Joe and Deborah both lent us decent mixers which made the process a lot easier.

For the mixing process you have to dry mix the sand and Natural Hydraulic Lime 3.5 (we buy ours from the fine people at Limeworks) for 5 minutes, add water and then mix for a further twenty minutes to make the render more workable or ‘fatter’.

We are thinking of buying or hiring something like the Render Gun for the harl coat and pay someone to do the finish coat.

Coming out of hibernation

We’re slowly coming out of hibernation here. In previous years you’d often find us working in freezing conditions, but now those days are thinner on the ground.

We are making progress on the house but we still have some major tasks to do and one of them is to apply a new lime parge coat to the exterior walls, install a french drain and then fill up the trenches around our house so it’s not an assault course.

Clearing out the back wall has been most tricky as the bank keeps on collapsing and everything has to be carried out by bucket. Luckily I had a guest appearance from my brother Matthew and we made a decent dent in the job. We’ll continue this job as the weather improves.

In other parts of the house we have been prepping to get the floor level but this been delayed due to the cold as the concrete slab and ambient temperature needs to be above 50°F/10°C, fortunately those temperatures are fast approaching and once we have a flat floor we can begin framing it out internally for walls and insulation.

Prepping for parging

Apart form the concrete pour, another task we are trying to get done before it gets too cold is to apply a parge coat/plastering of lime mortar to our outside walls, reason being we are fed up of the huge trenches and not being able to walk around our house. The old mortar has flaked off and as we had new footings added to the rear walls it meant that the normally sub-terrain walls were fully exposed. Alas we were busy doing other tasks so over the last year or so three foot of sandy sold has been washed back against the back wall.

This weekend we started to dig out the sediment. It’s too steep to wheel barrow so it was shoveling into buckets. We did hire a friend of ours to help us out but he bailed after about 1 & 1/2 hours, shame. We have, however, enlisted the help of some other friends Cari and George.

As we dig, more soil collapses back into the trench. It’s annoying as you think you have finished and then bam, another couple of wheel barrows needs to be removed, but I hoping that once the soil reaches an angle of 60 – 70° it will become stable.

We don’t have any video of Georges work but he’s made good progress, again more land slides after he left but we’ll remove them.

After some research it looks like we may need three coats of lime mortar, a first or bonding coat which is usually thrown on, then a scratch coat (called a scratch coat as it’s usually scratched or scored with a comb to give it a rough texture). followed by a finish coat, with each coat getting progressively thinner. Unfortunately each coat takes about a week to partially cure before the next coat can be applied, so it looks like we won’t have enough time this year. Bit of a shame as we really wanted to fill in these damn trenches around the house.

We will complete the digging out this year and then and add tarps so the bank doesn’t get washed down again and then wait for spring, which here is April/May.