To Jess

I dedicate this post to Jess Graves, who left us, far too early. Jess you were a very special person and will be missed so very much. Our thoughts go out to Luke and family.

Apologies for the lack of posts. This is due to a combination of demanding day (evening and weekend) job and cold miserable weather. Until the weather gets a bit better, jobs around the house will probably be limited to gardening and interior design, in particular tiles for the downstairs.

A while ago, we decided to have a tiled floor in the bathroom and hallway and after shopping around we found these lovely cement tiles from Zia Tiles, in particular the Star and Cross tiles. We ordered some samples and they looked lovely, only snag was the price, $17 a sq. ft. which, including shipping and tax from Los Angles, would have cost around $6,000. If this was the only expenditure on the house, we would have probably just bought them but alas it’s not.

We searched for alternatives but we didn’t really find anything else we liked. So then the idea of making some tiles, came to us. We consulted with my cousin Judith, a ceramics expert, and Judith thought it was definitely something we should try, so we started looking around for tutorials. We did find a few and in a nutshell cement tiles start off with a mould to which you first add an 1/8″ layer of pigmented mortar, followed by regular mortar, with chopped fiberglass added for strength.

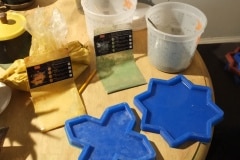
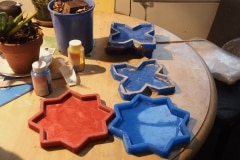
First step was finding some moulds and I was lucky to come across Athena Molds who could kindly made us some custom “Star and Cross” moulds of the same dimensions as the Zia tiles. The Zia tiles were about 5/8″ thick but I thought 1/2″ deep moulds would be sufficient, time will tell. In total we have four stars and four crosses, so we can make a bunch at a time.

Initial results were promising but it got tricky when it came to deciding the final design. First we fancied terracotta, then greens, then green and terracotta, then black and white etc. you get the idea. As we’re using these tiles downstairs, which will be fairly shaded, we wanted something that would lighten up the place a little, but at the same time not be garish and jarring to the eye.

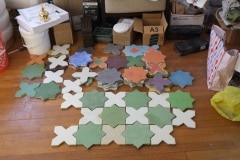
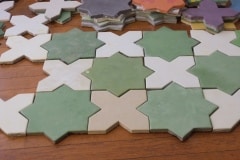
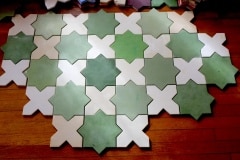
After much tile making and debate we decided on cream crosses and green stars (and that may change!) and as the tiles are individually made they’ll have an interesting color variation. Possible we will may change the colours subtlety as we move from hallway to bathroom.

This is roughly how they’ll look. We’ll drop some of the tiles if we don’t like the shade etc., for instance some of the crosses below are too white.

And now for some technical stuff, boring unless you want to make your own.

  • Mortar (cement, water and sand). Because we’re using pigments, I initially looked for a white mortar mix, my favourite was Rockite, which was fast setting and gave a beautiful, void free finish, only downside was the cost, $15 for a 5lb bag, which didn’t go far. I also experimented with using Rockite purely for the pigment layer and regular fast setting mortar for the remaining. This seemed to work, but, for a few tiles, the pigment layer didn’t bond well and started to show signs of delamination. Due to this and the high cost I decided to look at a few other mortars, eventually settling on the ‘RapidSet Mortar Mix’, which costs about $18 for a 55lb bag. When using this I used pigment throughout the thickness of the tile.
  • Pigment. I’ve been happy using the pigments from DirectColors. I did try some from Amazon, which were lovely and vibrant, but which also made me suspicious of how long they would last. In the end I’m sticking with DirectColors as they’re made in the US and I trust them. Your choice of pigment and final colour really dictates what colour mortar you need to use, if you’re after light colours then you’re best off starting with a whitish mortar, however if you’re after more earthy colours then you can get away with the regular grey mortar mixes.
  • Sealant. Cement tiles need to be sealed as they’re porous, spill some Chateau Lafite, Rothschild and you’ll stain them. For our sealant I’ve chosen Penetrating Concrete Sealer from Green Building Supplies. What I like about this water based sealant, is its low viscosity, it needs two or three coats before being fully saturated, so the sealant is going deep into the tile as opposed to a lot of other sealers which just seem to sit on the surface.
  • Reinforcement. I’m adding chopped fiberglass to the mortar mix to increase it’s strength.
  • Anti-slip. The last thing I want are the tiles to become an ice skating rink when wet, so I’ll be applying a final top coat sealer with an anti-slip additive.

Happy Birthday Martin, I know you would have loved these chairs

Recently we’ve been thinking that it might be nice to sit down whilst doing some work at DM. Our work bench is higher than most tables so chairs don’t cut it. What we need are some workshop chairs or stools. I did have a few workshop swivel stools with back rests but we sold them when we left Oakland, sigh. By the way we’re looking for something that fits the aesthetics of DM, so no chrome or thick vinyl clad foam seat .

I was toying with the idea of making some but adding a swivel seat put me off the idea. For some time I was looking on craigslist and ebay for stools but nothing ever decent came up, but then I came across something called a “Toledo” drafting chair which looked exactly what we wanted, seat was at a good height with foot and backrests and it also swiveled. My mistake was that I had been searching for workshop stool when I should have been searching for drafting stool. Since I discovered the Toledo I’ve spoken to a few friends about it and for most this chair was already on their wish list. Aimee and I had never heard of it.

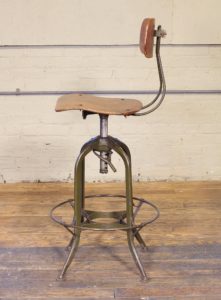
Below is a vintage Toledo and these sell for $300 – $1,000 per chair so we we aren’t going ‘chic vintage’.

Vintage Toledo drafting chair

A got this snippet about the history of these chairs from industrial furniture:

What came to be known as the Toledo Metal Furniture Company was started as Uhl’s Cycle Emporium at 1021-23 Monroe Street in Toledo, Ohio in 1898. Philip E. Uhl (president) and Clement Richard Uhl (VP/supt) founded the company on $85. Others of the 10 Uhl brothers joined the firm, including Joseph Ferdinand Louis Uhl (secretary/GM), Otto G., Charles, Henry and Robert Uhl. Joseph, a 1-legged concert violinist, also directed the family Concert Band and Orchestra.

As the popularity of automobiles reduced the market for bicycles (1900-1910), the Uhls shifted their focus to manufacturing ice cream parlor furniture, renaming the company Uhl Art Steel, and in 1904 incorporating as the Toledo Metal Furniture company. By 1920 capital stock reached $300,000, there were over 150 employees and the product mix had been expanded to include office and classroom furniture.

Fortunately for us we found that there are modern day reproductions of these chairs, the most popular being from Restoration Hardware. The hunt was on! Luckily these chairs seem to be pretty popular and they come up often on ebay and facebook. Most people seem to use them as kitchen or bar stools which is fine for us as once we’ve finished with them in the workshop, we’ll use them in our kitchen or close by.

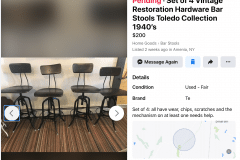
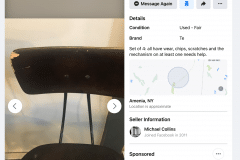
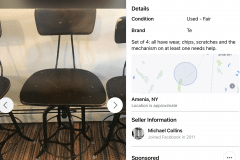
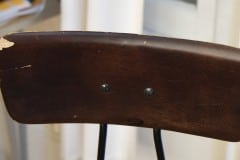
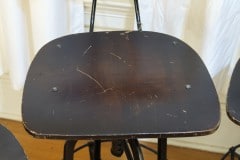
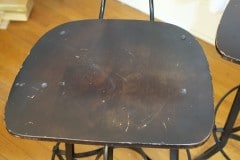
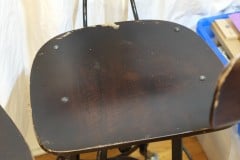
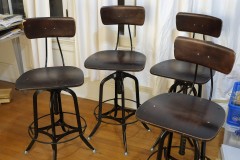
The best deal I came across were these. They did look a bit beat up with scratches, chips, a broken lift mechanism and the backs looked bent. I offered the seller $160 which was accepted and we went to pick them up last weekend, a 50 minute drive.

The sellers were a lovely couple, Michael and Patty, who run an antiques and furnishing store, called Amenia Station. If you’re ever in the area I recommend popping in for a browse, you never know what you might find, plus there is a lovely cafe next door. Back to chairs, yes they did look beat up, but they felt rock solid and the backs weren’t bent, just the way the adjustable back rests were set. We agreed to buy them and Michael kindly let us have them for $150 for all 4!!! Luckily they did fit in the car.

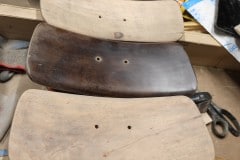
Back home we decided to sand all the paint off and repair the chip with epoxy and it so happened that the lift mechanism was also fixable.

We’re in the process of sanding and refinishing these chairs and we’ll post an update when they are finished. They won’t be perfect but we love them. We have a chair always for you Martin.

Cool cars at Disaster Mansion

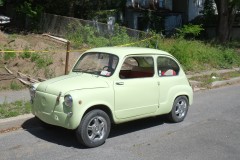
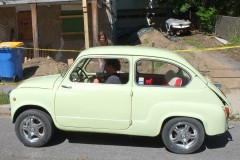
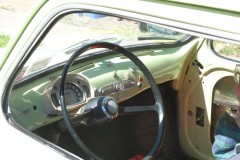
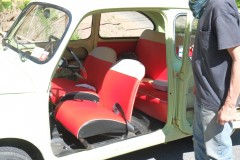
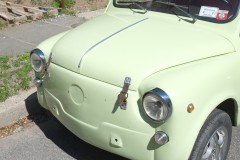
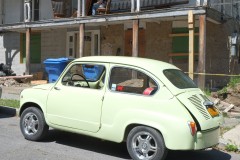
Today we honored with a visit from this cute car, the owner of which would rather be known as the Possibly the Honorable D the J.

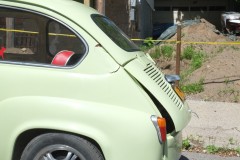
Some free beers in Kingston if you can identify the car and the year. Note the engine was upgraded to a 850cc, hence why the boot is continually open.

As we left Possibly the Honorable D the J had us join him in pray that he get home in one piece. Thankfully his prayers were answered and he did manage it.

Thank you Possibly the Honorable D the J for reveling this classic and you can trust us that we will not reveal your identity.

Cherish your friends

Today my best friend Martin will be laid to rest. Alas we weren’t able to attend the service but I am gratified that many of his close friends, including Rich, Huw, Jayne, Judith, Linda, Helen, Chris, Claire will be there to say their farewells. He will be desperately missed by all. What a solid chap.

I’m not alone in saying that Martin is part of our DNA and always will be, binding our memories and friendship. Martin you’re forever with us and we all thank you for sharing your very generous life with us. Like most of his friends we had expected our adventures with you to continue so I hope you watch down on us as we continue with them, sadly without you.

My last thoughts go out to his sister, Cathy who was forever at his side.

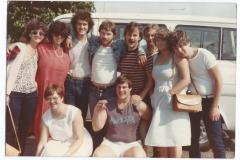
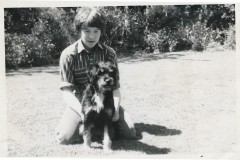
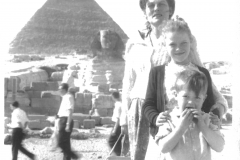
I leave you with some pictures of Martin and a funny story at the end.

One of the funniest things I ever saw, witnessed by my family and our cousins, was on a Boxing day when we all went up the common to watch Win and I fly our rather large Nasa Para Wing kite (hand built by Martin). It was a typical winters day, cold and damp with a decent breeze, but no rain. Win was already up there setting up the kite towards the rugby pitch end of the common as the wind was blowing toward the railway station. I helped him launch it and then stood back and watched as family chatted and half watched Win. It was soon obvious that Win was struggling a bit with the kite, knees bent, leaning back with arms out stretched. It was like watching a tug-of-war, Win would get pulled forward a few steps and then manage to stagger back and regain his ground. It was now becoming more fun to watch and we all became engrossed with us shouting encouragement to Win, which of course made him laugh which didn’t help his concentration at all. It must of have got tiring for Win as suddenly he went went down on one knee. Who was going to win this battle?

With Win on the ground his position was compromised as he couldn’t step forward or backward and before we knew it Win was down on both knees, leaning back on his haunches. There must have been a gust as the next thing we saw was Win flat on his stomach, in the mud. He could have let go of one of the lines, but did he, no, like a trooper he hung on, being pulled and at a decent rate of knots I may add into the sunset, well not quite the sunset but you get the idea, artistic license. We were all in hysterics by then and I think he got dragged pretty much all the way to the swings before the wind dropped and Win was able to stagger to his feet. By this time the whole front of Wins body was thick with mud and as Win said after, he was pretty sure he was dragged over some dog muck in the process. Luckily Win had his own car to drive back home in.

To this day this has to have been one of the funniest things I have ever seen and all that witnessed agree. Win also saw the funny side and he would often laugh at the retelling of this epic kite flying adventure.


Win you were a legend in your own lunch time and will continue to be!!!! – We salute you.