A window shrinks

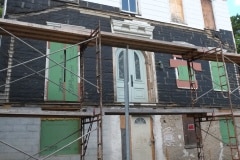
For some reason, when they built the new concrete block wall on the left side of the house, they left a window gap of about 5′ wide, which would be a huge window and not in proportion to the rest of our windows. I’ve probably got better pictures somewhere, but these are the best I can currently find.

To narrow the gap, I used 8″ square concrete blocks, tied into the existing wall with thick galvanised wire and filled internally with concrete and rebar. My brick-laying skills are poor, but after a light pass of the grinder it was perfect! The new width is now comparable to that of the other windows. I intentionally left a gap above the blocks to install a lintel, as the window couldn’t go that high.

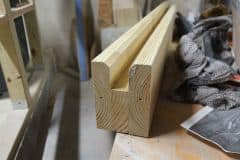
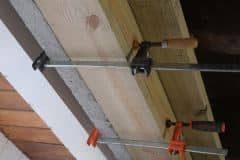
Regarding the lintel, I couldn’t find the right size locally, so I made one myself. To ensure I could lift it, the inner side was pressure-treated wood, and the outer side was concrete, reinforced with rebar. That said, it was still too heavy to install safely from the top of a step-ladder.

The make the lintel, I first made the wooden section, applied masking tape as a release layer, added shuttering and rebar, and then poured in the concrete. Once the concrete was cured, I prised the two apart so I could lift them separately.

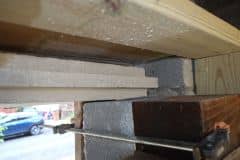
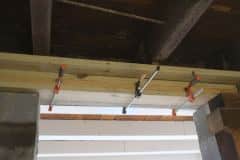
First to go up was the outer concrete part, and for this, I had to add a series of blocks so I could gradually get it to the correct height and then slide it into place.

With the concrete section part in place, I bonded the wooden section to the concrete section. I know it doesn’t look much, but I’m pretty pleased with how it looks, all in all a good job, without any mistakes 🙂

Fixing a hole

We recently had our plumber over to assess our needs, and while he was there, he took a look at our tub and said that we’d need to drill through our concrete floor so that the water supply lines for our rim-mounted faucets could go down into the concrete and across into the framing. I’m not sure why this wasn’t considered before we had the concrete pour.

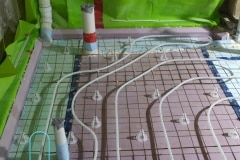
To keep the cost down a bit, I volunteered to remove the concrete as I had a good idea where all the PEX pipes for our radiant heating lay. I don’t have a detailed map of where the radiant pipes go, but I did take a lot of photos before the concrete was poured. When cutting into such a floor, there is always the worry that you’ll damage the PEX and you can probably guess where this post is going.

I’ve highlighted the section of Pex that I had to be careful of.

I marked with a Sharpie where not to drill and then went to work with my big jackhammer, which was a mistake. The jackhammer makes easy work of breaking up concrete, the downside is that it bounces about a bit,  accuracy isn’t its forte. When I did uncover the pipe, I noticed one dent and one hole in it, definitely my fault, as that hole would have been discovered during the pressure test.

Replacing the damaged pipe meant exposing more of it, and for this, I used a smaller hammer drill to first drill a series of holes and then a bunch of different chisels. Once I got the hang of where to chisel, it was pretty easy, and 30 minutes later, I had exposed enough pipe to cut the bad section out.

We’re using PEX A (Uponor) in the house, and I’d like to thank John Paul for letting us use his PEX expander tool. The expander tool is pretty neat, and if you’ve never seen one in action, here is a quick video of how it works. PEX A always wants to return to its original shape, so a joint is never going to loosen.

The actual repair took less than 5 minutes, and I’m glad I’ve been through the process of making such a repair, just in case another pipe gets damaged in the future.